
System/Other
Below are the most common system issues and other topics. Please click on the one that best fits your symptoms.

The OBS software isn’t available – or it crashed.
Solution: Restart the One Button Studio computer.
Relaunching the OBS software from the Applications folder may work temporarily, but if the crash was due to memory issues a complete reboot will be needed.
Admin only
The lights turned on but there is no video or a solid blue background on screen.
Solution #1: Check if camera or h.264 box is disconnected.
This is typically caused when the camera is turned off or has been unplugged from the h.264 box or if the One Button Studio computer loses connection to the h.264 box. Verify that the camera is turned on and plugged into the h.264 box. Then, verify that the h.264 box is turned on and plugged into the computer with a USB cable. Restart the computer.
Admin only
Solution #2: Check if h.264 box connection has been reset.
If the restart does not solve the issue, try this procedure:
- Quit the One Button Studio application
- Unplug everything from the h.264 box and then reconnect in the following order
- Plug power into h.264 box
- Wait 3 seconds
- Plug HDMI cable from camera into h.264 box
- Wait 3 seconds
- Plug USB cable from OBS computer into h.264 box
- Restart OBS app
Admin only
The lights turned on but there is only a solid white background on screen.
Solution: Remove USB flash drive.
Immediately after a complete system reboot, older Mac Minis with the OBS application may not recognize the video stream from the h.264 box the first time a drive is connected. Remove the flash drive, wait for the lights to turn off and then reconnect the drive.
I need test patterns to help setup of focus and exposure.
Solution: Download the testpattern.pptx.
The test patterns in the PowerPoint can be projected to assist with focusing the camera and evaluating for proper exposure.
I would like to collect usage statistics.
Solution: Follow these steps for the most recent version of the app.
Once you have connected a mouse and keyboard to your Mac Mini, exit out of full-screen mode in the OBS App by clicking on the green button in the top-left corner of the window:

Once out of full-screen, navigate up to the One Button Studio text at the top-left of your screen and click on it. This will bring up a dropdown window with a few options. Select Preferences… from this list.

This will bring up the Preferences panel for the One Button Studio. Your usage statistics will be shown at the bottom of this panel. It will list the Number of Videos recorded, and also the Time for All Recorded Videos.

Note: You will notice a Reset Counts button to the right of your statistics. This button will reset these numbers, so be sure to write down your numbers before clicking reset. You will want to reset the counts before the next semester, so your numbers in the app stay current. Clicking reset will not delete these videos from the computer.
For a information on deleting videos to free up space on your Mac Mini, please see the instructions below.
Admin only
Penn State One Button Studios supported by Media Commons: You should be contacted by your campus Media Commons consultant at the end of each semester, requesting these numbers. Please fill out this Google Form to submit your usage statistics for the semester. Thank you!
I would like to free up storage space on the OBS Mac Mini.
Solution: Delete recorded OBS videos from the OBS Folder.
Before deleting any videos from the computer, make sure you have logged the proper usage statistics for the previous semesters, by following the tutorial above.
Begin by connecting a mouse and keyboard to the Mac Mini (via the USB Hub). Now, exit out of full-screen mode in the OBS app by clicking on the green button in the top-left corner of the window:
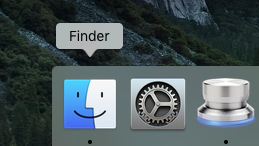
Once you’ve exited full-screen mode, navigate to the bottom of your screen and click on the Finder icon to bring up a new Finder window.
In this Finder window, look over on the left-hand side to find the Movies folder. Click on this to access the OBS files.
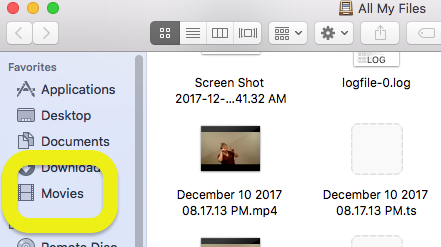
Within this Movies folder will be another folder titled OBS. Double-click on the OBS folder to open it up.

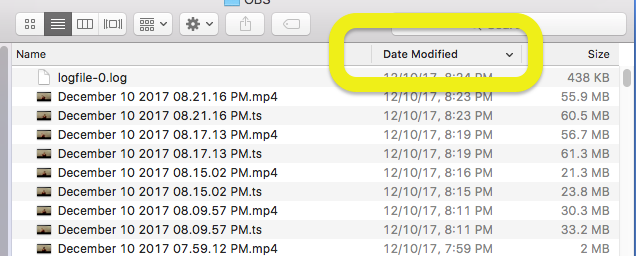
This folder contains all of the recorded OBS videos made previously. You will see both .ts and .mp4 files. Sorting by Date Modified at the top of the window will help finding the oldest and newest videos.
When you’ve identified the time period for the videos you would like to delete, hold the Command key on the keyboard (next to the space bar) and select the videos you wish to delete. If selecting a range of videos, you can also click on the first video in the range, then hold the Shift key and click on the last video in the range to select all in between. You can select both the .ts and .mp4 files, as you will be deleting both.
Once selected, click and drag these videos to the Trash in the Dock at the bottom of your screen.

This will move them into the Trash, but they are not yet deleted. To erase them from the computer, open up the Trash by clicking on it.
Once inside the Trash, click on Empty in the top-right corner.

This will delete this files permanently, and will free up space on your Mac Mini.
Admin only
There is audio coming from the Mac Mini's speakers. (OBS v 1.2.5 only)
Solution: Volume has been adjusted while flash drive is plugged in.
If the volume of the Mac Mini is adjusted while the flash drive is inserted and the OBS app is active, you will hear the recorded audio coming through the speakers. If this happens, mute the Mac Mini using the volume controls on the keyboard.
To prevent this from happening, make sure the volume is not adjusted while the OBS is running.
Admin only
I'd like to print more support signage for my location.
Access the “OBS Printable Materials” folder on Google Drive.

All currently available support signage is available via a publicly accessible Google Drive folder. You can print out the flowchart (provided by Berks), Do Not Touch notices for camera and proejctor, LibCal booking details, user support options, etc PDF documents by downloading them here.