Last Friday, I volunteered at an astronomy program at Shaver’s Creek Environmental Center. While there, I had several people try to figure out how to use the telescope. While amusing to watch, I realized that most people really have no idea what’s going on. That’s perfectly understandable if you’ve never used a telescope before. People would look in the finderscope and wonder why images were little, look in the eyepiece hole without an eyepiece in it, or think that they were looking at something completely different than they really were. I once had a very confused family friend look through my telescope at Venus. I asked what she thought. “Well… I think you aimed it wrong. All I see is the moon.”
Looking through the telescope at a crescent Venus, this is almost understandable. However… look up where the telescope is pointing. If you don’t see the moon, chances are you aren’t looking at the moon through the telescope. A telescope is not magic. If it’s cloudy, it doesn’t work. If it’s daytime, it doesn’t work (Except for a few bright things- Venus, the Moon, Jupiter, Mars…).
Though there are different types of telescopes, basically all operate under a similar principal. They’re basically a light funnel. A whole bunch of light goes in, then comes back out in a little beam showing a zoomed in image. To get a general idea of how much it does this, a typical magnification out of a telescope is maybe 40x (enough to fit the moon in the field of view) to around 200x at the max (enough to see decent detail on Jupiter instead of just looking like a star.) This depends on what eyepiece you use.
Eyepieces are sold by millimeters of focal length. Since they’re all physically about the same size, this can seem confusing. Basically, the lower the number of millimeters on the eyepiece, the more magnification it can produce. Telescopes are sold by focal length. Mine, for example, is 1200 mm. This means that the light travels 1200 mm from the mirror in the tube to your eye. To calculate how much magnification an eyepiece can produce, divide the focal length of your telescope by the mm rating on your eyepiece. Let’s take my telescope (1200 mm focal length) and use a 6mm eyepiece with it, the one I use for observing planets. 1200mm/6mm gives a magnification of 200x. This is about the max you can do under normal atmospheric conditions.
Telescopes are one of the most useful instruments used in astronomy, but there are many other accessories that can be used with them. Two that I use quite often are my camera and my USB eyepiece. Here’s a little description of how they work.
The Camera
My camera isn’t anything too special. It’s a Canon Digital Rebel XSi.
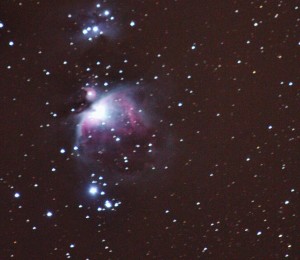
By itself, this camera can take some okay space pictures. Basically the only difference between taking regular pictures with it and space pictures is exposure time. With your ordinary point-and-shoot camera, exposure time (how long it takes to make the picture) will vary between maybe 1/1000 of a second on a bright sunny day to 1/5 of a second in the evening, about the max you can do without a tripod. Astronomy pictures have to be taken with a tripod.
Some fainter objects require MUCH longer exposures. The background to this blog, the Hubble Ultra-Deep Field image, required 11 days of exposure. Though astrophotography can get much more complicated, that’s basically the gist of it.
USB Eyepiece
This nifty little thingy is something that I picked up for Christmas two years ago. It’s basically the guts of a camera stuffed into something that looks like a telescope eyepiece.
I plug it into my computer and get a video image of whatever is in the telescope at the moment. For example, the moon.
http://www.youtube.com/watch?v=krvxBdp0i10
Once you have a video, you can use fancy software to take out the best frames and combine them into one good image:

This, for example, was made from my video clip of Sinus Iridum on the moon.
And that’s about it for how to take pictures of space. If anyone is interested, I’d love to show you how this stuff works sometime. It’s a lot of fun and I love to show it off!


Pingback: kabiny prysznicowe piotrków
Pingback: Favorite Astronomy Posts | Tim's Astronomy Blog
What a cool post, Tim! Believe it or not, I’ve never used a telescope. I’ve just never been around people who had one or who were that interested in astronomy. So, I’m sure I’d make plenty of mistakes using one for the first time!
I found it really interesting to read about the mechanisms for taking pictures, particularly the varying exposure time. I didn’t know that’s how it works! It’s actually really hard to imagine a photo taking that long. Pretty cool stuff.
I hope you had a great trip to Cherry Springs. Looking forward to hearing about it in class and maybe on your blog!