Creating Architectural Walkthrough of My Scene: Playblast (Draft)

Learning basic key frame animation in 3Ds Max is what I have to do to create my walk-through animation. Which is I’m sure very similar to Maya key framing.

First thing – I need to set up Time Configuration. If I want to have 25 frames per second (Custom Frame Rate) and my animation would be 10 sec than I would have to set the End Time = 250.


After the keyframing process was done (which I’m not going to describe here since it’s super easy in this case) I wanted to try an option of creating a preview animation before jumping to a long process of batch rendering in ART.

Here is what I got so far. I expanded some frames (decreased the speed a little) added the title text, and fade in/out effects in Premier Pro.

Final Interior Design Still Lives – Night Time Scene (Photo Realistic ART Renderings in 3Ds Max 2018)

These are the photo realistic 3000×2000 px rendered images of my scene produced in ART renderer at about 25-32 dB quality. The daylight is off and all scene lights are off which creates night time scene.

The Kitchen.

Resolution: 3000×2000 (render time was about 11 hours)

Living/Dining Area/View from the Kitchen Island


Partial Top View 


TV Wall Unit with all backlights on


A little bit about the process…

I was glad to see that 3Ds Max provides an estimated render time which Maya does not do for some reason.

Another cool thing about ART renderer (my experience in Maya with Mental Ray did not have this option) is that I can set the quality to a higher value, and still manually stop the rendering at any given time, once I feel I have reached a reasonable quality output. The reason why I think it’s important to do so is because our eye does not percept the difference between 32dB and 100dB quality rendered image (at least not in frames of this project since I don’t have that many highly reflective surfaces, a lot of multi-layer materials, and other super complicated stuff).


Here is the Estimated Render Time of 3000×2000 image at 100dB which is the Max Render Quality – 835 hours 30 min!!!!! (Which is almost 35 days in a row!) OMG! What else can I say.


I rendered this scene for about 11 hours and noticed that the quality of an image has not been really changing after about 5-7 hours (when the quality is reached at about 28-30dB).

Therefore, it’s important to set an automatic stop based on a time frame or a number of calculated iterations if and when the target quality is not attained. Or just stop it manually whenever you feel like it.

There was another quality setting based on the Rendering method: Fast Path Tracing and Advanced Path Tracing. I guess Advanced Path Tracing does a better job but it certainly takes longer render times. For my project, there is no need in Advanced Path Tracing so I go with the default Fast Path Tracing method.

Also, ART Renderer includes a Noise Filtering option to minimize grain. But I was taught by the numerous internet tutorials that I should not set it high otherwise I may lose the important details in the scene because the program may recognize it as noise as well. So I stuck with 20% noise filtering.

Stop the Violence – Sculpture Class Final Project


This is the presentation for my Sculpture class final project. For this project, I’ve used mine and my husband’s own hands to produce all the images, videos, and finally to create a plaster hands cast (using Alja Safe Starter kit) covered in bronze-like metallic acrylic coats.

The project represents hands of two individuals one of which (male hand) is an abuser and another (female hand) is a victim of a domestic violence. It is based on incredible bronze sculptures by Bruce Nauman’s works such as Fifteen Pairs of Hands and Hand Circle.


Click Here to See the Video Presentation in YouTube

The video is made in Premier Pro CC 2017 and exported through Media Encoder CC 2017.


Applying Materials in 3Ds Max 2018

The project is slowly coming to an end. By the way, I switched the version of 3ds Max I’m using from 2017 to 2018. I’ve learned how to use Slate Material Editor in 3Ds Max including not only how to apply different materials to my project scene objects but also how to create new materials, use bitmaps, bump maps, displacement maps, 3Ds Max material library, etc.

Applying bitmaps and bump maps to the apples and bowl


brick wall rendering – draft quality of 29.3dB


The slideshow of the current progress is also shown below:

Week 11 Presentation – Modern Home: Conceptual Approach in 3Ds Max

Click Here to See the Presentation in Google Slides

Click Here to Download the Presentation in Power Point


Plan for real life

This diagram shows that in the interior design process, “Space planning comes first”. No matter how many cool ideas and inspirational pictures you have in mind, you have to plan it.

As I mentioned in my previous presentation, project begins with an assessment of a room’s functional deficiencies and how the elements can be manipulated to better fit the people who live there.

“What do you need in your space and how do you move through your life everyday?”

Only after a lot of planning you can start doing sketches. For me, the best sketching tool was SketchUP. After many sketches have been done I went ahead to work on a final product using 3Ds Max.


From SketchUP to 3Ds Max

SketchUp is a great tool for visualizing the project. Instead of drawing on paper (even though I did sketch on paper a lot) you draw in this easy-to-learn software. It’s cost effective and easy to understand. However, You cannot professional 3D renderings in SketchUP.

3Ds Max is a professional software widely used in present architecture market. All interior designers nowadays should have some 3Ds Max skills under their belts.

3Ds Max vs Maya

For the most part, Maya has been known to be a much more powerful application when it comes to animation, with a huge library of animation tools, and for the most part the exact same animation could be accomplished in either application, but when it comes to ease of use, and the amount of tools available, Maya is the stronger of the two.

3ds Max has a very robust modeling toolset with a huge library of different modifiers which can make the modeling process easier. Depending on how new you are to the world of 3D then modeling in 3ds Max can be a little easier to grasp. If you’re familiar with the Booleon operation, 3ds Max is also known to work much easier and smoothly than in Maya. If you’re going to get into the architectural visualization like interiors and buildings, 3ds Max is your choice.
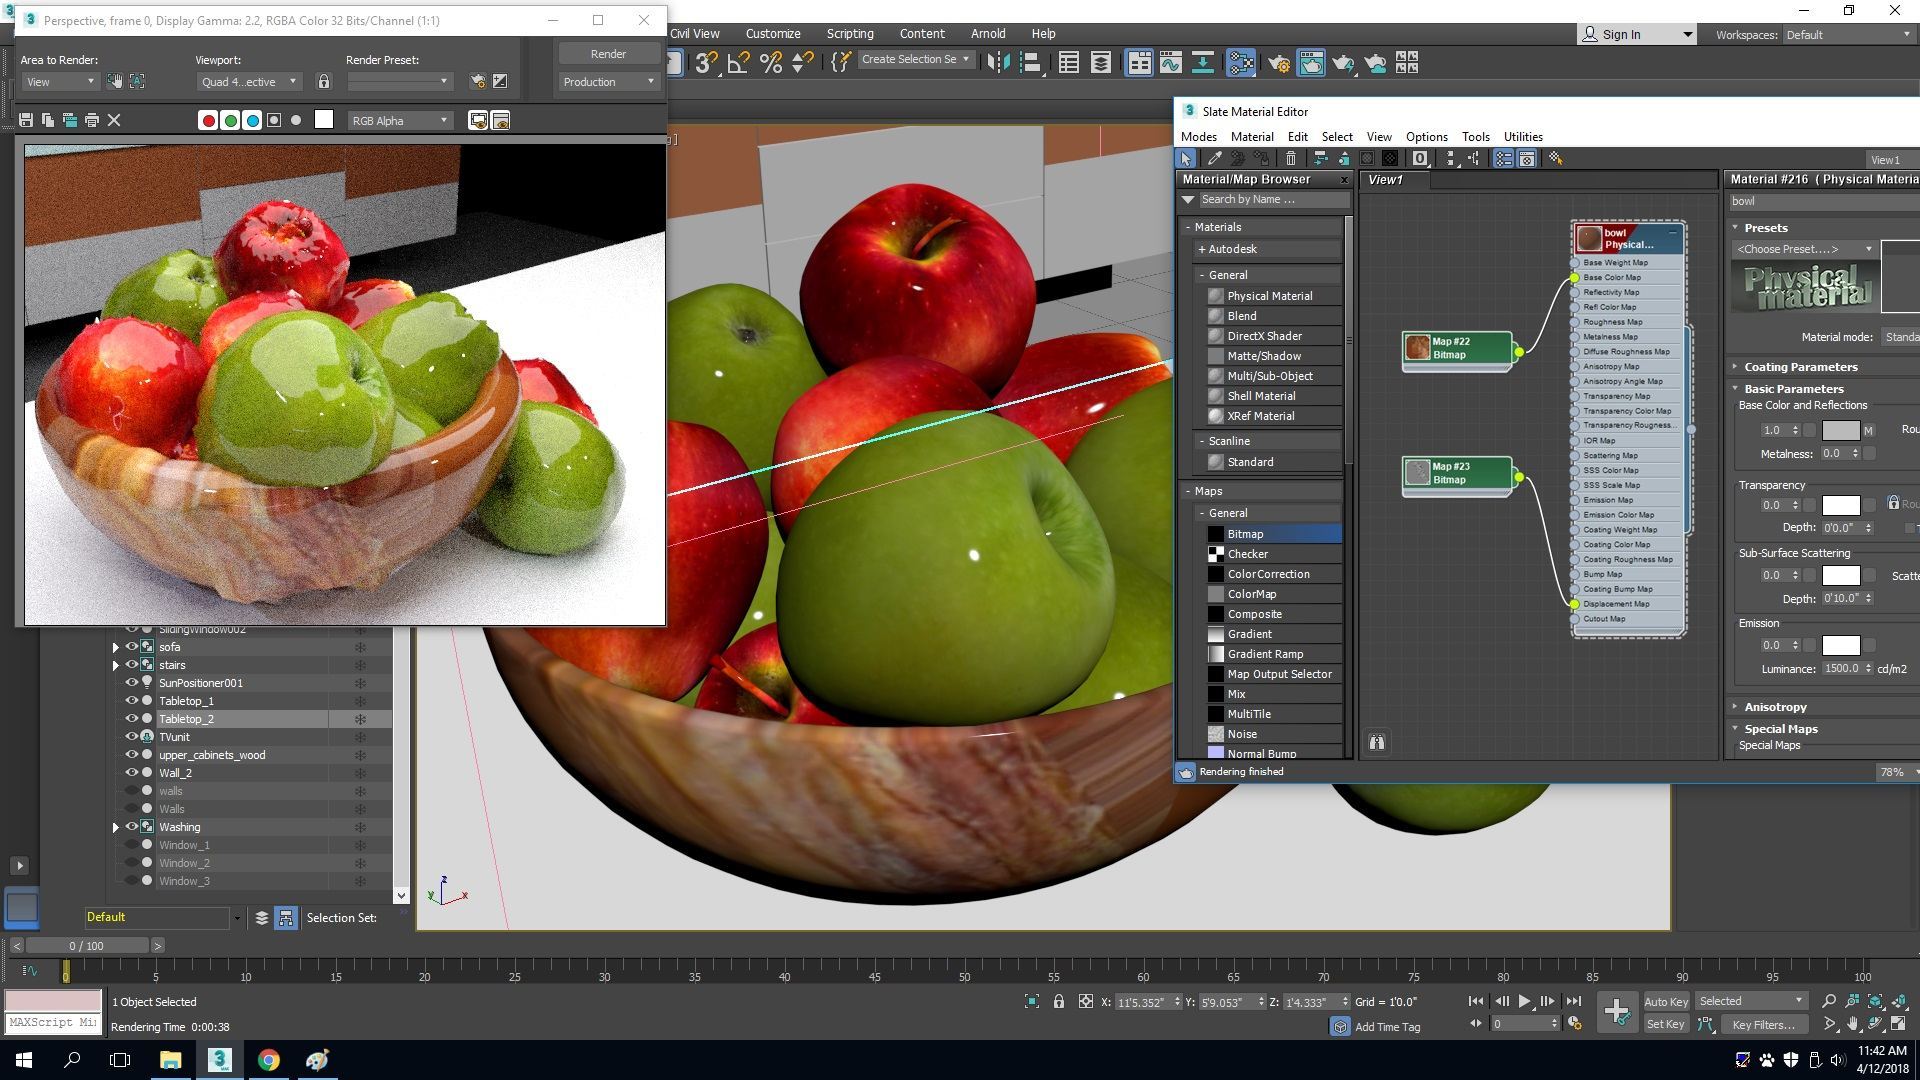
 

Screenshot slides:

  1. Creating floor plans (made by extruding the walls and then cutting holes for doors and windows using Boolean compound object)
  2. Two types of modeling:
  • Polygon (chair): I created a cylinder and shaped it using different tools
  • NURBs (stairs): I made a spline (or a curve), then extruded it along a certain axes and then duplicated each step using an “array” tool
  1. Combining into a major scene:

Two types of referencing objects:

  • XRef object referencing (briefly, it’s a type of referencing when you don’t copy the object but reference it from the other file. Good thing – no additional memory is used. BUT it didn’t work for me because my computer kept crushing so I used the second method)
  • Merging scenes (object becomes a part of the scene we’re currently in)

P.S. Just like in Maya, learning how to use Scene Explorer, in other words hierarchies and groups in 3Ds Max is also very important.

  1. Lights

– The purpose of photometric lighting is to expect that the rendering that you receive will look more or less like it would in the real world. Photometric lighting actually gives us a lot more power and control and we’ll end up with more believable renderings.

– Creating sun and sky. Not only it gives the option of creating a perfectly clear sunny day outside which creates a natural day lighting. But it only has an option of setting up the location on Earth. For example, we can set up that the scene is located in Philadelphia, its April 3rd, and its about 10am. And when I change these values, like if I go to a different month, that’s going to change where the sun is. So in January at 10 a.m., the sun is gonna be in different spot . But you can bring this back to April, and the sun’s gonna be a different location.

– ART renderer – Autodesk Ray Tracer is a physically based renderer which is already installed in 3Ds Max. Rule with ART renderer: you can’t do anything that doesn’t exist in the real world. It has to have volume to lights. For example, in order to have some soft shadows, light has to have some physical volume (sphere) and size (radius).

Intensity: 1000.0 cd

Color: Kelvin 3600.0

Shape/Area Shadows – Sphere (makes soft shadows and distributes light equally comparing for ex with point light) with Radius of 2’0.0”

Environmnent and Effects:

Exposure Value: 6.000 EV

White Balance: Temperature 3600.00 kelvin

Image Control

Highlights: 0.05

Midtones: 0.50

Shadows: 0.00

Modeling Progress and Creating Photometric Lights

The purpose of photometric lighting is to expect that the rendering that you receive will look more or less like it would in the real world. Photometric lighting is the first type of lighting I’m learning, and according to lynda.com tutorials it actually gives us a lot more power and control and we’ll end up with more believable renderings.

These are my first attempts of embedding photometric lights (standard spherical free light) into the lamps I have above the kitchen island and rendering using the default 3Ds Max Scanline renderer.

Current Progress with Modeling in 3Ds Max

Over the break, I learned how to model different shapes and objects using Polygon and Spline (NURBS) modeling tools. I also learned how to use groups and hierarchies which are very important in 3Ds Max (just like in Maya) and how to reference scenes with XREF objects.

*No materials and lighting sources have been explored and added yet. This is a draft – I still have to do some revisions.