Lohipiirakka

For this week’s recipe, I’ve decided to make Lohipiirakka also known as Salmon Pie. Since it’s our last week of passion blogs, I decided to go all out and try a more time-consuming recipe. I also thought it would be fun to make from a traditional Finnish recipe website (there was a lot of Google translate and metric conversions involved).

As I briefly mentioned before, Lohipiirakka is a Finnish dish, particularly from the region of South Karelia. From what I read, it seems that Lohipiirakka is a dish that people can snack on during a get-together or in between meals. There is also a lot of history of Finnish and Russian influence on this dish which was interesting to read about. A New York Times article from 1986 had a surprisingly in-depth article about the different Russian and Finnish variations of savory pies (I’ll link it down below if anyone is interested in checking it out). I’ve also learned that there is a lot of variation between how these pies actually look (from small personal ones to larger ones like the one below).Finnish Salmon and Dill Pie Recipe: How to Make It | Taste of Home

The ingredients I used were surprisingly easy to find. Smoked salmon is the key to my heart so I was really excited to try this recipe out. There are two main parts to this dish: the base (crust) and the filling. Once you have you’re ingredients, the rest isn’t overwhelmingly complicated. You just have to mix the ingredients of both parts together and bake them accordingly.

A tip I came across on many of the recipes I read through made sure to emphasize not straying too far from the pie when it is in the oven because the cooking time is way too variable and you could very easily burn the whole thing. It’s a good thing I listened because the pie was actually done much before I originally expected. The whole process from start to finish probably took about an hour and 10 minutes. That being said, I think that not having to figure out translations and conversions would definitely cut down on the time I spent, so I expect it to take less next time.

I’m really happy with how this recipe came out. It was really good and I will definitely be eating it as an afternoon snack for the next week. The whole thing reminded me a lot of a sort of quiche. While it did take more work than some of the other recipes I’ve tried making, it really is delicious and I definitely look forward to making it again sometime soon.

One version of the recipe I read suggested playing around with what to include in the filling. I really like when recipes account for variations like that because then you can personalize the dish to your own preferences or available ingredients. I think the next time I make this dish, I’ll try adding some feta or vegetables and see how it turns out.

Thank you all for reading my blog this past semester! I’m going to miss commenting on passion blogs with you all. As always, if you do decide to try this recipe out I’d love to hear what you think of it.

Sources:

Kylmäsavulohipiirakka

Finnish Salmon and Dill Pie

https://www.nytimes.com/1986/08/03/travel/fare-of-the-country-finnish-stew-of-meaty-riches.html

Nanaimo Bars

For this week’s blog, I’ve decided to make Nanaimo Bars, which are a classic dessert treat from Canada. I haven’t made a dessert for this blog for a while so I thought this would be a fun recipe to switch things up a bit!

Someone last week asked where I find these recipes every week, and honestly I usually just stumble upon them one way or another. Sometimes I also just go on a little internet hunt for different cultural recipes I’m interested in making and then I go from there in terms of research and actually finding the right recipe to follow.

So for this week, I came across a Candian food blog and found this recipe. This treat originates from Nanaimo, British Colombia. The earliest documented recipe for Nanaimo bars is found in 1952. I’ve also read some articles where people call them “Dairy Bars” too, especially in the US states near Canada. As you can see in the picture, there are three layers to these bars. From top to bottom, the layers go chocolate ganache (sometimes referred to as the glaze), vanilla custard, and then coconut-graham.

Making this recipe was not as difficult as I originally expected. I did have to go out and get most of the ingredients, but they were really not that hard to find (I’m just not usually much of a baker). The recipe was really easy to follow and just required melting or mixing the ingredients together layer by layer. The hardest part was definitely being patient enough to take them out of the fridge when they were ready as opposed to taking them out too early.

During the process, I did get a little bit distracted by all of the different parts of this recipe and making sure I did everything in the right order. I was worried that my layers

would come out uneven but shaking the pan for a little bit really helped even everything out. The whole process took about an hour and a half which includes the time I had to refrigerate each layer.

I really liked these Nanaimo bars and am really happy with how they turned out. I was worried that they would be too sweet, but they were actually not (they were just the right amount of sweet). I was happy to have a whole pan of them so that I can snack on them for the rest of the week. This recipe is great because you can make as many or little bars as you want just depending on how you cut them up. I was also interested to find a recipe that was totally microwave-only and didn’t require a stove or oven. That was a fun find for me because that means that this is a pretty easy dorm-room recipe for the future!

If you decide to make this recipe or have other recipes you think I should make in the future, I’d love to hear about it! As always, thanks for reading! 

Sources:

https://www.foodnetwork.ca/recipe/the-ultimate-nanaimo-bar/16810/

https://www.foodnetwork.ca/shows/great-canadian-cookbook/blog/history-of-nanaimo-bars/

Calgary Nanaimo Bars

Nanaimo Bars


Bungeoppang

For this week’s recipe, I decided to dive into some Korean street food cuisine. Bungeopanng (also referred to as Bungeo-ppang in some recipes), is a popular pastry dish. I was drawn to this recipe not only because of its delicious ingredients but also by its fun fish shape as you can see in the picture below.

Before I dive into the logistics of this recipe, I was to talk about the history and culture associated with this dish. Bungeoppang directly translates to crucian carp bread in English and has been a popular Korean street dish since around the 1930s. This dish is strongly influenced by a dish called “Taiyakii” from Japan. Bungeoppang is most popular sold by local Korean vendors during the winter months. Over the years, the available fillings in Bungeopanng have become more varied, but I will be making the traditional sweetened red bean paste filling for my own Bungopanng.

The ingredients for this recipe were surprisingly easy to find in my kitchen which was really helpful. I did have a little trouble finding sweetened red bean paste at first, but then I visited my local Korean supermarket and found it with no problem. The most difficult part of making this recipe was finding a fish-shaped mold. I was going to order one online, but my friend actually already had one so I just used hers. While I was reading about this recipe on a few different sites, I came across a pretty frequent suggestion to use wheat flour, as opposed to regular flour, in order to have a more authentic Bungopanng. So I did make that swap in the original recipe I was following, but otherwise followed it very closely.

This was actually one of my faster recipes to make. The whole process took me about half an hour. All you have to do is mix the ingredients together and then pour them into the fish-shaped mold. Depending on what kind of mold you are using, don’t forget to add the filling before you close it. I definitely accidentally forgot that last step a few times before I got the hang of things. Other than that, the cooking process was pretty similar to using batter and a waffle iron so it was a lot easier than I expected.


In the future, I will definitely be making these again. I will probably try some of the newer filling options to get a feel for the newer variations on the dish. Some other fillings that I read about and that I’m excited to try are cheese, Nutella, or cream. I was also excited to find out that there is a place near me that sells Bungeopang, so I will definitely be heading there for a visit sometime in the near future.

If you decided to make this recipe, or have already tried Bungeopang before, I’d love to hear about it. If you do decide to make this recipe and opt for a different filling. I would love to hear about that too! Thanks for reading my blog this week!

Recipe and Photo:

https://mykoreankitchen.com/bungeoppang/

Sources:

https://www.orientalmart.co.uk/blog/guide-bungeoppang-recipe

The battle of the waffle iron: Bungeoppang vs Taiyaki


Malfouf

I had a hard time deciding what recipe and culture to research for this week’s passion blog, but after a lot of research, I decided on making Malfouf. Malfouf is a dish comprised of cabbage leaves stuffed with various delicious ingredients. When I came across this recipe, I remembered that I had seated Malfouf before and absolutely loved it, so I was excited to try to make them myself.

Malfouf is a very popular Middle Eastern dish. Various regions and countries put their own spin on the recipe, but pretty much all of them include a foundation of rolled cabbage filled with rice. The spices and other ingredients that people choose to add to their Malfouf are really a matter of personal preference because this recipe is known to be really adaptable. I was interested to learn about how this recipe is a very popular comfort dish in Syria and Lebanon, as well as many other places.

As I mentioned before, Malfouf can be made in many different ways which made it somewhat challenging to pick a recipe to use. For that reason, I used a combination of a few recipes. This also helped when I had trouble finding an ingredient at my local supermarket because I could compare the different alternatives that the various recipes suggested. In terms of ingredients, most of them were easy to find at my local supermarket. There were some ingredients I had to substitute for their generic counterpart (like the type of rice) just because I couldn’t find it at my store.

The final product was really delicious. As someone who loves garlic, I definitely appreciated how much was in this dish. I also loved how many different spices were in the recipe because they made the final product so flavorful. I was really impressed with how well the Malfouf turned out because I was really doubting myself by the end of it. The process of actually rolling the cabbage leaves was probably the hardest part. This was definitely one of the harder recipes I’ve tried for this blog, but it was also one of the tastiest.

I’ll be honest, this recipe was pretty time-consuming. That’s not surprising though because this is a pretty complicated, multi-step recipe between boiling the leaves, making the rice, and putting everything together. I would say that the whole process took me about two hours in all. However, if you have the time, I think making this dish is really worth the time commitment. When you think about all of the work you put into making it makes the final product especially enjoyable. I also had a lot leftover so I expect to be eating Malfouf for the next few days, which I’m definitely looking forward to.

As usual, I’ll attach a link to the recipe I used so that you can try it out if you are interested in making the Malfouf yourself. If you do end up making this recipe, I’d love to hear how it turned out or how you liked it. Thanks for reading everyone!

Sources:

https://zaatarandzaytoun.com/malfouf/

Malfouf


Malfouf

Boxty

As we all know, St. Patrick’s day was this week so I decided to try out a traditional Irish recipe for this week’s post. At first, I was going to go with a recipe for corned beef. However, after a little bit of research, I was surprised to learn that corned beef is actually not considered a traditional Irish meal. So after a little more research and a lot of cookbook readings later, I decided to make boxty.

Boxty is a potato pancake dish that hails from the northern area of Ireland. In terms of history, many cite the Irish Famine as the event that inspired the creation of this recipe and it has been considered an Irish meal staple ever since.

Irish Boxty Recipe from Gallagher's Boxty House in Temple Bar, Dublin

The recipe itself is actually pretty simple. The recipes are all pretty standard and include things that were already in my kitchen which I greatly appreciated. In terms of actually cooking the boxty, the process was very similar to making a pancake just a lot stickier because the batter is very thick. One important thing to note is that according to the several blogs I read through, flattening the boxty while they cook is important to make them as thin as possible. The first recipe I used suggested using mashed potatoes in addition to actual potatoes, but I was really not prepared to make mashed potatoes in addition to making this recipe. Instead, I found another recipe to supplement the ingredient suggestions that only required one type of potatoes that I only had to prep by peeling which was helpful. However, this did make the version of the recipe stray a little bit from the traditional version. So, if you have a little more time or want to make the boxty as authentic as possible, have some mashed potatoes on hand!

Like some of the recipes I’ve tried in the past for this blog, boxty is considered a staple item that can be dressed up in a seemingly infinite amount of ways. I decided to try boxy in three ways. The first was just plain, the second was with peppers, and the third was with a mushroom sauce. I personally favored the last of the three, but all of them were surprisingly delish. If you want the standard version, I would recommend eating it as a side dish. If you’re looking to try out some of the variants on the recipe, then it’s honestly perfect for any meal. I’m also a really big fan of trying out a bunch of different spices and seeing how they end up, which I will definitely try on this recipe in the future.

I really liked this recipe and it was a fun cultural take on the typical potato pancake, which I appreciated. Be warned though, the boxty is very filling and the recipes do make quite a few so you may want to adjust accordingly if you’re just cooking for yourself.

If you try this recipe out or already have, I’d love to hear about it. I’ll attach a link to the recipes I used down below for you to refer to in the future.

Recipe:

Boxty: the Best Ever Irish Potato Pancakes Recipe

https://www.chowhound.com/recipes/boxty-irish-potato-pancake-28172

Sources:

https://www.irishcentral.com/culture/food-drink/traditional-irish-potato-cakes-boxty

https://www.chicagotribune.com/lifestyles/sns-holiday-st-patricks-day-dishes-story.html

Easy Irish Boxty Recipe From the Experts at Gallagher’s Boxty House, Dublin

Camarão Moçambique

For my second passion blog post, I decided to try to make something completely new. Camarão Moçambique (also known as Shrimp Mozambique) is an Afro-Portuguese dish originating from the Portuguese-speaking country of Mozambique, Africa. This recipe fuses multiple cultures by incorporating the seafood aspect and spices of multiple cultures and their availability.

This recipe was quite easy to make, especially since I’m used to making shrimp pretty frequently. Unforntualey, a lot of the recipes I looked at talked about using “Piri-Piri” which is a hot pepper sauce or powder that is pretty hard to find in the United States. A few recipes I did come across, though, did mention a few spicy substitutes for that particular spice as an alternative. The recipe I used told me to try habanero chili instead and, from what I could tell, it seemed to work well as an alternative. To be honest, I feel like the fact that it is so hard to find that ingredient also makes it more special in revealing the authentic fusion of African and Portuguese culture in this dish. Other than that, all of the other ingredients we’re very readily available in my kitchen which made the process a whole lot easier. 

In Portugal, this dish is served as either an appetizer or as an entrée. Usually, when it is served as an entree, it is coupled with a bowl of rice (which is how I made my own). Some of the sources I looked into also said that it is customary to eat bread with this dish to soak up some of the sauce.

If you like shrimp, I’d defiantly try this recipe out. It’s not too complicated and the results are definitely worth the work. The whole process took me about a half-hour, so I’ll definitely be making this recipe again because it was a lot easier than I expected. It’s also really perfect for the upcoming cold weather so if you are looking for a dish to warm you up, you should definitely try this one. Fair warning, the recipe is pretty spicy but I’m sure you could avoid using certain ingredients if you’re not a big fan of spicy foods. Personally, I really into spicy foods so I just made it with all of the spices in the recipe.

There is quite a bit of variation from recipe to recipe, but the main ingredients and tastes are the same. I’m definitely interested in trying another version of this recipe in the future and seeing how different it might be.

As always, if you decide to try this recipe out, I’d love to hear about how it went. I’ll leave the link to the recipe and more cultural information in case you are interested in reading more or making it yourself. Also, if anyone has any suggestions for a specific culture and/or recipe they want me to try out for my next post, I’d love to hear it. 

Link to Recipe: https://www.thespruceeats.com/shrimp-mozambique-camarao-mocambique-2743418

History Source: https://ifood.tv/african/shrimp-mozambique/about

Image Source: https://www.tasteofhome.com/recipes/shrimp-mozambique/

Galette Bretonne

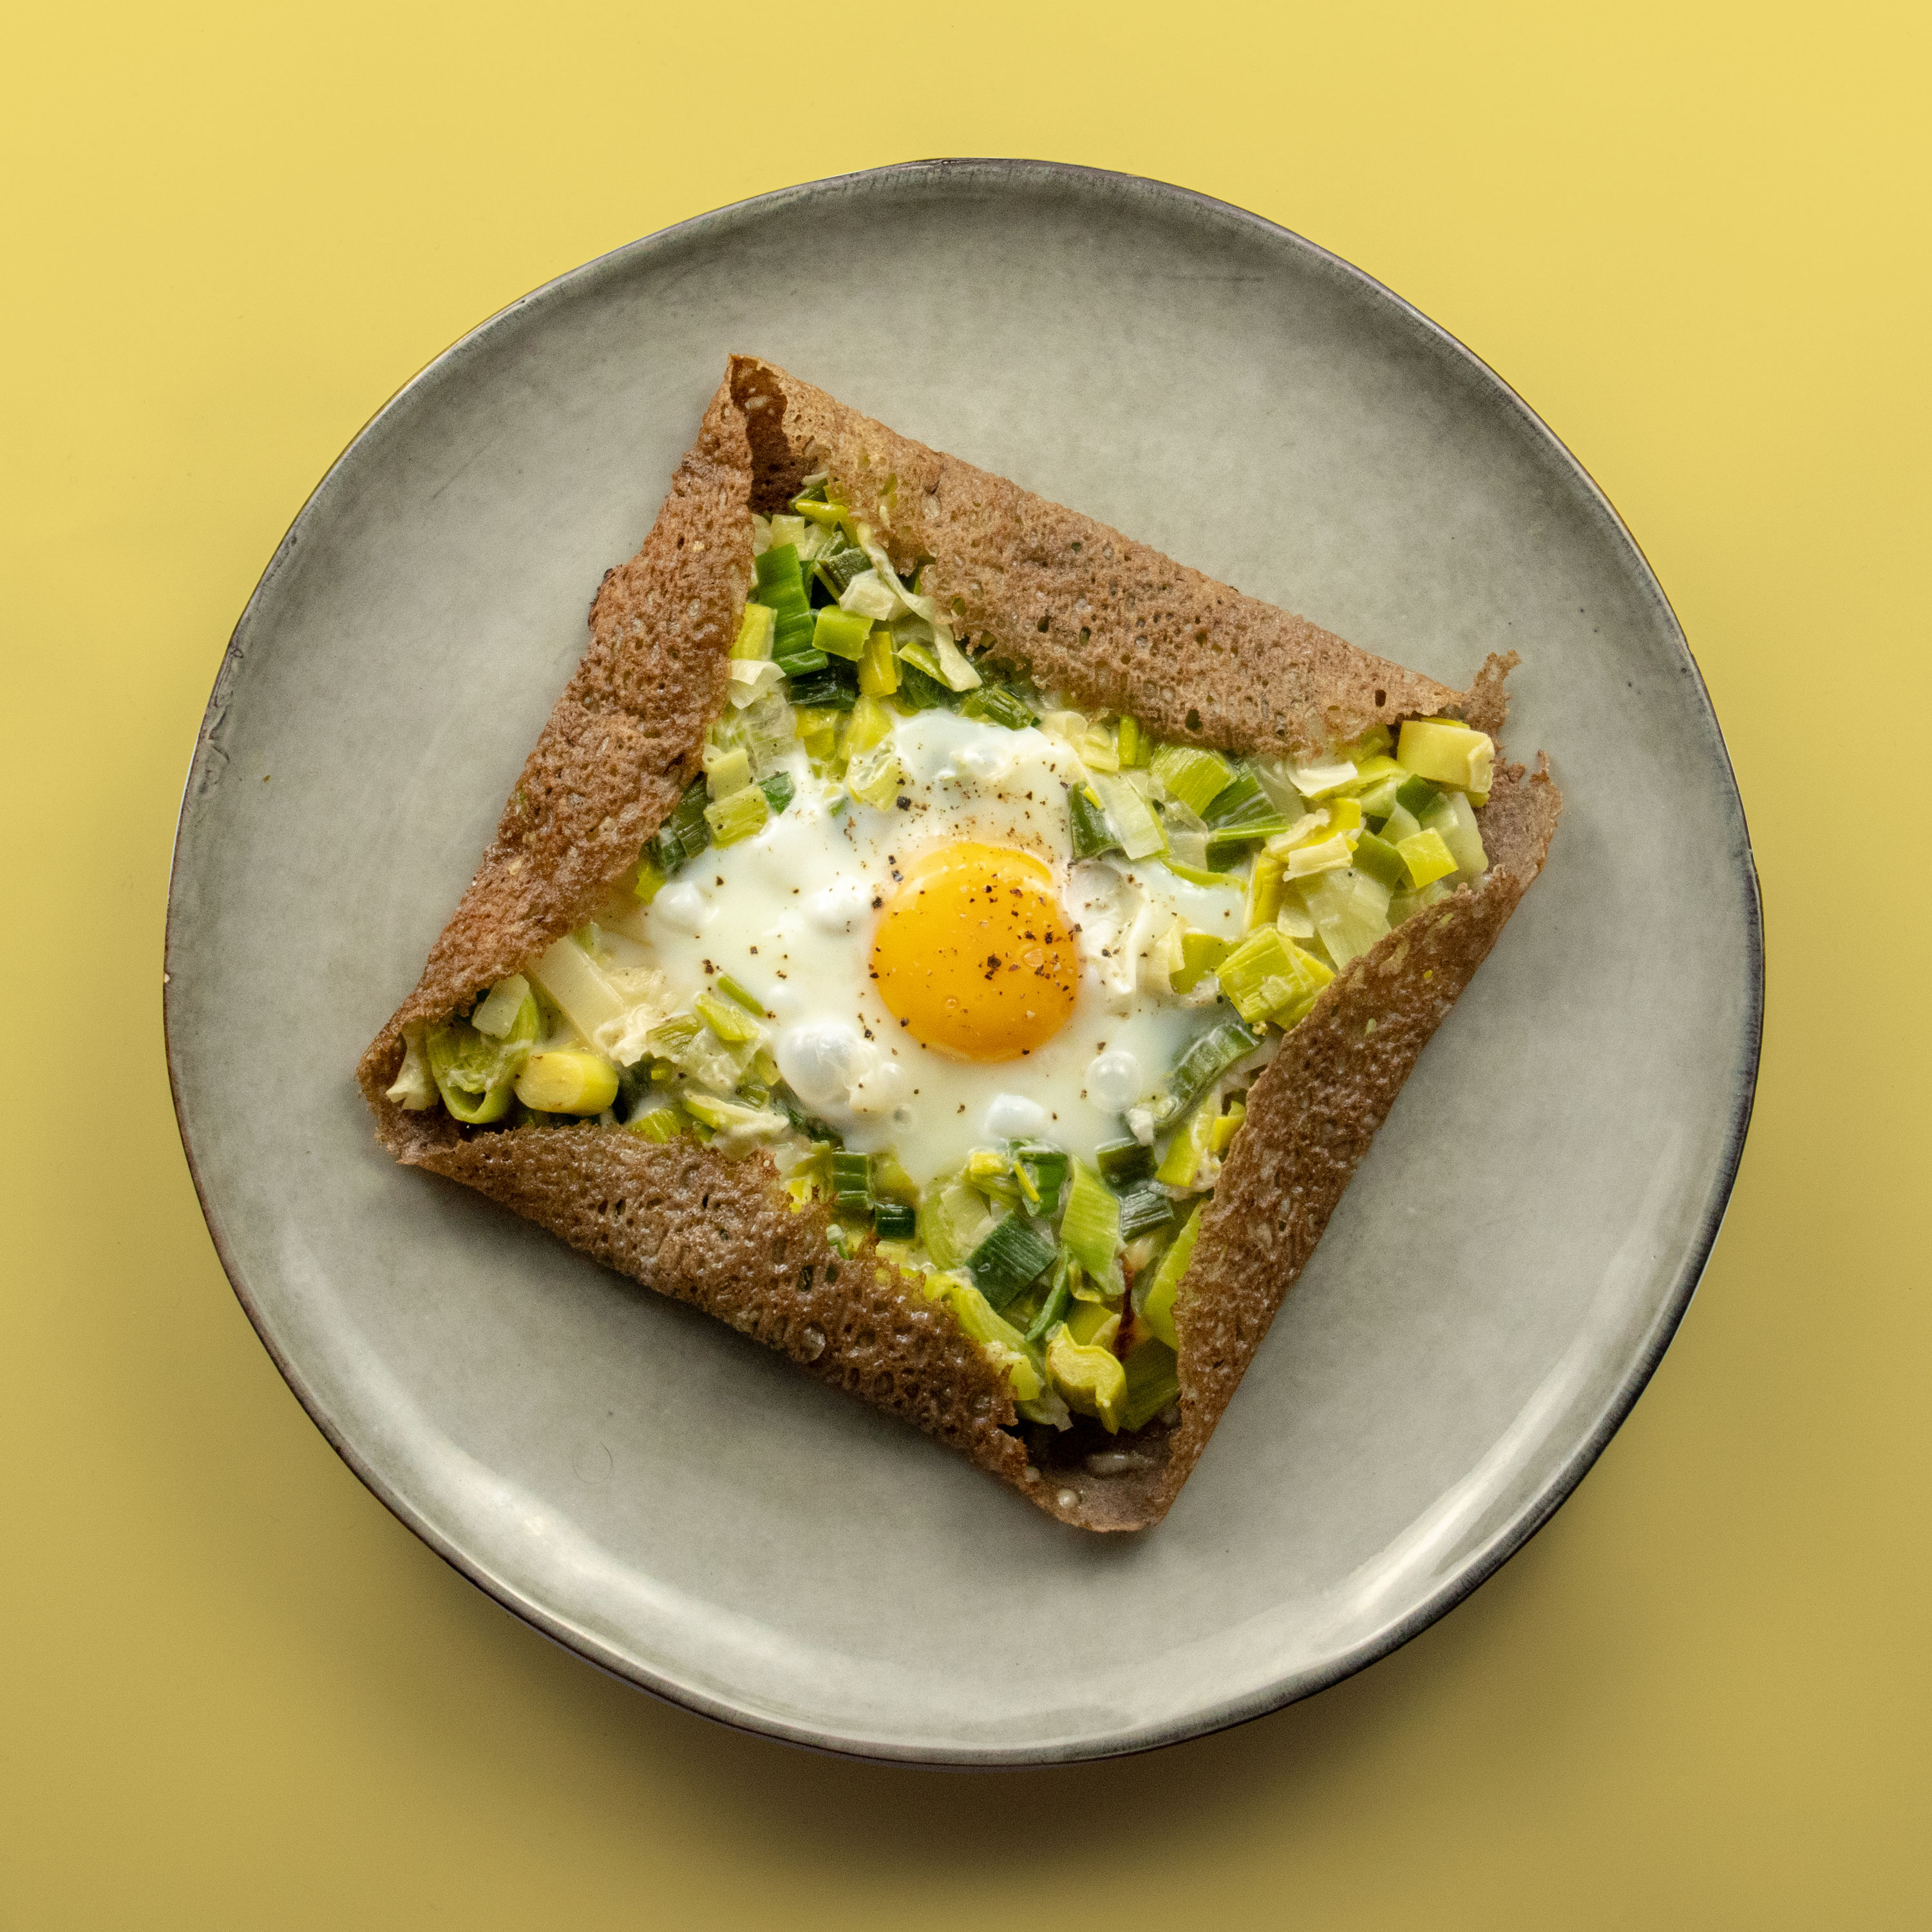
For my first passion blog post of the semester, I’m going to be looking at a French recipe that I’ve grown up with. Galette Bretonne is a savory crepe (instead of the dessert type) that is great for a typical French breakfast or lunch meal. Fair warning, this recipe goes by a handful of names depending on which source you chose to use but if the recipe includes buckwheat flour, it’s probably the right one. The outside of a crepe is really similar to how you would make a pancake, just really really thin. Buckwheat flour instead of regular flour is really the defining ingredient that makes this type of crêpe different. Once you make that outer layer you can use it to wrap up pretty much anything you want. Typical fillings for this type of crêpe include eggs, ham, and cheese.

Before I get into the logistics, I’m going to go over some of the history and cultural traditions of this dish. As I mentioned before, this is a French recipe from the specific region of Britanny (Bretagne in French) in the Western part of the country. This dish is also traditionally enjoyed with apple cider or juice which was something new that I learned so I really enjoyed being able to try that out.

Image result for galette bretonne

For this recipe, all you really need is buckwheat flour (which I surprised to find in my kitchen), whole wheat flour (which was included in the recipe I used but not always used in every recipe), an egg, and water. Then, you can top the crėpe of with whatever you want. I went with the traditional egg and cheese combination. Overall, this recipe is pretty simple when it comes to the necessary ingredients.

When I tried to make this dish, I struggled at first because it can be hard to make sure your crêpe is the right size and thickness. Crepes are like pancakes in that the first one is never good. The pan should also be really hot before you pour the batter. Other than that, the recipe is pretty straight forward just be mindful not to burn them (like I did multiple times) because they cook fast

Making the batter was pretty easy and adding the toppings was pretty straightforward. The whole process took me just over half an hour which includes the time I spent remaking burnt crepes. So, I’d say this recipe is pretty convenient and looks like it takes a lot more time than it actually does.

I’d say that these crepes took only a little more effort than making pancakes so if you’re looking for a new breakfast or brunch alternative, then you should definitely try this recipe out. This recipe wasn’t easy enough to replace my bagel in the morning, but I think it’s perfect for those days when I feel like putting in a little more effort because it’s definitely worth it.

I’ll like the recipe that I referred to down below so that you can try it out if you’re interested. If you do, I’d love to hear how it came out and how you liked it. Also, if anyone has any suggestions for a recipe and/or specific culture they want me to check out for future blog posts please let me know because I’d love to try them out!

Crêpe Bretonne Recipe: https://www.masalaherb.com/galette-bretonne/

History/Cultural Info Source: https://us.france.fr/en/brittany/list/all-you-need-to-know-about-breton-crepes-in-5-minutes

Photo Source: https://jow.fr/recettes/galette-fondue-de-poireaux-et-oeuf-miroir-89e1gm6slbiagvxt0vaf

Okonomiyaki

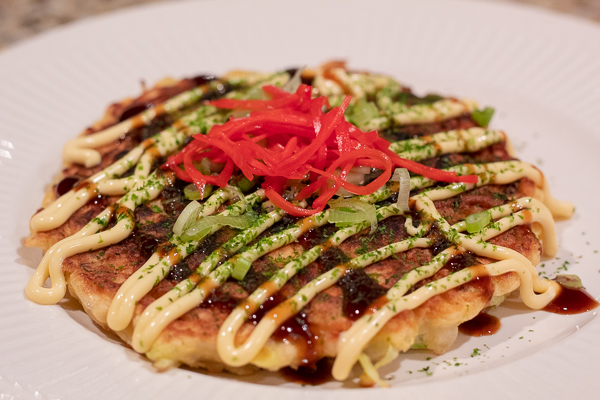
This week I decided to make okonomiyaki which, I’ll be honest, I really didn’t know about until I stumbled across this recipe. A lot of the recipes I came across actually referred to okonomiyaki as a type of street food, so I thought that was something fun to try out! After doing some research, I learned that this Japanese recipe is pretty popular and after trying it, I can definitely see why.

I really liked the recipe that I decided to use because it included a lot of background information where I learned a lot about this dish.

I also appreciated the simplified instructions and photos that made this recipe seem a lot less daunting, especially since I had no idea what to expect.

When I started cooking, all I really knew was that this dish was eventually supposed to resemble a “Japanese pancake”. I’ll be honest, this recipe was pretty intimidating at first but looking back on it, I really don’t think it was as complicated as I originally expected. Finding a “Japanese yam” was probably the most difficult part of this whole recipe which I eventually did.

The actual recipe was really easy to follow and once I had the right ingredients, it was pretty smooth sailing from there. I was really pleasantly surprised by how this dish turned out because it was my favorite amount of delicious and savory. I decided to use shrimp instead of pork for this recipe and I thought it was so good. The whole thing took me about an hour (not including the amount of time I spent looking for the ingredients at the store) so I think it was a good amount of time, especially considering that you can prep a lot of them at once and keep them to cook for later in the week. This is another recipe that I would definitely recommend with the colder weather slowly creeping up.

I also loved how this recipe was super customizable, and a lot of the recipes I read suggest a bunch of different toppings and ingredients that you could pick and choose from. For some of the more difficult to find ingredients (like the Japanese yam), the recipe also offered a lot of different alternatives and substitutes which was really helpful to have especially since these ingredients were not as easy to find in my local supermarket. If you’re interested in learning more about the different traditional Japanese ingredients, I’d definitely recommend checking out the link to the recipe.

If anyone decides to try this recipe out over the break, I’d love to hear about it (or if anyone has ever had this before). I’ll attach a link to the recipe I used at the bottom of this post as well as the source for the photo I used.

Okonomiyaki Recipe

Photo Source: https://thejapantry.com/wp-content/uploads/2019/05/Okonomiyaki-closeup.jpg

Ratatouille

This week I’ve decided to take a look at both a dish from my own culture but also a fun one that people love from the Disney movie. For anyone who hasn’t watched the movie, ratatouille is pretty much a traditional French vegetable stew which I thought would be perfect for the cold weather we had last week.

One thing to note is that some recipes are arranged in a dish in a more “organized” arrangement in a sort of spiral formation (like how it is in the movie) and is baked in the oven. I’ll include a picture of both arrangements that I’ve come across, but they’re both technically just different arrangements of the same recipe. For me, it was just a lot easier to make everything in a pot, but I’d definitely be interested in trying out the other version of this recipe just to see how it might be different.

I haven’t had this dish in a while, and I was honestly presently surprised by how well it turned out. I didn’t really expect anything special considering I felt like I was just cooking a bunch of different vegetables together, but it actually eventually came together really nicely into an actual stew. The ingredients I used for this were honestly pretty simple and things I could easily pick up if I didn’t already have them in my kitchen.

Making this dish was honestly a lot easier than I expected and didn’t require a lot of active work once I cut up all the vegetables I was going to use. The whole recipe took me about an hour to make, but I only had to work on it for about 25 minutes before I just let it cook. This is the perfect recipe to warm you up especially on a cold day, so I’ll definitely be making this dish more as the weather gets colder.

If anyone has any recommendations for a recipe I should check out next week, feel free to let me know. On top of that, if anyone decides to try this recipe out (or a version of it), I’d love to hear how you liked it. I also read some things about how a lot of different cultures have very similar dishes so if you know about those, I’d love to hear what you think about them. I’ll leave a link to the recipe I used down below and the source for the picture I used too.

Ratatouille Recipe

Photo Sources:

  1. Photo 1 
  2. Photo 2

Pasta al Pesto alla Genovese

Last week, someone recommended that I check out a traditional Italian pasta with a pesto sauce. I decided to try it out, and I was not at all disappointed with the results.

This week I actually used two different recipes (one in English and one in Italian) so that I could get an authentic understanding of this dish. It required a lot of back and forth with Google Translate but it was honestly worth it!

Something I learned this week is that this dish is typically served with boiled potatoes and green beans which makes it the traditional Genovese dish. Personally, I didn’t know that an authentic Italian pasta with pesto dish had these components so that was really interesting to read about. The Italian recipe included a lot of small pieces of information that just made it feel more authentic. For example, the pesto sauce you make should be cold before you add it to your pasta.

Overall, this recipe was honestly pretty simple. You just have to blend a handful of ingredients to make the pesto, cook some pasta, and boil potatoes and green beans. Some recipes are very specific about what type of pasta to use for your dish, while others seem to say it doesn’t really matter. I ended up just using whatever I had in my kitchen, which was fettuccini. To save space and time, I even cooked the potatoes with the pasta. Even though it’s not hard at all, this recipe definitely feels very authentic. Maybe it’s because I had to read parts of it in Italian, but this recipe made me feel like I was really engaging in Italian culture. I always thought that making my own pesto would be too much work, so I always opted for the jarred pesto option. After this week though, I now know that not only is making it not difficult at all but the whole recipe takes not much more work than making plain pasta. I’ll definitely have to make it a regular dinner meal.

I’m also going to start adding pictures to my posts, which I couldn’t really figure out how to do before now. Hopefully, these pictures (that are not mine) helps to give you a better understanding of what each recipe entails. I’ll be including my sources for these pictures at the bottom of my posts just like I do with the recipes in case you want to check them out too.

If anyone decides to try this recipe out (or ever has before), I’d love to hear how you liked it and if you did anything differently. Thanks for suggesting this dish! Let me know if you have any suggestions for next week’s recipe.

Pasta alla Genovese Recipe (English)

Pasta al Pesto alla Genovese Recipe (Italian)


Photo Source: https://www.ilcuoreinpentola.it/wp-content/uploads/2010/03/pasta-al-pesto-alla-genovese.jpg