Introduction
This guide is intended to illustrate from the ground up how to create a simple 3D scatterplot based of tabular data using the Unity game engine, for use in virtual reality (VR) experiences. This includes creating a Unity project, creating a prefab, loading a CSV (comma separated value) file, and assigning positions of objects according to values in the CSV. This guide assumes very little prior knowledge of Unity, but some basic programming skills (though theoretically you can copy and paste and it will work). Essentially, this is targeted as someone who is basically familiar with working with languages like R and Python, but has never used Unity or similar 3D software. For the bare understanding Unity you need to understand this guide, watching this two minute video will give a usable overview of the interface nomenclature.
Unity (or Unity 3D) is a game engine built for making games. It can create games and other experiences for web, PC, Android, iOS, etc, etc. Importantly for VR research, it makes working with VR technology like Oculus Rift or HTC Vive fairly straightforward. Unity projects themselves are essentially composed of content (assets), scripts (the programming), and the engine itself which smashes everything together and makes it work on your particular platform. The completed project this guide sets up is uploaded to GitHub here for reference.
If you have not used Unity before, I highly recommend first checking out the whole series official tutorial videos, starting with Interface Essentials. One upside of Unity is that there is a large knowledge base aimed at beginners, and very accessible documentation, among them the Unity Manual and the Unity Scripting Reference. Note that this guide uses C# scripting, and Microsoft’s C# Programming Guide might also help clear some nomenclature and syntax differences if you are coming from another language like R.
Setting Up Unity
First, you will need to make a Unity account and download the latest version of Unity. Unity is not open source, but it is free for educational purposes. Warning: when you install Unity, it may default to installing Visual Studio community IDE, which is a huge download. While it is a nice piece of software, Unity also includes the Monodevelop IDE, which works just fine (and also is well supported in the Unity community).
Once you have Unity installed, open it up and you will be greeted by a window (create a new account/login if necessary). You want to create a new project, which takes you to the following window. Pick a name for your project, make sure it is “3D,” and select a location to save it. This will create a whole file hierarchy for the project.

One useful thing to do is add the Standard Assets package under Add Asset Package, as shown in the screenshot below. It contains a variety of useful assets for testing/prototyping such as sample 3D models and basic interaction features. We will be using some of those assets at the very end of this guide.

Once you hit Create Project Unity will dutifully create the project. It may take some time to complete, as Standard Assets needs to be downloaded and unpacked. You will then be greeted by the Unity interface, which looks like this:
I again recommend taking a look at this video for a very short overview of the interface if you haven’t used Unity before or need a refresher, but in short:
- The Hiearchy window shows the “GameObject” that exist in the scene. By default there is a “camera” and a “directional light”.
- The center panel defaults to the scene view. This is how you navigate in 3D space (full list of hotkeys here, Mousewheel/Q is Pan, W goes back to default, Alt pivots, right click rotates view)
- Switching to the game view gives you the view from the camera GameObject.
- The Inspector shows the details of any selected GameObjects or scripts, which is how many, many options are changed in Unity.
- The Project folder shows you the assets/scripts of the project and is basically Unity’s file system view, but with recognition of different Unity asset types so that you can simply drag and drop into the hierarchy or scene view.
- The Console, which works much like any other development environment, notifying you of errors and allowing things to be printed to it through Debug.Log( example: Debug.Log(“Hello world”); )
Each window can be dragged to reposition and resized, and you can select from several precooked layouts in Window -> Layouts at the top of the main window. The one pictured above is “default,” but I recommend placing the Console window in a place where it is always visible. Note that since Standard Assets do not update with each Unity version the console will be full of warnings and/or errors. Generally you can ignore these or hit clear to erase them. If they give you too much trouble, you can go ahead delete the Standard Assets folder, since it is not core to anything we will be doing.
Adding GameObjects
In order to create a scatterplot, we need points to represent the data. There are many ways to do this, but one of the more straightforward ways is to use a Sphere, on of Unity’s built-in 3D assets, and turn it into what’s called a “prefab,” essentially a template object than can be cloned and modified as needed.
To make a prefab, add a sphere to your scene by selecting GameObject -> 3D Object -> Sphere at the top of the main window. The sphere should now be visible in the Hierarchy and in the Scene view, and should be selected (has arrows pointing out of it), as in the screenshot below.

The sphere is an example of a “GameObject,” a generic type of object within Unity to which different attributes can be assigned or modified via the inspector or via C# scripting. The sphere comes with some of these already populated, as shown in the Inspector. In essence, these are:
- Transform controls the location, rotation, and scale of the sphere in Euclidean X/Y/Z space (units are theoretically meters). All GameObjects at the very least must have a transform.
- The Mesh is the actual 3D model.
- The Collider is the boundary of the object for simulated physical interactions.
- The Mesh Renderer controls how the model is rendered (displayed), such as how it is affected by light (e.g., if it can cast shadows).
- The Material contains the texture information, or how the model is “painted.”
Creating a prefab
We need to turn the sphere into a prefab, so we can create clones of it on demand for our scatterplot. First, select the sphere and change its to be .25 in x, y, z, since the default size is too large for our purposes. This can be done by either changing the values in the inspector (under Transform), or by selecting the scale tool button in the top left corner of the main unity window and manipulating it in the scene window.
Then, create a prefab object by right-clicking in the Project window, under Assets, and selecting Create -> Prefab in the menu that opens up, and name it something meaningful, like DataBall.
Once the prefab exists in the Project, you can populate it with the Sphere GameObject by dragging the it from either the Inspector or the Scene window into the prefab object in the Project window. It should look something like this:

Saving the Scene
While Assets are stored as part of the file structure on your computer, the associations and placement of objects within the “Scene” are not. To save the Scene, simply go to File->Menu-> Save Scenes, or hit Ctrl+S. You will be prompted for a name and location the first time. The easiest place to store them is within the Assets folder within the Unity Project.
Importing CSV Data into Unity
Unity can read a wide variety of data types. As you can imagine, it takes a lot of different kinds of data to build a fully-functioning video game, such as images, 3d models, and sounds. Naturally, Unity can recognize CSV files. Getting Unity to parse CSVs, however, is unfortunately not as easy. There are two main steps: 1) creating a script to actually read and parse the data, 2) getting your data and putting it into a folder called Resources.
Creating a Script.
Parsing a CSV into something usable, like an array of values, is not built-in, requiring some scripting magic. Fortunately, brave internet souls have provided code to do this, so we do not need to reinvent the wheel (at least here). Namely, developer Teemu Ikonen has created a lightweight script for loading CSVs into a list of Libraries, described here, and posted to github here.
We have the code available, but how to get it, you know, into Unity? We need to create a script in the editor. To do this, within the Project window in Assets, right-click then select Create -> C# Script, and give it the name CSVReader.
Note: It is very important the name of the script file matches the name of the Class within the script. This is an assumption Unity makes in order to reference scripts from other scripts, and your scene will not run if there is a mismatch.
Okay, open up the script. This will mean a new program will open up, probably Monodevelop, but maybe Visual Studio (depending on what you chose to install). In the window, you should find some very plain code:
using System.Collections;
using System.Collections.Generic;
using UnityEngine;

public class CSVReader : MonoBehaviour {

 // Use this for initialization
 void Start () {

 }

 // Update is called once per frame
 void Update () {

 }
}
First, it declares namespaces at the top for access to various other classes. If you are used to R or Python, these are roughly analogous to packages, giving you access to various pre-made functions. As noted, the class name defined here must match the name of the script. We can use it to reference the methods we define in this script in others (like in our case to connect to a the script that places our points in the scatterplot). Two functions are included by default, Start () and Update(). Start runs when the game is started, while Update runs every rendered “frame” (think video/movie frames). Others exist for more specialized purposes.
In our case, all we need to do is take Ikonen’s code and paste it in, replacing all existing code, and save it. If you are curious about how it works, I have a commented version of his code uploaded on github here.
We can leave this script alone for the remainder of the guid, since we will be referencing (i.e., running) the function it contains in another script.
Getting some data
First, to get Unity to read the CSV, we need to create a folder called Resources under Assets within the Project window. Make sure the naming is exact, since a folder with the name Resources has a special meaning for Unity (it allows for simple direct references to assets rather than manually associating them in the editor).
Think very hard about what dataset you want to graph. Now stop thinking, because I have something cooked up already: the iris dataset (wikipedia). You can download my cleaned up version here: iris.csv. To get it, I exported it from R in Rstudio using this code (getting rid of the quotes is not necessary but makes for cleaner display):
# Write without quotes
write.csv(iris, file = "iris.csv", quote = FALSE)
Okay, now make sure the iris.csv is in the Resources folder (and make sure it is actually named that). You can drag and drop it into the Project window as if it were an OS file window, or you can actually right-click on the folder and select the option to view it in your OS file system (“Show in Explorer” on Windows), and then put the file there like any other. Whenever you import a new file, Unity will take a moment to import it, which involves creating some additional Unity-specific metadata.
Plotting the Points
Step 1: Loading the Data
In order to plot the points, we need a script that gets the values from the CSVParser script, turns those values into XYZ coordinates, and then creates a clone of our prefab DataBall at that location.
To start, create another C# Script (in Project, right-click -> Create -> C# Script) titled something appealing, like DataPlotter, and open it in your development environment of choice. It will look very familiar:
using System.Collections;
using System.Collections.Generic;
using UnityEngine;

public class DataPlotter : MonoBehaviour {

 // Use this for initialization
 void Start () {

 }

 // Update is called once per frame
 void Update () {

 }
}
First, we need to make sure we can get our input file read using our CSVReader script. To do this, we need a variable to hold the name of the file, a variable to hold the data that the script outputs, and the code to run the other script and populate set that variable. Delete the Update() function as we will not be needing it. Namespaces are omitted here for space.
public class DataPlotter : MonoBehaviour {

 // Name of the input file, no extension
 public string inputfile;


 // List for holding data from CSV reader
 private List<Dictionary<string, object>> pointList;

 // Use this for initialization
 void Start () {

 // Set pointlist to results of function Reader with argument inputfile
 pointList = CSVReader.Read(inputfile);

 //Log to console
 Debug.Log(pointList);
 }

}
Public variables are accessible by other scripts, but also modifiable within the Unity editor, which will override any default values at runtime. Private variables are inaccessible by other scripts and hidden in the editor.
Once you save your script, move back to Unity. For a script to run, it needs to be attached to a GameObject within the Scene. We have a sphere sitting in our scene, but a better option is to right-click within the Hiearchy and select Create Empty. This will create an empty GameObject, which is useful for holding other GameObjects and serving as something to attach scripts to. Give it a memorable name, such as Plotter, and drag your script to it from the Project menu to make the script a Component of the Plotter GameObject.
Warning: Make sure you are not in “Play mode” (that the buttons at the top are not blue) when you are changing settings in the Editor. Anything changed during Play mode will revert back to the way it was when Play mode began, including the placement of GameObjects, components attached to GameObjects (like scripts), and variables set within scripts.
You should now be able to select Plotter in the Hierarchy and see the script in the Inspector, like this:

As you can see, there is a field for Inputfile, which we defined within the script. Go ahead and put the name of the CSV, minus file extension, into that field (in our case, iris).
Now, hit the big play button at the top of the screen and look at the Console (I recommend setting it to “Clear on Play”). The last entry should be something like:
System.Collections.Generic.List`1[System.Collections.Generic.Dictionary`2[System.String,System.Object]]
UnityEngine.Debug:Log(Object)
DataPlotter:Start() (at Assets/DataPlotter.cs:18)
While this does not neatly print our data, it does show that our data was loaded (it is a List that contains Dictionaries), and that it came from line 18 of the DataPlotter.cs script.
Step 2: Setting up Column Names
To actually begin printing meaningful things (that we can also store and use for displaying our data), we need to do a little conversion. This code goes right after the Debug.Log() in the previous code block, within the Start() function:
// Declare list of strings, fill with keys (column names)
        List<string> columnList = new List<string>(pointList[1].Keys);

 // Print number of keys (using .count)
 Debug.Log("There are " + columnList.Count + " columns in CSV");

 foreach (string key in columnList)
 Debug.Log("Column name is " + key);
pointList[1].Keys is technically the list of “keys” of the index 1 Dictionary in pointList. These are the column names within the CSV. These are counted and printed, and then each column name is printed via a foreach loop. If you hit the play button, the console should fill with the following:

Okay, we have a list of column names we can use to reference points within pointList in order to get the coordinates for the data points.
What that lets us do is designate which column we want graphed by its index, rather than having to manually type the full name in the Editor. To implement that, we need to create two sets of variables, three ints to expose in the editor, and three strings which hold the full column names. We can leave the strings Public in order to see the actual Column names at runtime.
These should go below the existing variables, but before the Start() function:
// Indices for columns to be assigned
 public int columnX = 0;
 public int columnY = 1;
 public int columnZ = 2;

 // Full column names
 public string xName;
 public string yName;
 public string zName;
Keep in mind that here we have some values assigned to the columns. This ensures that if the user does nothing, the first three columns are taken as the default. Anything the user inputs in the Inspector will override these values.
The next block actually assigns these variables. Within the Start() function, after the last Debug.Log(). Keep in mind this needs to be after the creation of columnList, because it relies on that variable to be populated:
// Assign column name from columnList to Name variables
 xName = columnList[columnX];
 yName = columnList[columnY];
 zName = columnList[columnZ];
What this does is take the string within columnList, at the index specified by the column variables, and assign it to the Name variables.
Save and go back to the Editor, and hit Play. Select the Plotter GameObject and look in the Inspector. You should see the fields populated (if not, you may need to exit Play mode, then manually input the Column values), like so:

Note that Column X has no name… which is true, it doesn’t in our data! Try exiting play mode, changing the columns to 1, 2, 3, and hitting play again to see how it updates. Also note that you can put in nonsense into the Names fields, and it just gets overwritten by the script (since you just told it to get new names from columnList).
You entire DataPlotter script should now look like this:
using System.Collections;
using System.Collections.Generic;
using UnityEngine;

public class DataPlotter : MonoBehaviour {

 // Name of the input file, no extension
 public string inputfile;

 // List for holding data from CSV reader
 private List<Dictionary<string, object>> pointList;

 // Indices for columns to be assigned
 public int columnX = 0;
 public int columnY = 1;
 public int columnZ = 2;

 // Full column names
 public string xName;
 public string yName;
 public string zName;

 // Use this for initialization
 void Start () {

 // Set pointlist to results of function Reader with argument inputfile
 pointList = CSVReader.Read(inputfile);

 //Log to console
 Debug.Log(pointList);

 // Declare list of strings, fill with keys (column names)
 List<string> columnList = new List<string>(pointList[1].Keys);

 // Print number of keys (using .count)
 Debug.Log("There are " + columnList.Count + " columns in the CSV");

 foreach (string key in columnList)
 Debug.Log("Column name is " + key);

 // Assign column name from columnList to Name variables
 xName = columnList[columnX];
 yName = columnList[columnY];
 zName = columnList[columnZ];

 }
}
Step 3: Instantiating the Prefab
Before placing our points, we first need to associate the prefab DataBall we made with our script, then direct the script to instantiate (make a clone).
First, we need to let our script know what the prefab is it will be placing. To do this, we need to declare a public GameObject variable within the script, like this (place it just below our other variables, but above Start() ):
// The prefab for the data points to be instantiated
 public GameObject PointPrefab;
Save your script and go back to the Editor, and look at Plotter again. There is now another field open in the Inspector, under our Column and Names variables. It has some text, with a little circle next to it:
![]()
To populate it, all you need to do is drag the DataBall prefab we created from the Project window to that field. It should look like this:
![]()
Now, our script “knows” about DataBall, but right now it is doing nothing with it.
While you are looking at the editor, delete the Sphere in our Scene within the Hierarchy (Not our prefab!). Don’t worry, the Sphere will rise again, in the form of the prefab.
Placing a clone of DataBall means instantiating it. Three pieces of information are needed to instantiate a prefab. A reference to the prefab itself (our PointPrefab variable will do), the position in XYZ space in a data type called a Vector3, and its rotation in a data type called a Quaternion.
For now, we can leave the position and rotation at zero (Quaternion.identity is shorthand for zero rotation), like so:
//instantiate prefab
Instantiate(PointPrefab, new Vector3(0,0,0), Quaternion.identity);
Note that this code needs to be within the Start() function in order to run, preferably at the end (for now).
Once you save, go back to the Editor, and hit Play, you should see DataBall appear in the scene view and the hierarchy, with the name (Clone) appended. If you stop playing, it will disappear. This is because instantiated objects only last for as long as the scene is run (unless destroyed by something else, which won’t happen in this guide).
Feel free to change the values within the Vector3 to other values, such as 1, 3, 4, and saving and hitting Play to see how the position it spawns at moves.
Step 3: Looping and Instantiating
Now that we know how to instantiate a DataBall, we need to instantiate one for each row in our table, according to the values in the three columns we have selected.
To do this, we need to loop through every row, get the value at each column position, then use those values as the coordinates to instantiate our DataBall.
This code will replace the Instantiate() code above, but still be within Start(). It needs to be after where the Name variables are assigned.
//Loop through Pointlist
 for (var i = 0; i < pointList.Count; i++)
 {
 // Get value in poinList at ith "row", in "column" Name
 float x = System.Convert.ToSingle(pointList[i][xName]);
 float y = System.Convert.ToSingle(pointList[i][yName]);
 float z = System.Convert.ToSingle(pointList[i][zName]);

 //instantiate the prefab with coordinates defined above
 Instantiate(PointPrefab, new Vector3(x, y, z), Quaternion.identity);

 }
pointList.Count returns the length of the List (in other words, the number of rows), so that the loop runs as many times as there are rows.
I want to point out that System.Convert.ToSingle simply ensures the value given by pointList is a float (Single is a type of floating point number).
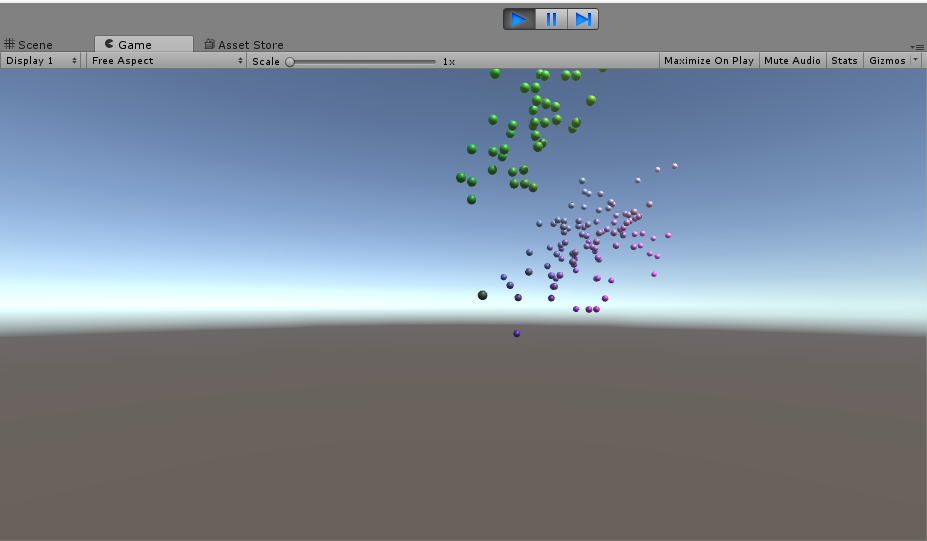
Once you save and hit Play, you should have a whole mess of Clones in your hierarchy, and a cloud of data points in your Game/Scene view, as shown below. Remember, at the moment these points are assigned according the values in the CSV, so aren’t necessarily going to be around the origin (0,0,0). To get a better look, you can go into the scene view tab and navigate around.

Try changing the column values (and remember to start/stop Play) and see what happens. Warning: if you put in a column that does not exist (like 12), or if the column is full of strings (like 5), nothing will be plotted and there will be an error in the console. Essentially, make sure you are giving the script numerical data, or it won’t work.
To recap, your full DataPlotter script should look like this:
using System.Collections;
using System.Collections.Generic;
using UnityEngine;

public class DataPlotter : MonoBehaviour {

 // Name of the input file, no extension
 public string inputfile;

 // List for holding data from CSV reader
 private List<Dictionary<string, object>> pointList;

 // Indices for columns to be assigned
 public int columnX = 0;
 public int columnY = 1;
 public int columnZ = 2;

 // Full column names
 public string xName;
 public string yName;
 public string zName;

 // The prefab for the data points that will be instantiated
 public GameObject PointPrefab;

 // Use this for initialization
 void Start () {

 // Set pointlist to results of function Reader with argument inputfile
 pointList = CSVReader.Read(inputfile);

 //Log to console
 Debug.Log(pointList);

 // Declare list of strings, fill with keys (column names)
 List<string> columnList = new List<string>(pointList[1].Keys);

 // Print number of keys (using .count)
 Debug.Log("There are " + columnList.Count + " columns in the CSV");

 foreach (string key in columnList)
 Debug.Log("Column name is " + key);

 // Assign column name from columnList to Name variables
 xName = columnList[columnX];
 yName = columnList[columnY];
 zName = columnList[columnZ];

 //Loop through Pointlist
 for (var i = 0; i < pointList.Count; i++)
 {
 // Get value in poinList at ith "row", in "column" Name
 float x = System.Convert.ToSingle(pointList[i][xName]);
 float y = System.Convert.ToSingle(pointList[i][yName]);
 float z = System.Convert.ToSingle(pointList[i][zName]);

 //instantiate the prefab with coordinates defined above
 Instantiate(PointPrefab, new Vector3(x, y, z), Quaternion.identity);

 }

 }

}
Cleanup: Instantiating Clones as Children
Right now, we dump a series of clones in the Hierarchy, which is messy. What would be better is to instantiate clones as a child of another object in the Hierarchy, which is both neater in terms of organization and lets you manipulate all the points at once by manipulating the parent object.
First, create an empty GameObject by right-clicking in the Hierarchy, and selecting Create Empty, and give it a name like PointHolder.
Now that we have this object ready to go, we need to make space for it in our script.
// The prefab for the data points that will be instantiated
 public GameObject PointPrefab;
Much like before, we simply need to declare a GameObject variable in our script (and save the script!), then drag our PointHolder object from the Hierarchy into the newly empty slot in the Inspector (make sure to select Plotter in the Hierarchy).
Here is where things get slightly more involved. In short, instead of just calling Instantiate() in our loop, we need to set it to a new GameObject. By setting it to a new GameObject, we can more easily manipulate the attributes of each prefab right after its made. This code replaces the previous Instantiate() line.
// Instantiate as gameobject variable so that it can be manipulated within loop
 GameObject dataPoint = Instantiate(
 PointPrefab,
 new Vector3(x, y, z),
 Quaternion.identity);
Now we can assign it to be the child of our our PointHolder object. In Unity, this entails making the Transform component of our newly generated prefab (dataPoint) a Child of PointHolder’s transform. Remember, order is important, so this code needs to be after you instantiate the object.
// Make dataPoint child of PointHolder object
 dataPoint.transform.parent = PointHolder.transform;
Remember that Transform is also the thing determines position in the Hierarchy in addition to 3D location/rotation/scaling. What this means is that anything affecting the Transform of the Parent will also affect the Children (relative to the Parent).
We can do just a simple thing and give our prefab clones a more meaningful name, like the actual values they represent:
// Assigns original values to dataPointName
 string dataPointName =
 pointList[i][xName] + " "
 + pointList[i][yName] + " "
 + pointList[i][zName];
Then of course, we actually need to give the string dataPointName to dataPoint, which is done like so (name is another property of Transform):
// Assigns name to the prefab
 dataPoint.transform.name = dataPointName;
Save and return to the Editor, Play, and check that the points are neatly nested in the Hierarchy and have their new names assigned.
Your entire script should look like this:
using System.Collections;
using System.Collections.Generic;
using UnityEngine;

public class DataPlotter : MonoBehaviour
{

    // Name of the input file, no extension
    public string inputfile;

    // List for holding data from CSV reader
    private List<Dictionary<string, object>> pointList;

    // Indices for columns to be assigned
    public int columnX = 0;
    public int columnY = 1;
    public int columnZ = 2;

    // Full column names
    public string xName;
    public string yName;
    public string zName;

    // The prefab for the data points that will be instantiated
    public GameObject PointPrefab;

    // Object which will contain instantiated prefabs in hiearchy
    public GameObject PointHolder;

    // Use this for initialization
    void Start()
    {

        // Set pointlist to results of function Reader with argument inputfile
        pointList = CSVReader.Read(inputfile);

        //Log to console
        Debug.Log(pointList);

        // Declare list of strings, fill with keys (column names)
        List<string> columnList = new List<string>(pointList[1].Keys);

        // Print number of keys (using .count)
        Debug.Log("There are " + columnList.Count + " columns in the CSV");

        foreach (string key in columnList)
            Debug.Log("Column name is " + key);

        // Assign column name from columnList to Name variables
        xName = columnList[columnX];
        yName = columnList[columnY];
        zName = columnList[columnZ];

        //Loop through Pointlist
        for (var i = 0; i < pointList.Count; i++)
        {
            // Get value in poinList at ith "row", in "column" Name
            float x = System.Convert.ToSingle(pointList[i][xName]);
            float y = System.Convert.ToSingle(pointList[i][yName]);
            float z = System.Convert.ToSingle(pointList[i][zName]);

            //instantiate the prefab with coordinates defined above
            Instantiate(PointPrefab, new Vector3(x, y, z), Quaternion.identity);

            // Instantiate as gameobject variable so that it can be manipulated within loop
            GameObject dataPoint = Instantiate(
                    PointPrefab,
                    new Vector3(x, y, z),
                    Quaternion.identity);

            // Make child of PointHolder object, to keep points within container in hierarchy
            dataPoint.transform.parent = PointHolder.transform;

            // Assigns original values to dataPointName
            string dataPointName =
                pointList[i][xName] + " "
                + pointList[i][yName] + " "
                + pointList[i][zName];

            // Assigns name to the prefab
            dataPoint.transform.name = dataPointName;


        }

    }

}
Normalizing the Values for Display
Right now, our data is placed according to the raw value in the file. This isn’t very flexible, since if you are dealing with a different dataset with values in the hundreds or thousands, the graph will be that large. This becomes very important when implementing interaction, particularly in VR, since you don’t really want people to have to walk a mile to just look at the graph.
To do this, we will scale all values to between 0-10 before using them as coordinates for instantiating our dataBalls. First, we need to find the minimum and maximum values per-column. We can then work a little math with our raw values to get them into our 0-10 range.
Finding the min and max within our Start() function would mean packing in quite a few more lines, so this is a good time to do the C# thing and create a Method (function) outside Start(), that we can then call as needed.
First, some housekeeping: we will be using Convert.ToSingle a lot. Currently, we specify its namespace explicitly each time we use it (System.Convert.ToSingle), but instead we can declare it at the beginning of our script along with others (like using UnityEngine;).
using System;
Now we can just use Convert.ToSingle by itself, which makes the code a little cleaner. Next, onto the implementation
Find Maximums and Minimums
I won’t walk through it line by line, but here is the method FindMaxValue() to find the maximum value in a column in our pointList. In essence, it takes the column name as the argument (string columnName) and returns the maximum value as a float (private float). It does this by looping through the particular Dictionary (column), and overwriting the value it has if it finds a bigger one. Keep in mind that it assumes that pointList is defined, which is fine for our purposes, but means it would need to be modified to be extensible.
Place these functions into its own Method, after Start(), but within the last curly bracket (i.e., within the DataPlotter class). Note that we could place almost all our code within separate methods, which would be preferred for most projects, but we are keeping much of our code within Start() so that it is more readable.
    private float FindMaxValue(string columnName)
    {
        //set initial value to first value
        float maxValue = Convert.ToSingle(pointList[0][columnName]);

        //Loop through Dictionary, overwrite existing maxValue if new value is larger
        for (var i = 0; i < pointList.Count; i++)
        {
            if (maxValue < Convert.ToSingle(pointList[i][columnName]))
                maxValue = Convert.ToSingle(pointList[i][columnName]);
        }

        //Spit out the max value
        return maxValue;
    }
Similarly, here is the code for finding the minimum value. Place it after the block for the FindMaxValue, and make sure all your curly bracket make sense- remember, these are separate methods, at the same level as Start().
 private float FindMinValue(string columnName)
    {

        float minValue = Convert.ToSingle(pointList[0][columnName]);

        //Loop through Dictionary, overwrite existing minValue if new value is smaller
        for (var i = 0; i < pointList.Count; i++)
        {
            if (Convert.ToSingle(pointList[i][columnName]) < minValue)
                minValue = Convert.ToSingle(pointList[i][columnName]);
        }

        return minValue;
    }
From now on, we can just refer to these methods within our Start() function. Knowing they take the columnName, we can give it our existing string variables something-Name, and store the results in new floats.
// Get maxes of each axis
 float xMax = FindMaxValue(xName);
 float yMax = FindMaxValue(yName);
 float zMax = FindMaxValue(zName);

 // Get minimums of each axis
 float xMin = FindMinValue(xName);
 float yMin = FindMinValue(yName);
 float zMin = FindMinValue(zName);
Now all we need to do is work a little math magic to calculate the normalized position of the points: (i -min)/(max-min). This code then can replace the existing code for defining the x, y, and z floats within Start():
 // Get value in poinList at ith "row", in "column" Name, normalize
 float x =
 (System.Convert.ToSingle(pointList[i][xName]) - xMin) / (xMax - xMin);

 float y =
 (System.Convert.ToSingle(pointList[i][yName]) - yMin) / (yMax - yMin);

 float z =
 (System.Convert.ToSingle(pointList[i][zName]) - zMin) / (zMax - zMin);
One more thing: it would be nice to be able to change the scale of the graph, meaning how far in space the maximum points go, so let’s quickly create a variable to do that, defined at the top of the script with the other variables.
public float plotScale = 10;
Then we can just add that variable to our Instantiate code, so that it becomes:
GameObject dataPoint = Instantiate(
                    PointPrefab,
                    new Vector3(x, y, z)* plotScale,
                    Quaternion.identity);
Save and return to the Editor. Hit Play, and if all your curly brackets are right (probably won’t be the first time), you should see all the points in their new positions. Try exiting play mode and changing the columns they represent in the Inspector for Plotter. The positions of the DataBalls will not exceed 10 in any axis, a value you can alter by changing the plotScale variable we created (but you will need to exit and re-enter play mode) in the Inspector.

Adding Color
Obviously, our plot is a little drab. Fortunately, we only need one line of code in order to dynamically assign color to our DataBall prefabs as we instantiate them. This is because we already have normalized values created for x, y, z in 3D world space that we can instead map to red, blue, green in RGB color space. There are several ways to define color in Unity, but the most straightforward way is as a set of four floats with values between 0-1, one for red, one for green, one for blue, and one for Alpha (transparency).
Conveniently, we already have x, y, z in our rendering loop in that format. We can use them to create a new color (we can just leave Alpha at 1), and then assign it as the color of the prefab dataPoint, to override the default color. That code looks like this:
// Gets material color and sets it to a new RGBA color we define
 dataPoint.GetComponent<Renderer>().material.color =
 new Color(x,y,z, 1.0f);
Note the syntax is a little different because we need to actually get the Material Component on the GameObject. It is what contains the color information.
Now (after saving and hitting Play in the Editor), you can see our fancily colored DataBalls, like so:
Finally, our code should look like this:
using System.Collections;
using System.Collections.Generic;
using UnityEngine;
using System;

public class DataPlotter : MonoBehaviour {

    // Name of the input file, no extension
    public string inputfile;

    // List for holding data from CSV reader
    private List<Dictionary<string, object>> pointList;

    // Indices for columns to be assigned
    public int columnX = 0;
    public int columnY = 1;
    public int columnZ = 2;

    // Full column names
    public string xName;
    public string yName;
    public string zName;

    public float plotScale = 10;

    // The prefab for the data points that will be instantiated
    public GameObject PointPrefab;

    // Object which will contain instantiated prefabs in hiearchy
    public GameObject PointHolder;

    // Use this for initialization
    void Start () {

        // Set pointlist to results of function Reader with argument inputfile
        pointList = CSVReader.Read(inputfile);

        //Log to console
        Debug.Log(pointList);

        // Declare list of strings, fill with keys (column names)
        List<string> columnList = new List<string>(pointList[1].Keys);

        // Print number of keys (using .count)
        Debug.Log("There are " + columnList.Count + " columns in the CSV");

        foreach (string key in columnList)
            Debug.Log("Column name is " + key);

        // Assign column name from columnList to Name variables
        xName = columnList[columnX];
        yName = columnList[columnY];
        zName = columnList[columnZ];

        // Get maxes of each axis
        float xMax = FindMaxValue(xName);
        float yMax = FindMaxValue(yName);
        float zMax = FindMaxValue(zName);

        // Get minimums of each axis
        float xMin = FindMinValue(xName);
        float yMin = FindMinValue(yName);
        float zMin = FindMinValue(zName);


        //Loop through Pointlist
        for (var i = 0; i < pointList.Count; i++)
        {
            // Get value in poinList at ith "row", in "column" Name, normalize
            float x =
                (System.Convert.ToSingle(pointList[i][xName]) - xMin)
                / (xMax - xMin);

            float y =
                (System.Convert.ToSingle(pointList[i][yName]) - yMin)
                / (yMax - yMin);

            float z =
                (System.Convert.ToSingle(pointList[i][zName]) - zMin)
                / (zMax - zMin);


            // Instantiate as gameobject variable so that it can be manipulated within loop
            GameObject dataPoint = Instantiate(
                    PointPrefab,
                    new Vector3(x, y, z)* plotScale,
                    Quaternion.identity);

            // Make child of PointHolder object, to keep points within container in hiearchy
            dataPoint.transform.parent = PointHolder.transform;

            // Assigns original values to dataPointName
            string dataPointName =
                pointList[i][xName] + " "
                + pointList[i][yName] + " "
                + pointList[i][zName];

            // Assigns name to the prefab
            dataPoint.transform.name = dataPointName;

            // Gets material color and sets it to a new RGB color we define
            dataPoint.GetComponent<Renderer>().material.color =
                new Color(x,y,z, 1.0f);
        }

    }

    private float FindMaxValue(string columnName)
    {
        //set initial value to first value
        float maxValue = Convert.ToSingle(pointList[0][columnName]);

        //Loop through Dictionary, overwrite existing maxValue if new value is larger
        for (var i = 0; i < pointList.Count; i++)
        {
            if (maxValue < Convert.ToSingle(pointList[i][columnName]))
                maxValue = Convert.ToSingle(pointList[i][columnName]);
        }

        //Spit out the max value
        return maxValue;
    }

    private float FindMinValue(string columnName)
    {

        float minValue = Convert.ToSingle(pointList[0][columnName]);

        //Loop through Dictionary, overwrite existing minValue if new value is smaller
        for (var i = 0; i < pointList.Count; i++)
        {
            if (Convert.ToSingle(pointList[i][columnName]) < minValue)
                minValue = Convert.ToSingle(pointList[i][columnName]);
        }

        return minValue;
    }

}
Exploring your Data
So far we’ve been looking at our data largely through the view of the camera when you hit play, which is not very dynamic. While going ahead and implementing VR technology is beyond the scope of this guide, we can emulate a VR-ish experience by adding a controllable camera. We can use a prefab player controller from Standard Assets, which allows you to wander around the environment like standard first-person game. If you did not download Standard Assets at the very beginning, you can go to the Asset Store window, search for Standard Assets, and download them from there (there will be a few windows asking about import settings, but the defaults are safe and you can agree to the prompts).
Before we add the prefab, we need to create a ground to walk on, or our FPS controller will fall through to infinity. Reminder: make sure you are not in play mode!
We do this by adding a Plane to our scene, through Game Object -> 3D Object -> Prefab at the top of the main window. It will be a little small, so change the scale to 10 in x, y, z by modifying the scale values in the Transform Component visible in the Inspector (with the plane selected).
Next add the prefab FPS controller by dragging it from the Project window into the Scene (make sure it’s on the plane!). It’s located in Standard Assets -> Characters -> FirstPersonCharacter -> FPSController.prefab. Also make sure it’s above the plane, or it might fall through.

Your scene should look like this:

Now disable the Main Camera, which you can do by unchecking it in the Inspector (a little box near the top, pictured below), since it will clash with the camera attached to the FPSController.

Okay, now finally hit Play! You should be able to walk around the environment freely by using the WASD or the arrow keys to move, and looking around with the mouse. These controls should seem very familiar if you have played a first person shooter game. You can even press spacebar to jump on top of the dataPoints!

Little Things (Aesthetics)
If you haven’t noticed, having a white ground is pretty jarring, and our bluish points don’t contrast well with the sky. Predictably, we can change both those things.
To get a prettier ground, we can just apply one of the existing materials in Standard Assets that we have downloaded. Personally, I like NavyGrid, which is contained within Standard Assets -> Prototyping -> NavyGrid. To assign it to our plane, all you need to do is drag it from the Project window onto the Plane in the Hierarchy. Your plane should instantly update to look like this:

Feel free to manipulate the options of the Material in the Inspector, either by selecting the Material itself, or selecting the plane. For example, I made my plane a little darker by picking a darker color in Albedo (click the colored square by the little eyedropper symbol).
To change the sky color is more counterintuitive. It’s actually a property of the camera. For us, that’s now in the FPSController GameObject, on the FirstPersonCharacter in the Hiearchy. If you select FirstPersonCharacter, you can see the Camera in the Inspector.
First, you need to change the Clear Flags option to “Solid Color” from “Skybox,” and then set the Background by clicking on the colored bar.(I prefer solid black for contrast, but you can pick whatever you want). Once set, it should look like this:

Now when you run your script, you are given a more modern scene, ripe for screenshots, or amazing your friends.

Extensions
You may have noticed we are still missing some important components of a real plot, such as labels and axes for reference. These are not difficult to make, but are time consuming, and I won’t be covering them here. If you wish to make your own labels, we already have much of the information coded in our script. To create labels, you will need to add 3D Text (Game Object -> 3D Object -> 3D Text), give that object a specific name, such as X_Title, and add code in your script to find that object by name and change the text (via TextMesh), which looks like the following:
GameObject.Find("X_Title").GetComponent<TextMesh>().text = xName;
Similarly, we have mins and maxes already stored, so it is largely a matter of placing 3D Text GameObjects at the extent of our graph area, which is defined by plotScale.
At the beginning, I mentioned deployment to different platforms. This involved “Building” your project, and how you build your project depends on your target platform, something that is out of scope for this guide, but not too difficult to find documentation on.
Conclusion
This guide is meant to give a taste of Unity for data visualization, and illustrate many of the idiosyncrasies that need to be dealt with in order to use Unity for displaying data. While at present, few tools exist to quickly and easily create data graphics in the variety of VR technology we have today. But, hopefully it won’t be long until this post is a quaint reminder of how things used to be.
Update March 2, 2018:
I have uploaded a more complete scatterplot with the labels included, along with some other minor improvements here: https://github.com/PrinzEugn/Scatterplot_Standalone
Excellent tutorial. Thank you for your work.
You’re welcome! I’m glad you found it useful.
Thank you so much for this tutorial ! It helps me a lot 🙂
Thanks this awesome! I’ll use with VR
hey , which XR device you used?
Thank you for the amazing tutorial!
I am having an issue with assigning the DataBall to the Prefab. Any idea on how to fix it?
I use this for color:
https://github.com/rstecca/ColorBands
Uses curves to make gradients then you call evaluate with a value. Gives you a color. Great tool for data viz.
Neat, cool tool, I’ll have to give it a try. Thanks for the tip!
Was actually looking for something like this. Thanks!
How can we add labels to the data points? Can you make a tutorial on that?
Hi timmsg, sorry for the late response, I think some notification go into my spam folder! Unfortunately I don’t have the time to make a new tutorial (I’m a PhD student, and all my time goes into that).
However, I think you could probably rig something up with 3D text as part of the databall prefab, and populate it with appropriate values when you instantiate the prefab point as part of a graph. You can then turn the 3D text turn on and off through some other mechanism, like a tooltip.
Great work ! Thanks a lot. It helps me building my first Hololens app.
Fantastic tutorial that will help with AR/VR dev! 🙂
Great tutorial! The code snippet right after: ‘Now that we have this object ready to go, we need to make space for it in our script.’ seems to be incorrect (in the ‘Cleanup: Instantiating Clones as Children’ section).
Hi Erik, thanks for checking it out! It’s been a while since I wrote this so I don’t remember the exact steps, but did you continue with the tutorial and make sure you had an object referenced (dragged PointHolder into the new slot in the inspector)? Also, I’m not sure it’s that clear, but you need to put that line right below where you declare other variables in the script (make sure it’s not inside Start() ). You can also check out the completed project on Github (as well as the version with axis labels referenced at the end of the tutorial). If you’re still having trouble, let me know it might be an issue with a new version of Unity breaking something.
Hey, this tutorial was very useful and easy to understand for beginners as well. Thanks a lot! Are there any other work which would describe about highlighting a particular part of the data using raycast and visualize the data for VR applications? It would be great if you share them to a novice like me!
Thanks a lot for this wonderful work
Kindly whenever you have time add some blog related to the implementation of gaze and audio interactions with HMD in unity3D
Thank you so much for your work!
I’m having trouble when I attach the script to the empty object that I created. The Inputfile option doesn’t show up in the inspector after I attach the script, so I can’t input csv file to the object. Any thoughts?
Thanks so much for that well-explained tutorial 🙂
though, i think in line 67 of your final code “i < pointList.Count;" need to be set to "i <= pointList.Count;" to also include the last row of each column
Ah, no sorry! It’s right as it is..
Thank you !
I’m glad it still works! One easy way to verify your data is change the point name to the index value, so :
dataPoint.transform.name = i.ToString();
instead of:
dataPoint.transform.name = dataPointName;
This lets you more easily keep track of which row in the CSV corresponds to which point, and then the maximum number of points since the highest value name should correspond to the length of the list (number of rows). You just have to keep in mind the start of the index might differ (starting at 0 or 1). (i +1).ToString(); might even be more convenient if you’re working with R, where indexing starts at 1.
Great, thanks!
Hi, thanks for the tutorial, it was very helpful for a beginner like me.
Please, how can I create a streamline from the data set?
I need this to visualize my simulation result (generated with ANSYS Fluent) in Virtual Reality using Unity. I will be very grateful if you could point me to any tutorial or resource that will guide me.
Thanks for your help.
Thank you! This is a great tutorial. How would one go about making line render connections between the nodes to make a knowledge graph?
Thank you for this tutorial!