Welcome to part 3 of this blog series. In this post, I’ll be discussing starting seeds.
Transplanting vs Direct Sowing:
When it comes to planting seeds, there are two main ways of doing so. Each with its own advantages
Direct Sowing involves planting the seeds directly in the soil in the location in which the plants will be grown. This method is efficient because it reduces the number of times each plant is handled. However, in areas with short growing seasons, seeds sown directly may not have time to mature before the seasons change.
Indoor sowing/transplanting involves first planting seeds in some sort of flat/container either indoors or in a greenhouse, growing those seeds into small seedlings, and then transplanting those seedlings out into the ground. While this method is certainly more resource and effort intensive, it allows the grower to get a head start on growing certain plants indoors while they wait for the weather to warm up in spring or cool down in fall. Transplanting can also be beneficial if one finds that their direct sown seeds are being eaten by birds or rodents in the garden.
Direct Sowing
Plants that should be sown directly include:
- Root Crops (carrots, turnips, radishes, beets, etc.)
-
- These must be directly sown because transplanting will damage the taproot that will eventually be harvested; resulting in a crop that looks like this:
-

- Non-root crops that have taproots (cilantro, dill, swiss chard) or roots easily damaged by transplanting (corn, beans, peas)
- Crops that mature quickly enough that transplanting is unnecessary (lettuce, microgreens, salad mixes)
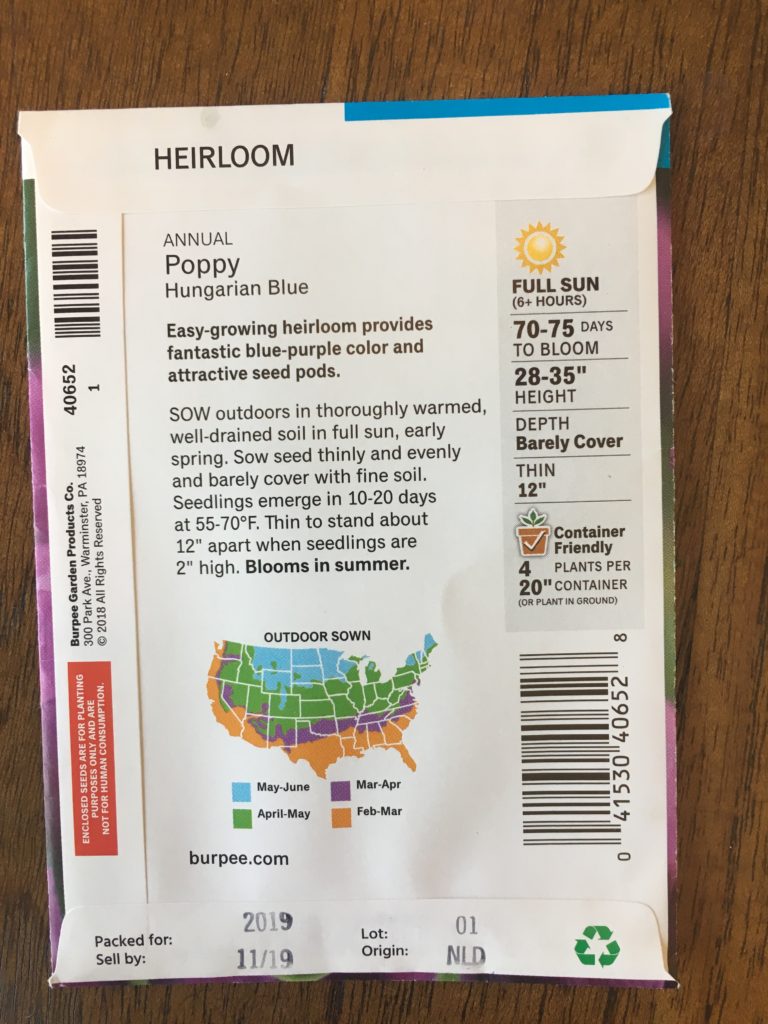
When in doubt, reading the back of the seed packet will provide you with the recommended planting method for that particular variety:

Note the direction to “sow outdoors”. Picture 2
In addition to the recommended planting method, the seed packet will also address the recommended planting time (usually in relation to frost dates). Many packets will list the depth to which seeds should be sown, but as a general rule, seeds should be planted about 1-2x as deep as the seed is wide.
-
-
-
- Following this guide, tiny seeds such as those for lettuce or carrots should be sown shallowly and covered with only a fine (0.125 inch or less) layer of soil; the larger seeds of beans and corn can be sown up to 1-2″ deep.
- Assuming the seeds were planted at the time of year directed by the packet, simply keeping the soil moist but not waterlogged (too wet will cause the seeds to rot) should allow for successful germination
-
-
Indoor sowing/Transplanting
Planting indoors and then transplanting out is best used for long maturing varieties which benefit from a head start indoors before the outdoor conditions are suitable. These are typically warm weather crops such as tomatoes and peppers, but sometimes even cool season crops can benefit from a head start, especially in the short cold days of early spring.
Starting indoors requires a little more preparation than direct sowing, because it requires attention to the following: Container, lighting, temperature and growing media.
- Containers
-
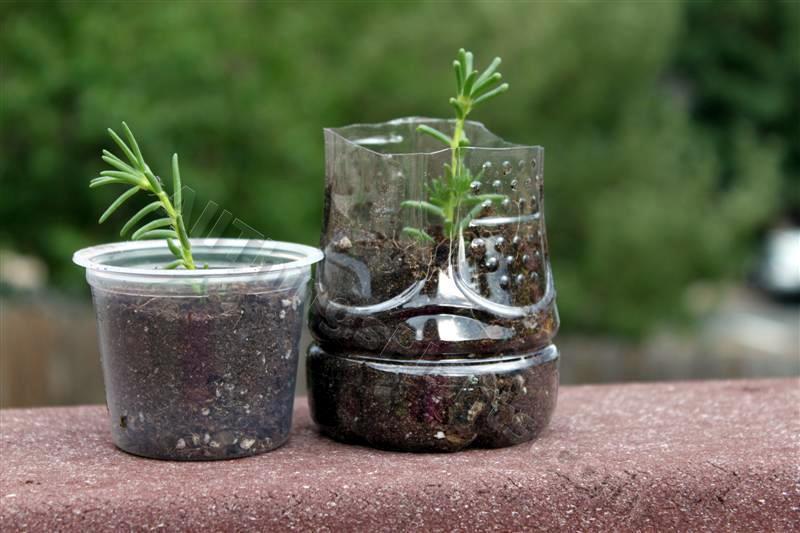
- Many different containers can be used, anything from old water bottles to yogurt containers to specially designed greenhouse trays will work. What is most important is that the container has a drainage hole for water. Without this, the standing water can rot seeds and kill seedlings.
-
 Homemade seed starting pots-Picture 3
- Lighting
-
- The most important consideration when starting seeds indoors is having adequate lighting. A sunny windowsill can work, but the window needs to have direct light for at least 6-8 hours to achieve strong seedlings. Seedlings lacking light will become “leggy” (tall, weak and stretched out) and will not grow well

-
Leggy seedlings from lack of light-Picture 4
-
-
- If your window does not receive enough light or you simply want the best results, investing in an LED or florescent grow light is a good idea. Grow lights could have their whole own blog post, so if you want to learn more about them, this publication from The University of Vermont is a good resource.
-
- Temperature
-
- Most seeds can germinate at normal room temperature, but when indoors you have the ability to optimize germination rates and speeds by using a heating pad to increase soil temperatures to optimal ranges.
- This is not usually necessary-unless you’re starting in a cold garage or sunroom-but it does improve results.
-
- Media
-
- There are several options of what you can use to start seeds in. Potting soil is cheap and available, and special seed starting mixes are also sold in stores. However, it is important to note that trying to use normal garden soil to start seeds is a recipe for failure due to its poor drainage and tendency to become compacted, as well as the risk of bringing in pests and disease.
-
Much like starting outdoors, planting the seed at the recommended depth (or 1-2x its width if no recommendation) and then keeping the soil moist but not waterlogged is an effective way to
Once these indoor seedlings have grown to their desired size and the outdoor weather conditions are appropriate, the plants are ready to be transplanted from their initial containers into the ground.
That’s it for this week’s post. Next time we’ll be talking about caring for those plants in the garden, specifically watering and irrigation methods.

You seem to know a lot about gardening which is really impressive! I love the amount of detail you give. It makes me think I could grow my own plants even though every plant I’ve cared for has not done so well.
I really like the way this blog is formatted so far, it gives very easy-to-follow directions and lots of information in each post! I also like how you added your own voice into the posts as well so it doesn’t just sound like a step-by-step instruction. I can tell you have a lot of expertise in gardening, so this is really interesting to read!
I really enjoyed reading your blog! It is very well organized and the information is summarized yet complete. I learned a lot about gardening and how to ensure the best growth for your plants through your posts, the images were also very helpful.