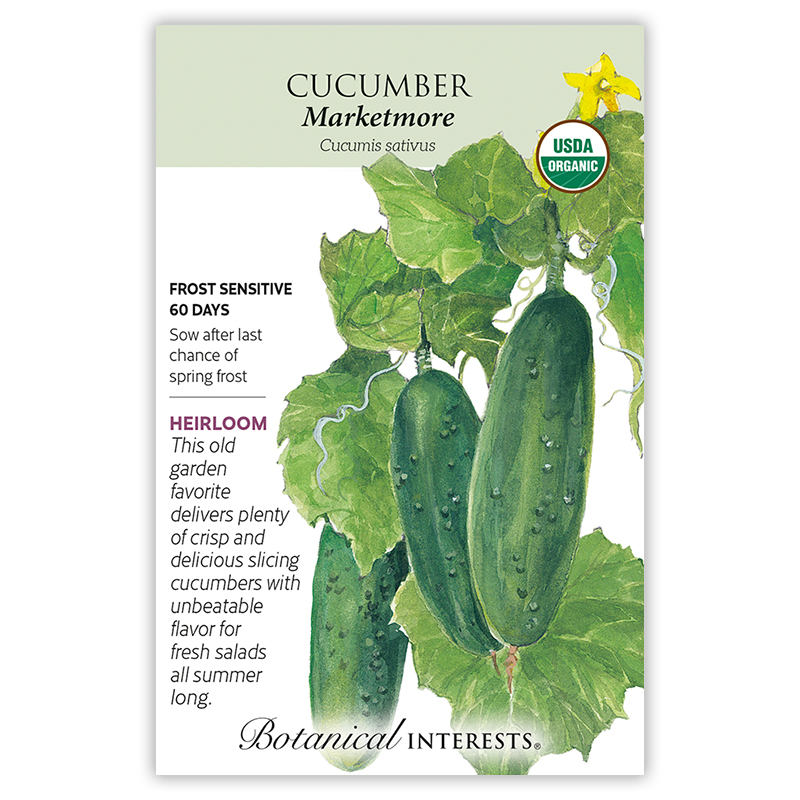
Even if you do everything right, buy the right seeds, plant them correctly at the right time in the right place and care for them properly, it is still very possible that one day you will go out to find that your precious planting has been ravaged by some mysterious force. In this post, we’ll talk about some of those “mysterious forces” (bugs), how you can avoid them, and what to do when they inevitably show up anyway.
Bugs
So many different insects (and non insects like slugs and mites) can cause problems in a garden. Luckily, if you can figure out which one is the issue in your garden, they’re usually not too hard to deal with.
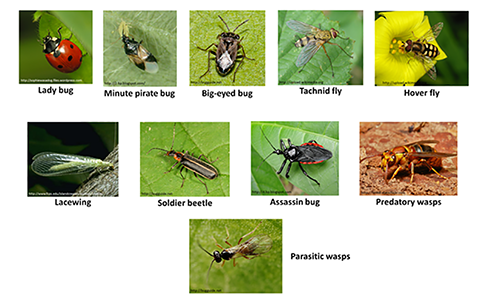
Now, you might not be a fan of any bugs at all, and you’re probably wondering why you should bother identifying your pests in the first place? Why not just go nuclear with the strongest pesticide you can find? The reason for this is that some bugs are actually beneficial to your garden and the environment. Bees, wasps, butterflies and moths are all excellent and very environmentally important pollinator species, while other wasps, flies, mantises, beetles and spiders are all predators of the species which plague your crops. Unintentionally killing these species off with general insecticides could pose more problems to your garden and local environment than doing nothing at all.
In some cases, these bugs are so desirable that you can even buy them in large quantities online and introduce them into your garden. Unfortunately, not every bug in the garden is going to work with you as well as these guys, and if you want to get the harvest you’ve been working for, you may have to take things into your own hands. Here are some of the common pests you’ll encounter and how to handle them:
* Note that my recommendations for how to handle the pests will usually be based on organic methods, since I worked on an organic farm and follow these methods in my own garden, meaning I have more experience with these vs conventional methods.
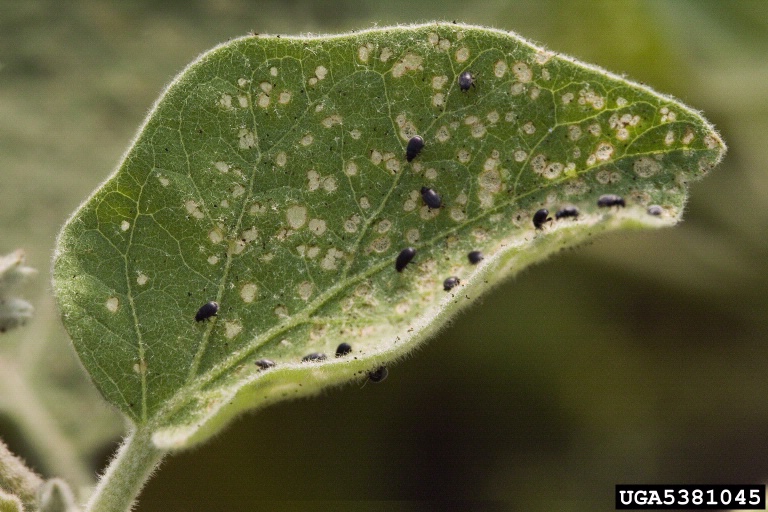
- Aphids

- Image 2
- Tiny soft bodied insects that feed on sap of the plant. Usually red, green, pink, black or brown but come in many colors. One of the most common garden pests, attacking nearly any plant species.
- Infestations will show distorted growth on the new shoots of plants, leaves may curl and plants appear stunted. Colonies can be seen on the underside of leaves
- Easily treatable by crushing the aphids with fingers, knocking off the plants with a spray from a hose, introduction of ladybugs (the larvae eat many aphids every day) or by spraying with neem oil or spinosad (Organic pesticides)
- Infestations will show distorted growth on the new shoots of plants, leaves may curl and plants appear stunted. Colonies can be seen on the underside of leaves
- Flea Beetles
-
- Image 3
- Tiny black hard bodied beetles which jump away (like fleas) when you get close. Affects most plant species, but are of particular concern for seedlings and eggplant
- Leave tiny holes in the leaves which make it appear as if the plant was shot with super tiny birdshot
- Can be controlled with diatomaceous earth (DE) or through fine mesh insect netting
-
- Cabbage worms/Cabbage Loopers/Cabbage moth

- Image 4
- Small green or green and black caterpillars which eat the leaves of brassica (cabbage family) crops. The larvae form of the cabbage white butterfly (the little white moth things that fly around all summer)
- Easily controlled through manual removal or use of bt (organic bacterial-based pesticide)
- Slugs/snails

- Image 5
- Long slender and slimy creatures which sometimes have shells (snails) that come in a variety of shapes and sizes. Usually more of an issue with seedlings and plants in very cool and wet conditions. These pests will take bites from leaves and fruit and in large quantities can decimate a garden overnight.
- Can be hand picked (best done at night), deterred with DE, or captured in “beer traps”
- Japanese beetles

- Image 6
- These invasive beetles will feed on most crops but are of particular concern to flowers, fruit trees and beans.
- Hand picking, DE, and pheromone traps are effective methods of control
- Allium Leaf Miner

- Image 7
- A very new pest to PA, this small fly came over from turkey just a couple years ago. The fly lays eggs on plants in the onion family (leeks and garlic included) which then hatch into small maggot like worms that burrow into the stem and cause it to rot. Because the flies are tiny and the maggots live inside the plant, the easiest way to detect this pest is through inspection of the leaf tips for the small white circles that come as a result of the adults feeding.
- Very fine mesh insect netting over the plants during the flies breeding season (usually March-June and late August-October) is the best control method
- Tomato Hornworm
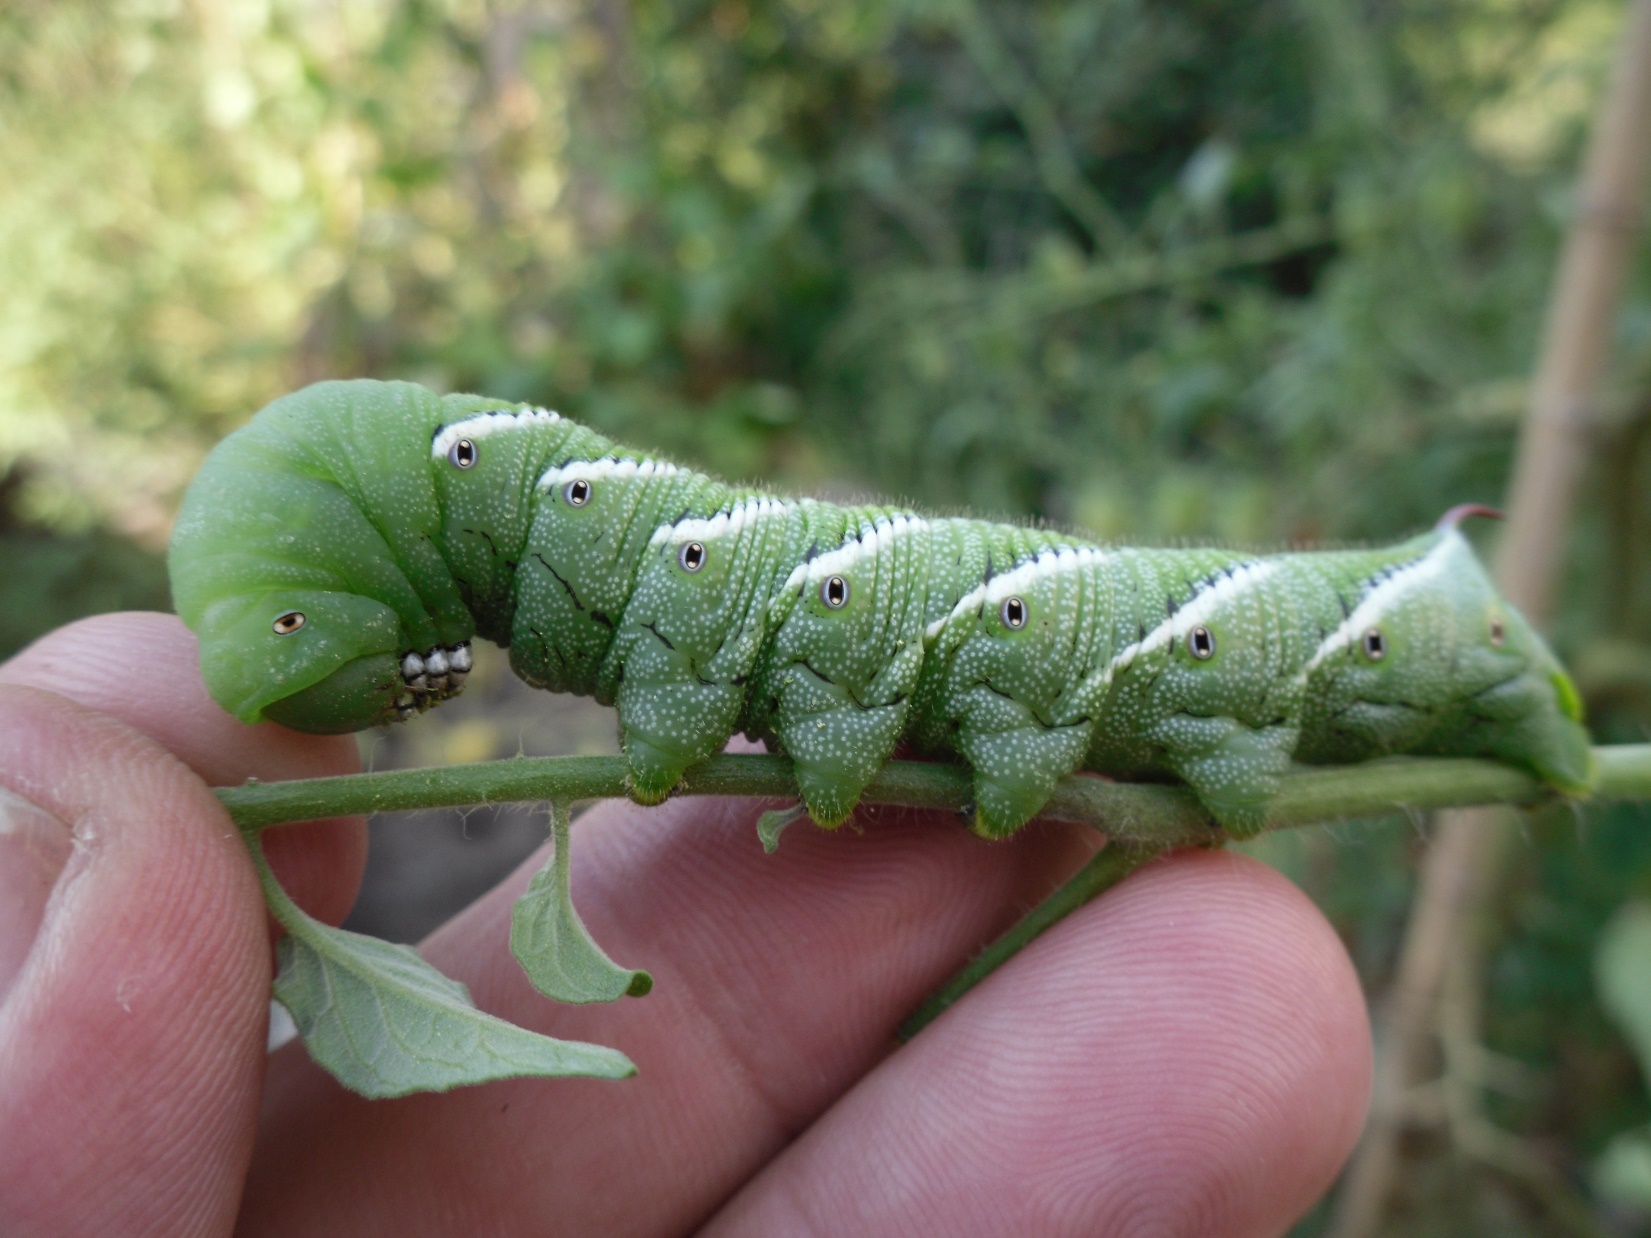
- Image 8
- Large green and white caterpillar with pronounced spike on rear. Larval stage of hawkmoth. Eats the leaves of mainly tomatoes but sometimes also related plants such as peppers and tomatillos.
- Best controlled through hand removal (they glow under black light so they’re easy to find at night using one) or through applications of Bt
- Untreated infestations will quickly result in near total defoliation of the plants
- Large green and white caterpillar with pronounced spike on rear. Larval stage of hawkmoth. Eats the leaves of mainly tomatoes but sometimes also related plants such as peppers and tomatillos.
- Whiteflies

- Image 9
- Much like aphids but having small white wings, the aptly named whitefly feeds on the sap of of plants, usually from the underside of leaves.
- Left unattended, the population will quickly get out of control and the small pests will stunt plant growth as well as coating the leaves with their sticky excrements, making them nearly unusable
- Treatments include neem oil and spinosad
Obviously this is not a fully comprehensive guide of the foes you may encounter, just a brief overview of some of the more common ones that can affect a wide range of crops. For any other unidentified pest issues, consulting your local county extensions website is always a good place to start. The next post in this series will be similar to this one, but focusing on some common plant disease issues instead.

 Homemade seed starting pots-