The Garden Guide: Part 4- What’s Buggin’ You?

Even if you do everything right, buy the right seeds, plant them correctly at the right time in the right place and care for them properly, it is still very possible that one day you will go out to find that your precious planting has been ravaged by some mysterious force. In this post, we’ll talk about some of those “mysterious forces” (bugs), how you can avoid them, and what to do when they inevitably show up anyway.

Bugs

So many different insects (and non insects like slugs and mites) can cause problems in a garden. Luckily, if you can figure out which one is the issue in your garden, they’re usually not too hard to deal with.

Now, you might not be a fan of any bugs at all, and you’re probably wondering why you should bother identifying your pests in the first place? Why not just go nuclear with the strongest pesticide you can find? The reason for this is that some bugs are actually beneficial to your garden and the environment. Bees, wasps, butterflies and moths are all excellent and very environmentally important pollinator species, while other wasps, flies, mantises, beetles and spiders are all predators of the species which plague your crops. Unintentionally killing these species off with general insecticides could pose more problems to your garden and local environment than doing nothing at all.
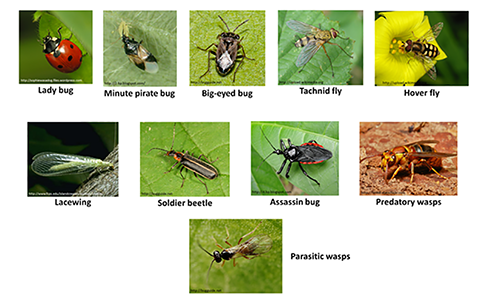
Increasing beneficial insects for enhanced pollination and biological control using insectary plants // Missouri Produce Growers Bulletin // Integrated Pest Management, University of Missouri

Beneficial Insects: Image 1

In some cases, these bugs are so desirable that you can even buy them in large quantities online and introduce them into your garden. Unfortunately, not every bug in the garden is going to work with you as well as these guys, and if you want to get the harvest you’ve been working for, you may have to take things into your own hands. Here are some of the common pests you’ll encounter and how to handle them:

* Note that my recommendations for how to handle the pests will usually be based on organic methods, since I worked on an organic farm and follow these methods in my own garden, meaning I have more experience with these vs conventional methods.
  • Aphids
    • Some Aphid Babies Are Born Already Pregnant | HowStuffWorks
    • Image 2
    • Tiny soft bodied insects that feed on sap of the plant. Usually red, green, pink, black or brown but come in many colors. One of the most common garden pests, attacking nearly any plant species.
      • Infestations will show distorted growth on the new shoots of plants, leaves may curl and plants appear stunted. Colonies can be seen on the underside of leaves
        • Easily treatable by crushing the aphids with fingers, knocking off the plants with a spray from a hose, introduction of ladybugs (the larvae eat many aphids every day) or by spraying with neem oil or spinosad (Organic pesticides)
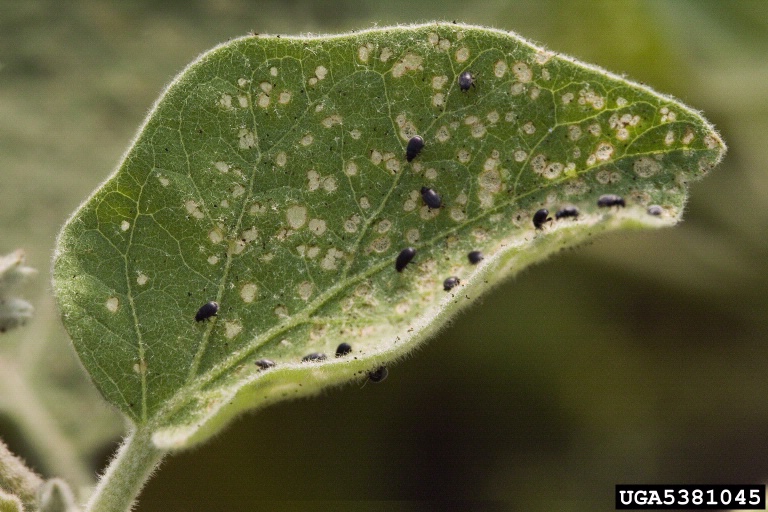
  • Flea Beetles
      • Backyard Gardener - Flea Beetles in the Garden - June 7, 2017
      • Image 3
      • Tiny black hard bodied beetles which jump away (like fleas) when you get close. Affects most plant species, but are of particular concern for seedlings and eggplant
        • Leave tiny holes in the leaves which make it appear as if the plant was shot with super tiny birdshot
        • Can be controlled with diatomaceous earth (DE) or through fine mesh insect netting
  • Cabbage worms/Cabbage Loopers/Cabbage moth
    • Cabbage, Broccoli & Other Cole Crop Insect Pests | Home & Garden Information Center
    • Image 4
    • Small green or green and black caterpillars which eat the leaves of brassica (cabbage family) crops. The larvae form of the cabbage white butterfly (the little white moth things that fly around all summer)
      • Easily controlled through manual removal or use of bt (organic bacterial-based pesticide)
  • Slugs/snails
    • 9 Natural Ways To Deter Slugs
    • Image 5
    • Long slender and slimy creatures which sometimes have shells (snails) that come in a variety of shapes and sizes. Usually more of an issue with seedlings and plants in very cool and wet conditions. These pests will take bites from leaves and fruit and in large quantities can decimate a garden overnight.
      • Can be hand picked (best done at night), deterred with DE, or captured in “beer traps”
  • Japanese beetles
    • Japanese beetles emerging as next insect nuisance for eastern U.S.
    • Image 6
    • These invasive beetles will feed on most crops but are of particular concern to flowers, fruit trees and beans.
      • Hand picking, DE, and pheromone traps are effective methods of control
  • Allium Leaf Miner
    • Field Scouting Guide: Allium Leafminer - Growing Produce
    • Image 7
    • A very new pest to PA, this small fly came over from turkey just a couple years ago. The fly lays eggs on plants in the onion family (leeks and garlic included) which then hatch into small maggot like worms that burrow into the stem and cause it to rot. Because the flies are tiny and the maggots live inside the plant, the easiest way to detect this pest is through inspection of the leaf tips for the small white circles that come as a result of the adults feeding.
      • Very fine mesh insect netting over the plants during the flies breeding season (usually March-June and late August-October) is the best control method
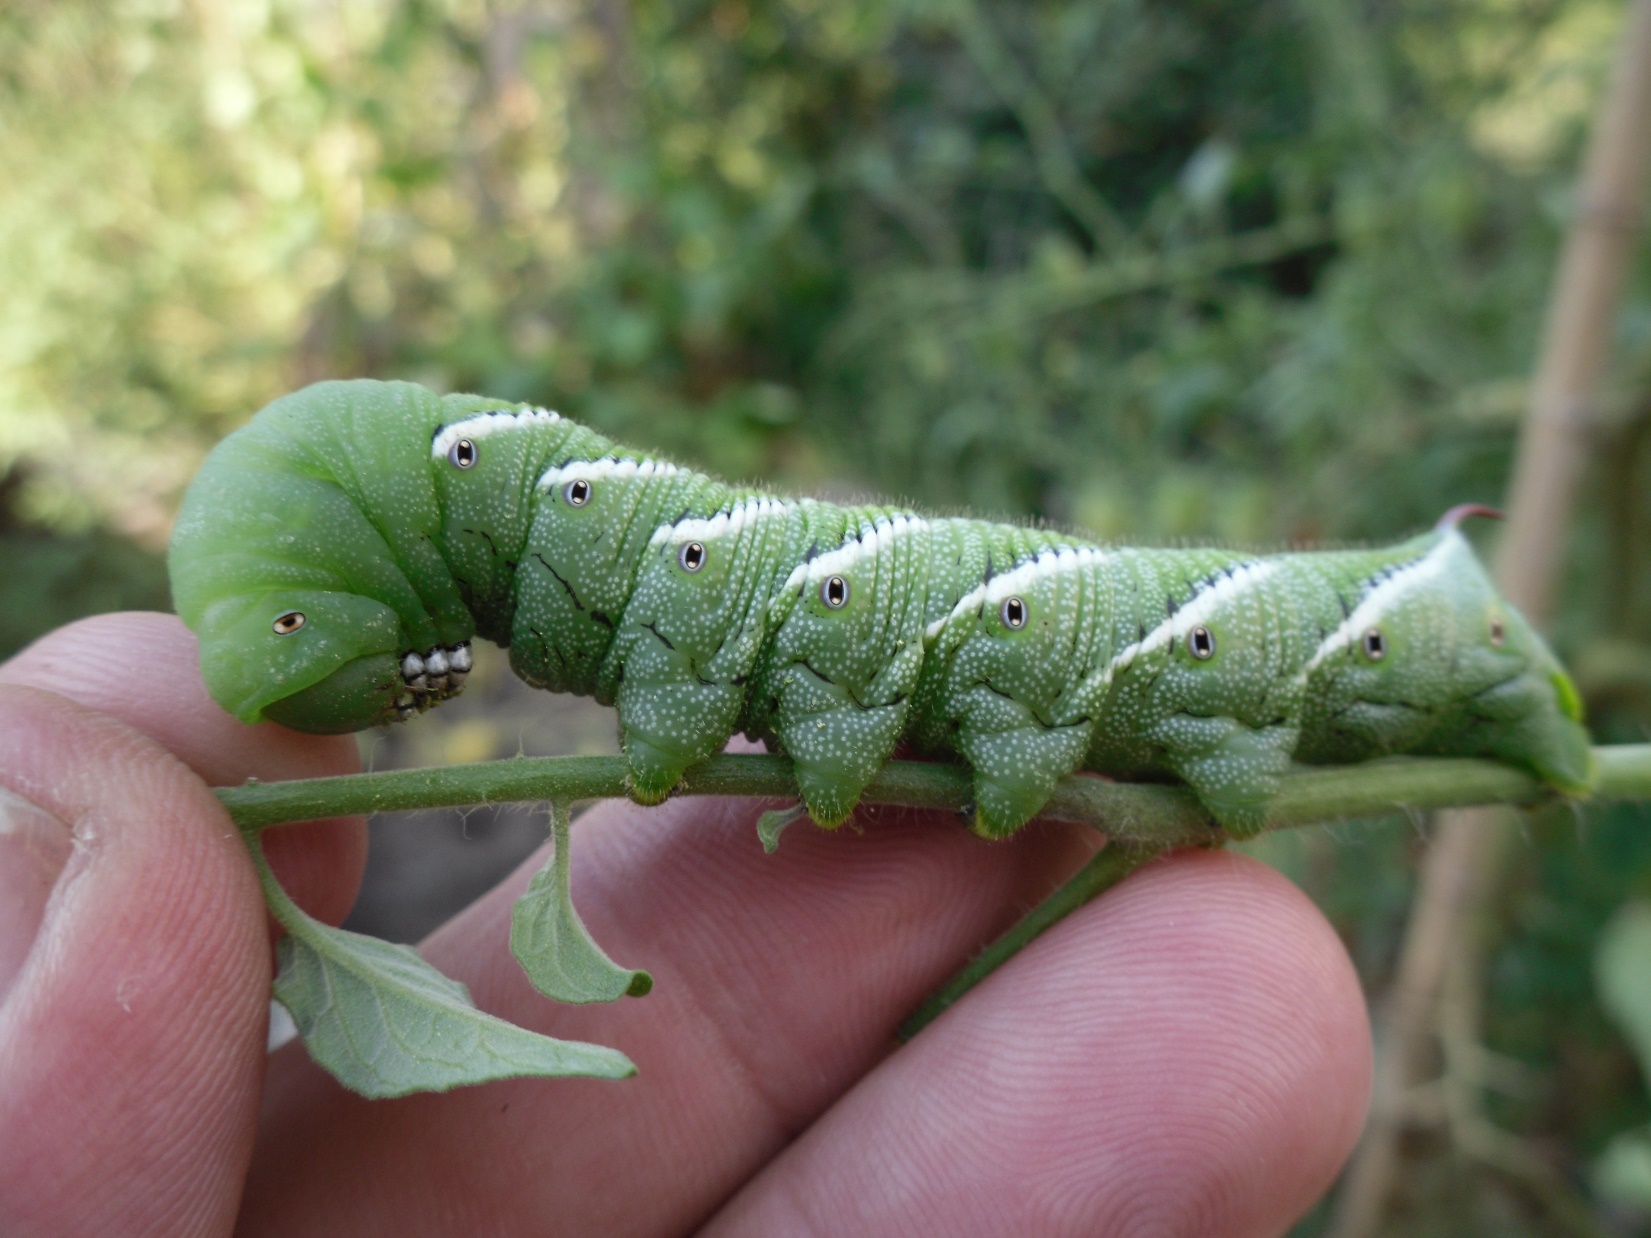
  • Tomato Hornworm
  • Hornworms on the Tomatoes | Home & Garden Information Center
  • Image 8
    • Large green and white caterpillar with pronounced spike on rear. Larval stage of hawkmoth. Eats the leaves of mainly tomatoes but sometimes also related plants such as peppers and tomatillos.
      • Best controlled through hand removal (they glow under black light so they’re easy to find at night using one) or through applications of Bt
      • Untreated infestations will quickly result in near total defoliation of the plants
  • Whiteflies
    • How to Control Whiteflies | Planet Natural
    • Image 9
    • Much like aphids but having small white wings, the aptly named whitefly feeds on the sap of of plants, usually from the underside of leaves.
      • Left unattended, the population will quickly get out of control and the small pests will stunt plant growth as well as coating the leaves with their sticky excrements, making them nearly unusable
      • Treatments include neem oil and spinosad

Obviously this is not a fully comprehensive guide of the foes you may encounter, just a brief overview of some of the more common ones that can affect a wide range of crops. For any other unidentified pest issues, consulting your local county extensions website is always a good place to start.  The next post in this series will be similar to this one, but focusing on some common plant disease issues instead.

The Garden Guide: Pt. 3-Time to Grow

Welcome to part 3 of this blog series. In this post, I’ll be discussing starting seeds.

Transplanting vs Direct Sowing:

When it comes to planting seeds, there are two main ways of doing so. Each with its own advantages

Direct Sowing involves planting the seeds directly in the soil in the location in which the plants will be grown. This method is efficient because it reduces the number of times each plant is handled. However, in areas with short growing seasons, seeds sown directly may not have time to mature before the seasons change.

Indoor sowing/transplanting involves first planting seeds in some sort of flat/container either indoors or in a greenhouse, growing those seeds into small seedlings, and then transplanting those seedlings out into the ground. While this method is certainly more resource and effort intensive, it allows the grower to get a head start on growing certain plants indoors while they wait for the weather to warm up in spring or cool down in fall. Transplanting can also be beneficial if one finds that their direct sown seeds are being eaten by birds or rodents in the garden.

Direct Sowing

Plants that should be sown directly include:

  • Root Crops (carrots, turnips, radishes, beets, etc.)
      • These must be directly sown because transplanting will damage the taproot that will eventually be harvested; resulting in a crop that looks like this:

Garden Diary: Curly Carrots, Alien Courgettes and Assorted Veg – May 1st – Piglet in Portugal

Picture 1

  • Non-root crops that have taproots (cilantro, dill, swiss chard) or roots easily damaged by transplanting (corn, beans, peas)
  • Crops that mature quickly enough that transplanting is unnecessary (lettuce, microgreens, salad mixes)

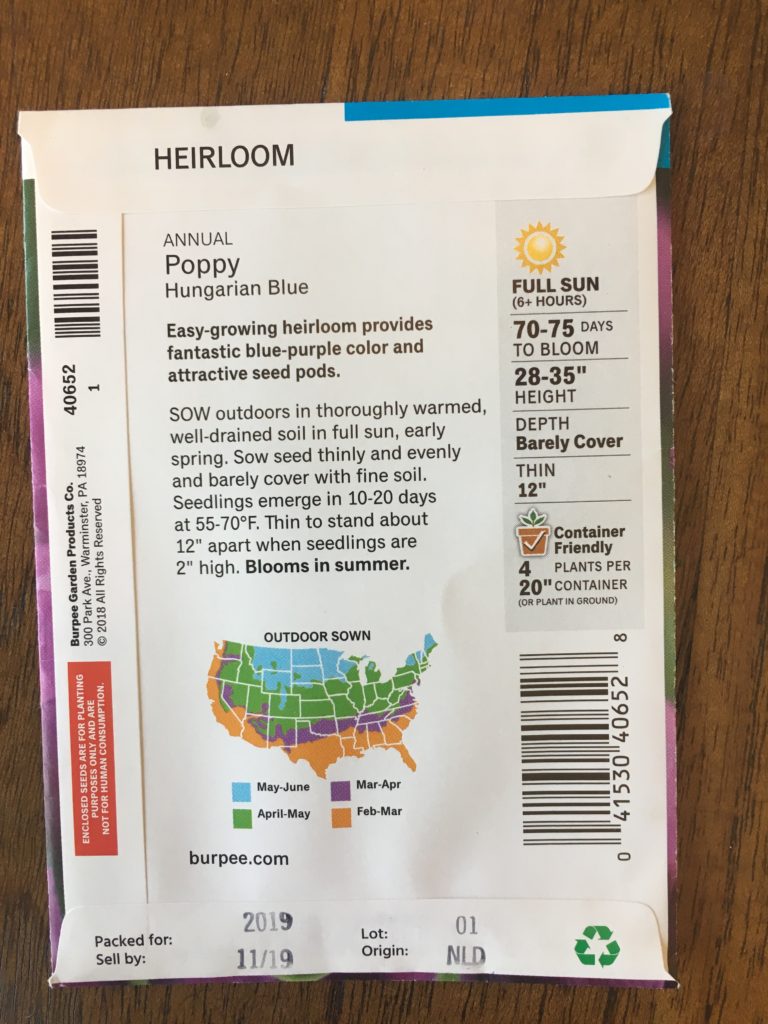
When in doubt, reading the back of the seed packet will provide you with the recommended planting method for that particular variety:

Note the direction to “sow outdoors”. Picture 2

In addition to the recommended planting method, the seed packet will also address the recommended planting time (usually in relation to frost dates). Many packets will list the depth to which seeds should be sown, but as a general rule, seeds should be planted about 1-2x as deep as the seed is wide.

        • Following this guide, tiny seeds such as those for lettuce or carrots should be sown shallowly and covered with only a fine (0.125 inch or less) layer of soil; the larger seeds of beans and corn can be sown up to 1-2″ deep.
        • Assuming the seeds were planted at the time of year directed by the packet, simply keeping the soil moist but not waterlogged (too wet will cause the seeds to rot) should allow for successful germination
Indoor sowing/Transplanting

Planting indoors and then transplanting out is best used for long maturing varieties which benefit from a head start indoors before the outdoor conditions are suitable. These are typically warm weather crops such as tomatoes and peppers, but sometimes even cool season crops can benefit from a head start, especially in the short cold days of early spring.

Starting indoors requires a little more preparation than direct sowing, because it requires attention to the following: Container, lighting, temperature and growing media.

  • Containers
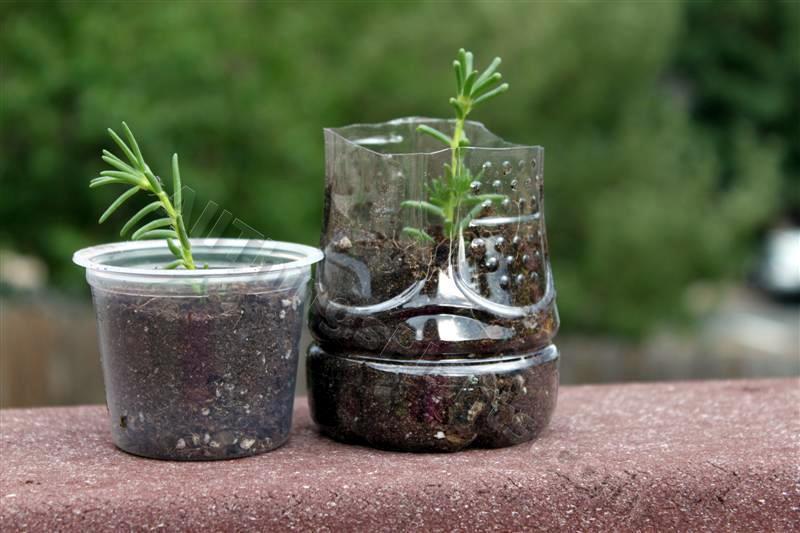
      • Many different containers can be used, anything from old water bottles to yogurt containers to specially designed greenhouse trays will work. What is most important is that the container has a drainage hole for water. Without this, the standing water can rot seeds and kill seedlings.

Recycle Containers for Seed Starting - Garden.orgHomemade seed starting pots-Picture 3

  • Lighting
      • The most important consideration when starting seeds indoors is having adequate lighting. A sunny windowsill can work, but the window needs to have direct light for at least 6-8 hours to achieve strong seedlings. Seedlings lacking light will become “leggy” (tall, weak and stretched out) and will not grow well
      • Leggy Seedlings: What Causes Them and How to Fix Them – Garden Betty

Leggy seedlings from lack of light-Picture 4

      • If your window does not receive enough light or you simply want the best results, investing in an LED or florescent grow light is a good idea. Grow lights could have their whole own blog post, so if you want to learn more about them, this publication from The University of Vermont is a good resource.
  • Temperature
      • Most seeds can germinate at normal room temperature, but when indoors you have the ability to optimize germination rates and speeds by using a heating pad to increase soil temperatures to optimal ranges. 
      • This is not usually necessary-unless you’re starting in a cold garage or sunroom-but it does improve results.
  • Media
      • There are several options of what you can use to start seeds in. Potting soil is cheap and available, and special seed starting mixes are also sold in stores. However, it is important to note that trying to use normal garden soil to start seeds is a recipe for failure due to its poor drainage and tendency to become compacted, as well as the risk of bringing in pests and disease.

Much like starting outdoors, planting the seed at the recommended depth (or 1-2x its width if no recommendation) and then keeping the soil moist but not waterlogged is an effective way to

Once these indoor seedlings have grown to their desired size and the outdoor weather conditions are appropriate, the plants are ready to be transplanted from their initial containers into the ground.

That’s it for this week’s post. Next time we’ll be talking about caring for those plants in the garden, specifically watering and irrigation methods.

The Garden Guide: Pt. 2-Seeds

Welcome to part 2 of this blog series. In this post, I’ll be discussing all things seed related: Seed types, definition, and selection.

Acquiring seeds:

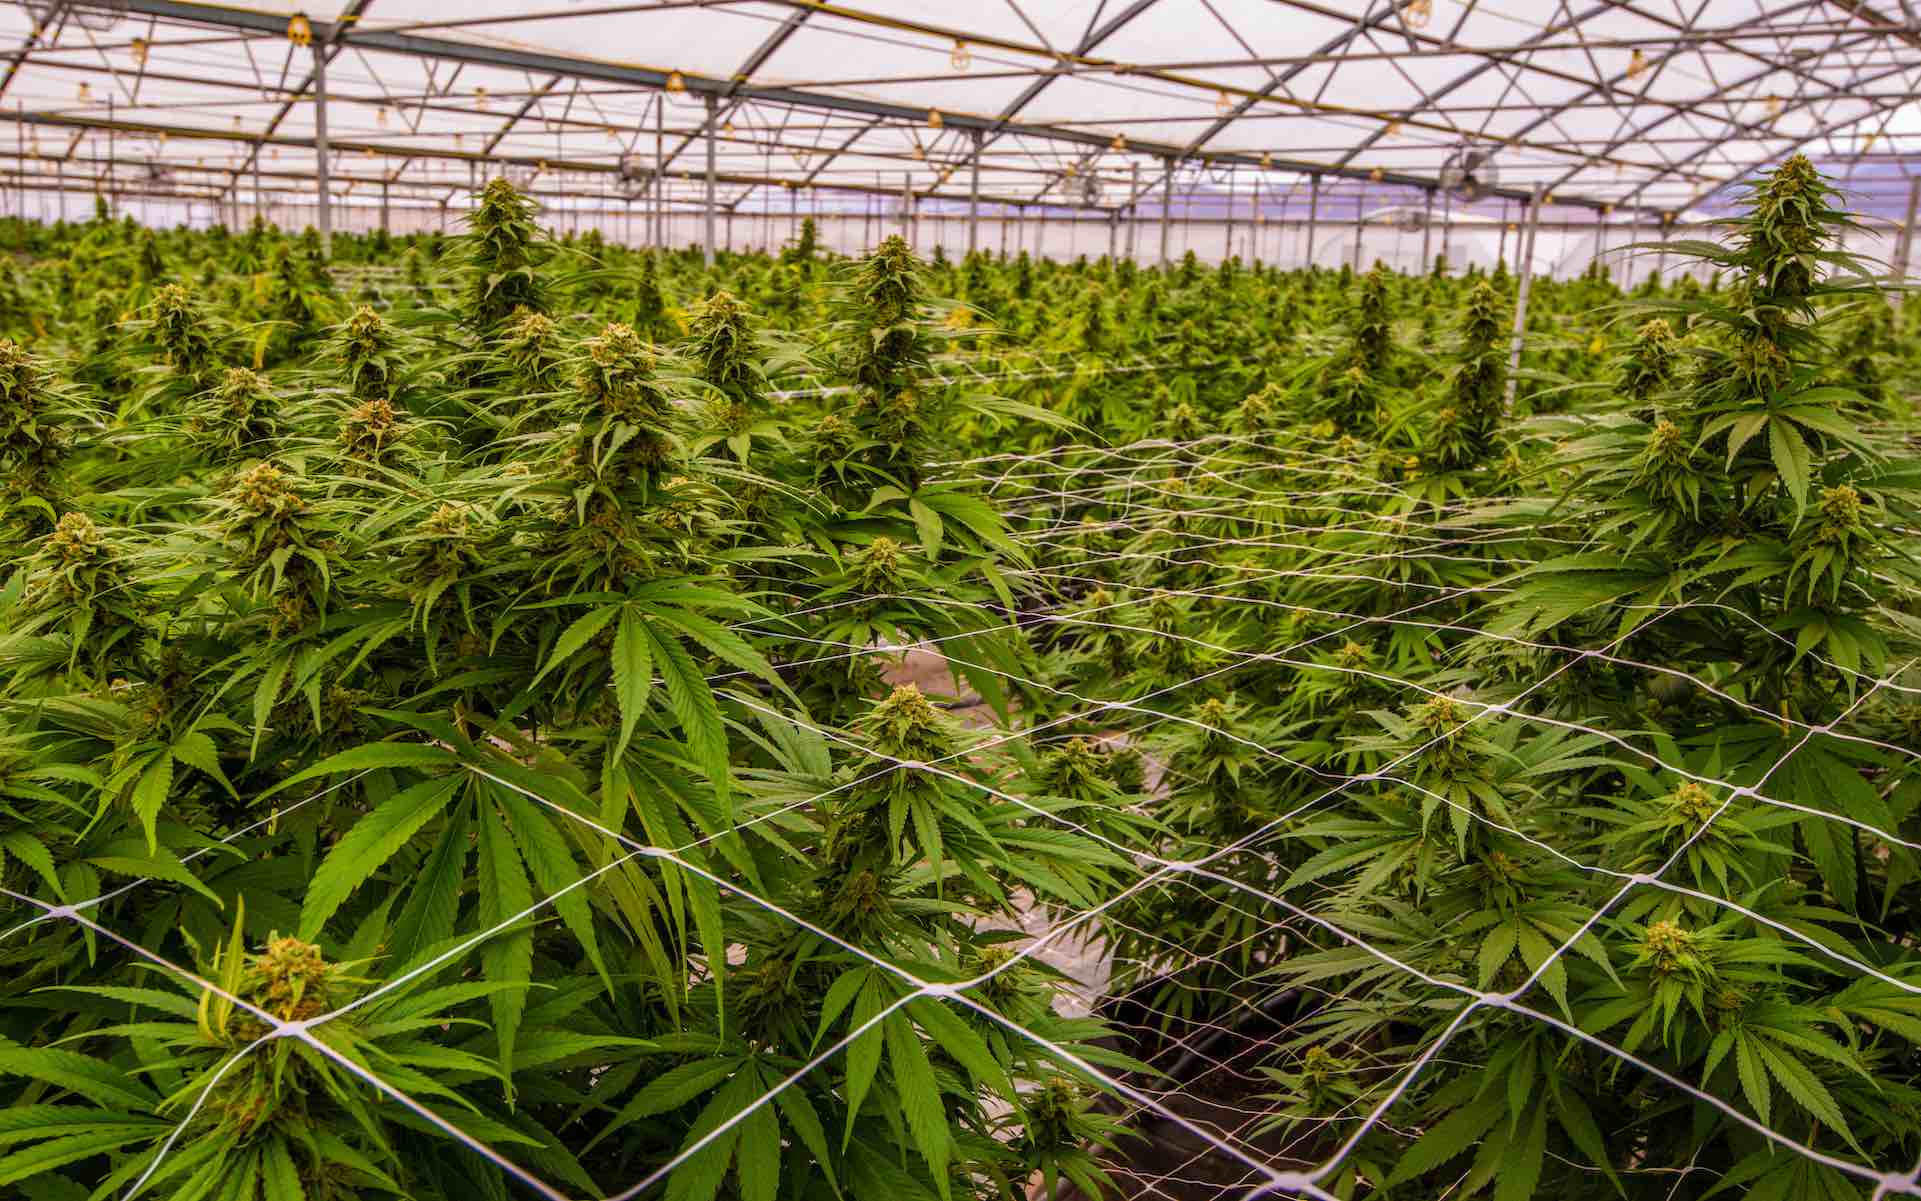
Step one of acquiring seeds begins with finding a place to buy them from. This can be done either in stores or online. My personal recommendation is to buy online, because there is usually a much wider selection to choose from, but big-box stores: Lowes, Home Depot, Tractor Supply, Walmart, etc., also commonly stock seeds. When buying online however, it is important to order from reputable brands and not just random accounts on Amazon, otherwise you may end up with “tomatoes” that look like this:

Where's a better environment to grow weed: indoors or outdoors? | Leafly

Picture 1

Some well known online seed retailers include:

You may also notice that despite what you see on TikTok, I don’t recommend planting seeds obtained from grocery store produce. While these seeds may grow, they usually don’t produce the quality of produce you’d expect. This is because almost all produce found in the store is grown from “hybrid seeds” (I’ll describe this further down, or you can read more about it here). Long story short, planting the seeds from the store is not a reliable option, and you’re better off spending the $1-4 for a pack from an actual seed company.

Terminology

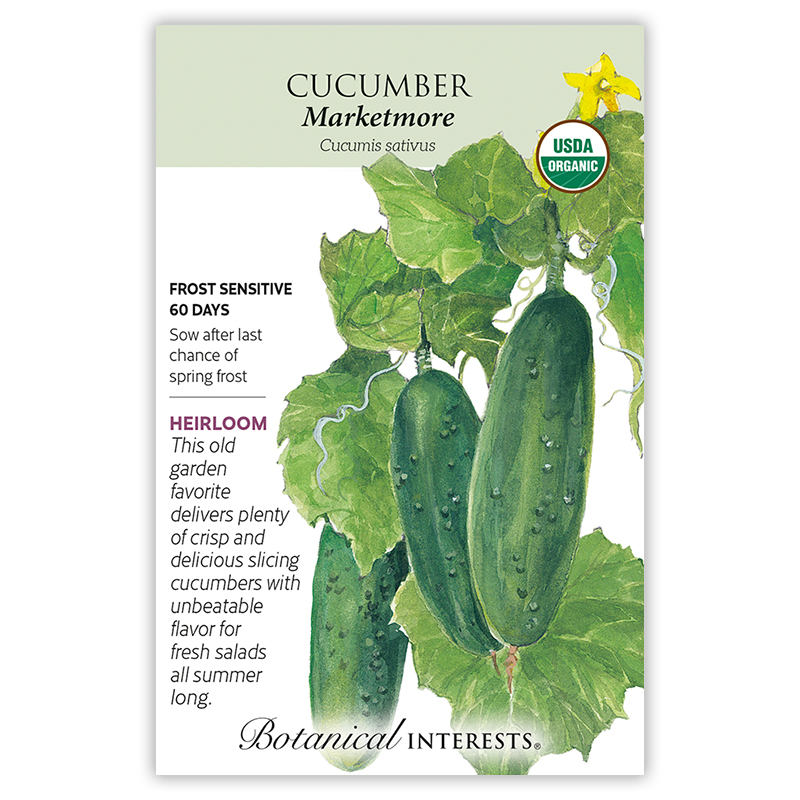
Heirloom Organic Seed Bank Collection, View All Vegetables: Botanical Interests

Picture 2

Clicking on one of the above links will bring you to a page full of pictures and descriptions of different varieties, all of which will contain various terms that may not be easy to understand. Here is a quick breakdown of some common seed terminology:

      • Open Pollinated (OP): These varieties of seeds are basically the plant equivalent to a purebred dog. They are genetically stable varieties, which means they will produce viable seeds that would grow a plant identical to the parent plant.
      • Heirloom: This is a subset of open pollinated seeds which have been cultivated for a long period of time (usually at least 50-100 years) and are considered “classics”.
      • Hybrid/ F1/ F1 Hybrid: These plants are the first generation offspring of a cross between two open pollinated varieties. They share genetics from both parent varieties, but if the seeds from these are saved and replanted, they will not produce identical plants because hybrids are not genetically stable -They ARE NOT what people commonly call “GMOs”*- A similar example that you may be more familiar with is how a golden retriever and a poodle can be bred to create a “Goldendoodle”. In this case, the resulting goldendoodle puppy is an F1 hybrid
      • DTM or DTH: This stands for days to maturity (or days to harvest) and reflects the number of days that pass under ideal conditions from when a seed is planted until when the crop can first be expected to be harvested.
      • Organic/USDA Organic: These seeds have been produced following a set of cultural practices established by the USDA concerning the use of specific chemicals. Unless you’re looking to sell “certified organic” produce, this designation will not mean much.


*Technically from a scientific standpoint all domesticated plant varieties are GMOs, but that is not the common usage in todays society which equates genetically modified organisms (GMOs) with genetically engineered organisms (GEOs). You can read more about the differences here.

Selecting Seeds:

Now that you understand what the websites are saying, the next logical question is: What should I buy? This ultimately will come down to personal preference, but a few general considerations are:

      • What do you want to eat? Those really spicy ghost peppers may look like fun, but if you’re not much of a hot food fan; they’re probably not a good idea. Looking for crops you’ll be able to enjoy eating is a good way to get an idea of where to start.
      • What do you have space for? Growing a pumpkin with 30′ vines out of a pot on your apartment balcony is a terrible idea; simply skimming the description of each plant will provide you with enough information to determine if you’ll have the space for that type of plant.

5 climbing plants for the balcony

Picture 3 (Someone didn’t consider their space…)

      • What grows in your area? If you live in Maine, its probably not in your best interest to grow peanuts, simply because the weather is too cold. Looking around at what people in your area are growing can be very informative as to what types of plants are feasible options for your location.
What about varieties? Hybrids vs Heirlooms?

Hybrid and Heirloom seeds - GreenMyLifePicture 4

Much like the selection of what to grow, the choice of variety is also mostly personal preference, and you’ll have to try each one for yourself if you want to really know the best ones.

However, a couple more considerations to keep in mind:

      • Hybrids tend to have better pest or disease resistance since they are often specifically bred to improve these traits
      • Hybrids may mature faster than open pollinated varieties
      • Some hybrids are said to taste worse their heirloom counterparts, the common example always being supermarket (hybrid) tomatoes vs one out of your grandmothers garden. However, some hybrids are explicitly bred for taste and in some cases may win blind taste tests over several heirloom varieties. In addition, the conditions in which each plant is grown can also have huge impacts on flavor and texture, sometimes more so than the variety itself.
      • If you intend to save seeds, open pollinated varieties (including heirlooms) will grow true to type (assuming there is no cross pollination), while hybrids will not. This does not mean hybrid seeds are sterile; it just means that they will produce offspring that don’t have the same traits as the parent plants, making them risky to save seeds from.

That’s it for this blog on selecting seeds. The next post in this series will focus on planting those seeds and starting the growing process…

Pre-Sprouting Seeds: 101 | Rimol Greenhouse Systems

Picture 5

The Garden Guide: Pt. 1-The Beginning

Dreaming of an early spring and gardening? – Westboro Beach Community Association

So, you want a garden? (Or maybe not and you just need to read this for an assignment, in which case I’m sorry). Regardless, you’re here now. In this 8 part series “The Garden Guide”, I, Charlie Colvin, a first year Plant Science major at PSU and lifelong gardener, will walk you through your first season in the garden. From selecting a location, to picking varieties, pest management, canning and more, this blog will teach you everything you’ll need to know to get your garden up and growing. In this post we’ll talk about the very first steps to starting your own garden.

Types of Gardens

Well before you start planting, you’ll need to establish what type of garden you’re aiming to have. This is usually determined by where you live and the type of spaces you have available. If you live in an apartment on the 15th floor, you’ll likely be limited to a couple containers on your balcony. Conversely, if you own a 10+ acres of land surrounding your home, you could easily fit a traditional in ground or raised bed garden. If the only space you have is on your kitchen countertop, you can still have a garden, you may just need to look into a small, self-contained  hydroponic unit such as an “AeroGarden” (I have no affiliation with this company). The majority of this blog will be focused on traditional outdoor gardens, but some information will apply to other types as well.

BEDS: The Advantages of Using Raised Beds in Your Urban Garden -AlboPepper.com

Picture Source

Location, Location, Location…

Much like real-estate, location is a huge factor when deciding where to put a garden. The ideal site is level, has well-draining yet fertile soil (we’ll get into this in a bit), direct sunlight, and is in a location that is convenient to access. If possible, locating the site out of any small dips/valleys can be beneficial to preventing frost damage. Depending on your situation, a fence to deter dogs, deer and other critters may also be desirable.

Soil

For in-ground gardens (and to some extent raised bed gardens as well), selecting a site with appropriate soil is critical. Proper soil will make the entire garden more successful and prevent many issues from occurring. Quality garden soil should be dark in color and should be soft enough to be easily dug with hand tools. Additionally, soil should have adequate drainage such that water does not pool on the surface, even following significant rainfall.  All of these things are able to be observed by simply going out and digging a shallow hole at prospective locations.

Soil Health - Stark Bro's

Picture Source

Good soil should also be within a “normal” pH range and have at least moderate levels of fertility. These characteristics must be determined through a soil test, commonly offered through extension programs of state universities, including Penn State.

Sunlight

Plants need sun to grow, and fruits/vegetables usually need a lot of it. Ideally, a garden site will receive a minimum of 6-8 hours of direct sunlight per day during the growing season. This online tool can help determine the path of the sun around your potential garden, and using it you can see if the sunlight might be blocked by any trees/buildings etc.

Vegetables, Herbs & Flowers That Grow in Shade: 5 Tips for Shade Gardening - Growing In The Garden

Picture Source

USDA Hardiness Zones

Although not able to be changed, it helps to note your USDA plant hardiness zone when you prepare to start your garden. The USDA zones are based off the average extreme low temperature (i.e. the absolute coldest temperature one would expect to see over the whole year in that area). Knowing your zone will help you better plan when to plant different crops in your garden, and in the case of perennial plants (those which survive over the winter and grow for multiple seasons) which ones are cold hardy enough to survive winters in your area. You can determine this by looking at the below map, or by visiting the USDA website and entering your zip code.

Understanding Hardiness Zones: How To Use Hardiness Zone ...

Picture Source

Getting Started

Once you have picked a location for your future garden, the area will need to be prepared before you can plant. One method of doing this is known as sheet mulching. For in ground gardens, this is best done by depositing a 2 inch deep layer of compost/mushroom soil/manure directly over the existing vegetation or soil. This soil should followed by a layer of biodegradable carbon rich material such as cardboard or newspapers, followed by an additional 2 inches compost/manure, and then covered with 2-3 inches of mulch (woodchips or shredded leaves work well). The diagram below gives a rough idea of the order of layering:

Sheet Mulch Your Way to a Regenerative Garden - Lyngso Garden Materials

Picture Source

The cardboard will smother out any existing weeds and the mulch and compost helps to develop a soil rich in organic matter and nutrients that can be planted directly into. The buried cardboard will eventually fully decompose, leaving behind a weed free and fertile topsoil layer with very little effort.

For a raised bed, the process should be the same, except the layers will be inside the bed and the rest of the bed should also be filled with compost or topsoil (how much will be dependent on the height of the bed), with the mulch being the last thing to be added on top of everything else.

Ideally this site preparation would occur in fall or winter, and be ready to plant the following spring. However, if that is not possible, the process can still be done and the beds planted in the same day.

Next Steps…

The next post in this blog series will focus on seeds, including the types of seeds and their classifications, as well as how, when and where to start different types of seeds.