Beauty Hacks

We have all heard the phrase beauty is pain. It is a common thought to believe that beauty has to take so much time and effort, but this isn’t always the case. There are a numerous amount of beauty hacks that can make our processes easier and faster. In this blog post I will share some of my beauty hacks that I have learned over the years.

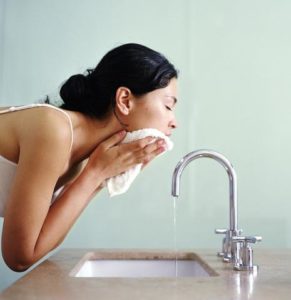
Acne is something almost ev53a669ba2acc0
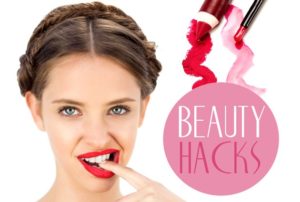
eryone struggles with. Blackheads, whiteheads, and pimples are irresistible when it comes to popping, and it’s okay to pop pimples if the right technique is used. You should know that all the sebum and puss rise to the surface a few days after a pimple appears, making it the perfect time to extract. Removing all the dirt and oil from the skin should be done after a shower because the hot water will open the pores, making itcan_popping_pimples_kill_you easier to pop the pimple.

After a pimple is popped, the surrounding area is usually inflamed from all the applied pressure. To reduce the swelling , apply an ice pack to the area. This will also close the pores reducing the exposure to the environment. We want to make sure that we clean the infected area with tea tree oil, which is a natural antibacterial. If you follow these steps, I promise your pimple will be gone the next day.
ultimate-palette-v2
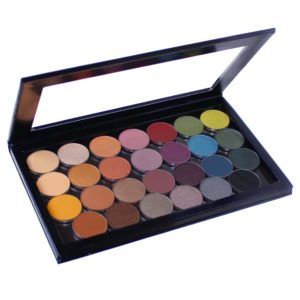
Applying makeup requires so many products that people often feel overwhelmed with how many primers, foundations, powders, and shadows they need to create a beat face. One way to reduce the products needed is to use mascara as eyeliner. The mascara product is very similar to gel liner, making it the perfect substitute. Just swipe an eyeliner brush on the wand of the mascara to pick up product and proceed to create your desired eyeliner shape. Another way to get a good use out of a product is to use eyeshadows as different face powders. Since eyeshadows come in so many finishes and colors, they can be used as highlighters, blushes, and contour shades. Usingshavingtips10 one product for multiple applications saves space for other products that are more important, like lipsticks!

Nothing is worse than wanting to go out and show off your smooth legs and realizing you have no shaving cream. Do you dare to dry shave? Do you just put on a pair of jeans instead? Of course you don’t! If you find that you don’t have shaving cream, use conditioner as a replacement. It provides a barrier between the razor and skin and allows the blade to glide easily against the legs. Ever since I used conditioner as shaving cream, I never went back.

Using these hacks will provide great results and make your life so much easier. There are so many other beauty hacks that people from all different backgrounds use. Make sure you pass your beauty secrets down to other people so that we can all enjoy our “beautifying” process much more.

Hair Cleaning

Hair is such an impnatural85-long-natural-hair-4aortant part of appearance and beauty. Everyone loves the feeling of clean washed hair, but no one really likes to take the extra time out of his or her day to take the proper steps. If we ever want strong healthy hair, following the right routine will allow us to achieve this goal. In this blog posts, I will explain the proper steps to getting a clean well prepped head.

There are two two big sections of hair: the roots and the ends. The roots and scalp are where all the new hair grows. The ends of the hair shaft are the oldest part of the hair. They are the most dry and brittle section, so they need extra attention during the moisturizing and conditioning part when taking care of the hair.

Before washing we want to give a little TLC to the roots. As stated before, the scalp is the center for hair growth, so we need to increase the bloodflow to this area. For this we can take natural oils such as peppermint, lavender, jojoba, or coconut, and use it to massage the scalp. These oils will provide the slip needed when maneuvering through all the tangles from the past few days. You can either leave the oils in for a pre-poo treatment or jump straight to the washing step.

tumblr_inline_mmedi7EVkJ1qz4rgpIf you have thin hair, washing your hair all at once might be easy, but this isn’t the same for people with thick coarse hair. If you find your hair unmanageable while washing, I recommend washing in sections. This will keep all the hair in the proper place and make the process a lot easier.

Before we can get to cleaning, we need to pick out a proper shampoo. It is easily one of the biggest decisions to make simply because there are just so many available to use. We all want a shampoo to leave the hair feeling clean, but not stripped. Our cleanser needs make us question if professional products are really worth the price. I would say they aren’t. There are a number of inexpensive cleansers that give us our desired results. When picking one out, just make sure it doesn’t contain any dyes, sulfates, or parabens. These substances often strip the hair of the natural oils and irritate the scalp. Safe traditional shampoos can be found in the Shea Moisture, Pureology, and Kinky Curly hair lines. A less stripping alternative to shampoo is a cleansing conditioner or cowash. These untraditional cleansers don’t lather and leave the hair and scalp clean and super soft. A natural option is apple cider vinegar diluted with water. This cleanser restores the scalp’s natural pH and rem15847559oves and product build up. All the shampoo options are good, just be aware of how your hair responds to each one.

When it’s time to wash the hair, make sure to focus on the roots. This is where most of the sebum build up occurs, so we need to clear the scalp of that and the other oils we placed on the scalp while massaging it. While rinsing the shampoo out, the cleanser will reach the rest of the hair shaft, cleaning it of product build up, but not striping the already dry part of the hair.

After washing, the hair should be ready for conditioning. Conditioner provides the slip needed to detangle the hair. I find that choosing a conditioner doesn’t require much thought. Just have to check for drying substances such as alcohols and dyes.

When we are ready, apply the conditioner on wet hair focusing on the ends and less on the roots. We just cleaned the roots; we don’t want to start piling on the products. As we detangle with the conditioner, we want to use our fingers and hands only. Hair tools such as combs and brushes often pull out much of the hair because aren’t used gently when getting rid of tangles. However the fingers allow us to feel the knots and work them out the hair the proper way. After detangling, rinse the hair out with lukewarm to warm water.

Treating the hair after washing and conditioning is essential to the health and strength of the hair. It adds moisture back into the hair shaft and strengthens the weak areas. Some of my favorite deep conditioners come from the Shea Moisture and Cream of Nature lines. Natural alternatives include oils like the ones used during massaging, bananas, avocados, and eggs. We 15651079want to apply these products again focusing on the ends and working our way up the shaft. Leave the treatment
on for an hour to overnight while the hair is covered with a shower cap or plastic bag. This traps in all the heat from the head which opens the hair shaft allowing these lovely moisturizing ingredients to penetrate through.

After the treatment rinse the hair out with cold water only. This closes the hair shaft and locks in all the moisture. When it’s time to dry the hair, never use a cotton towel. They are super absorbent and will suck all the nutrients that we just gained from our treatment. Instead use a microfiber towel or old t-shirt.

I hope you learned a lot more about washing your hair. Thank you for reading!

Makeup


Makeup was my first love in the beauty world. I would always buy cheap lipglosses and pIMG_3577_1ut vaseline on my eyelids since I was a little girl. My first actual makeup product was an old blush set given to me by my grandma during my sixth grade year. There were only three shades, so I would endlessly recreate the same makeup look on the weekends. I found myself looking up makeup tutorials on YouTube, which quickly became an obsession of mine. I loved seeing the transformation of a natural being to someone who expressed his or her artwork on his or her face with makeup. I too wanted to be able to to transform, so I practiced and practiced and practiced some more. I can say after a few years I finally got the basic makeup applications down pact and I can’t wait to share my knowledge with all my readers.

Before we can begin to apply makeup, we want to make sure our faces are clean and moisturized. This ensures a better application prevents the spread of bacteria to the makeup brushes.

The first step is to apply a primer. Primers set a barrier between the face and makeup. It also creates a smooth base that gives the foundation and eyeshadow something to adhere to, making the products last all day. There are a number of different primers that help mattify, add a glow, smooth, or color correct the skin. The trick in choosing a primer is knowing how you want your makeup to look after application. Many brands have a number of primers designed for different skin types and finishes.

One of my favorite steps is doing my eyebrows. Everyone wants fleeky brows because they are the feature that frames the face. The wrong brow can either make or break the whole application. The problem most people have with brows is creating dramatic shapes and filling in too heavily with the wrong color. When doing brows, you need to pick a color that is a little brighter that your brow hairs, but will still show up on the skin. This will give color to the brow area, but won’t look too dark when used to fill in.

a9c07266d39dd9faf090240a14cc659eNext consider the natural shape of your brows; it is most likely fine the way it is. Often times, people try to create a new shape that isn’t suiting for their eyes or the rest of their face. We want to keep our natural shape and just worry about filling in the sparse areas. Did you read that correctly? Yes, I think you did. JUST FILL IN THE SPARSE AREAS! Don’t try to overfill the spaces that have more than enough hair. Remember we want fleeky brows, not boxy brows.

When we are ready to fill our eyebrows in, we want to brush our hairs in place with a spooly so that each hair is in perfect position. Use a brow pencil, powder, pomade, or gel to start outlining the ends of the brow. Make the lines lighter as you work your way to the front of the brow. Fill in the middle and ends with hair-like strokes. Do the same for the head, but use extremely light pressure and less product. This creates the gradient look that natural brows have. After filling in, we can use a concealer which is 1-2 shades lighter than our normal complexion to highlight and correct any mistakes we made when filling in. Make sure to blend the concealer with your fingers or a brush, it really doesn’t matter.

With the help of the Eyebrow Gods, our brows are finally slayed. It is now time to apply foundation. I like to use a beauty blender sponge, but you can use a natural or synthetic hair brush that is fluffy and dense to blend out the foundation. Start of applying a little foundation at a time then adding more layers for the desired coverage. Adding on is always better than having too much makeup to start with. Besides, once you finish the rest of your face application, you realize you didn’t need as much foundation as you originally thought. Make sure you blend the foundation on your eyes and down your neck. This way other people won’t be able to see where the makeup starts or stops.

After foundation, our faces look flat with only one color. We need to add some dimension back into our skin. This is where highlighting and contouring comes into play. Highlighters are used to brighten the face where the light naturally hits while contours are meant to create shadows and depth. To highlight, place the concealer we used underneath the brows under the eyes, on the bridge of the nose, and a little on the forehead. Blend this out with a beauty blender or blending brush similar to the foundation brush. We need to set these areas with a translucent powder so that the concealer doesn’t crease. To contour use a powder that is 1-2 shades darker than our normal skin color. Use a color that
is neutral instead of warm, which can make you look like an oompa loompa, or cool, which can create unnatural grey shadows. Apply the powder with a tapered fluffy blending brush tomakeup-contouring-for-different-face the hairline, sides of the nose, cheekbones, and jawline.

Now that we have some depth, we need some color. Blushes of all different shades can be added to the cheeks to give the face a pop. To apply, use a fluffy brush and sweep the product to the apples of the cheeks. Above the blush, at the highest part of the cheekbone, a highlighter is often applied. This adds a glow that is either subtle or seen from Mars- you decide. Either way we want to pick a highlighter that is shimmery and apply it with a fan brush.

Now that the face is done, we can focus on the eyes. Because eye makeup is done in many different ways to express different styles, we’re going to skip out on this step. I know it’s so sad because eyeshadow is so fun, but it is the application that can never be clearly defined. Instead we want to make the eyes pop in a different way. We will do this by mascara. Adding mascara to the top and bottom lashes will automatically make the eyes more defined by giving them a flirty look.

The final and last step is applying a lip color. Lips can be enhanced through lipstick, gloss, liquid lipsticks, lip balms, lip tints, and so much more. Lip colors are the makeup accessory that immediately adds color to the face, especially when eye makeup isn’t applied. The countless colors that can be created is the reason why lipstick can be worn on the daily basis. Pick a color and finish that matches your personality, style, or mood for the day. I promise once you get into lip combinations, you’ll become a lipstick junky forever.

And that’s it! You are able to tweak any of the tips I gave that will make your routine perfect for you. That’s the great thing about makeup, there are no rules that constrain you. You are allowed to express yourself in any way you want. So do you, and own your new beat face.

13381084_244279902615733_1705441141_n

1451878005245

Cffku4QWwAE2Gn1


Skin Care

Welcome back! As previously stated, this blog is going to be heavily based on health and what we can do to create a perfect foundation. The best way to achieve this goal is to have the proper skincare routine. The face is a delicate area that can’t be treated like the rest of the body. This post will demonstrate a simple and effective routine that can work on all skin types to keep the face well balanced.

Makeup-for-black-women-007Everyone knows the input will always equal the output, and the same rule applies with skincare. Before we can even begin to discuss the right techniques and products, we need to consider your internal health. It is essential that you make an effort to drink the correct amount of water everyday. Water hydrates the body and flushes out the many toxins we excrete.

Okay, now that we’ve got the annoying part out of the way, we can actually start talking about the fun stuff, yay! The basic face routine will always start off the same: with a proper face wash. When choosing face wash, you need to ensure that there aren’t too many drying or skin irritating ingredients. Face washes are meant to remove the excess dirt and oils that have accumulated on the skin throughout the day, not strip it of of the natural secretions it creates to keep the skin balanced. I recommend the natural Canadian-based company Lush. They create plant based items that leave the skin feeling soft, clean, and balanced.herbalism-face-cleanser-lush-natural-organic-cosmetics-beauty-review-tlvbirdie-blog

After choosing the right face wash, it is important that you take the correct steps while actually washing your face. Make sure you hands are clean and washed because we don’t want to spread bacteria to the face or wash, which can contaminate the whole sample. Rinse your face with warm, not hot water. This will open the pores so that the face wash can have easier access while extracting dirt. Wash the face for no longer than a minute to avoid over washing, which can also strip the skin. While rinsing the face off, start off with lukewarm water and switch to cold water at the end. This will force the pores to close  so that they aren’t exposed to the environmental toxins. Dry your face with preferably a clean washcloth or paper towel. This assures that no bacteria from your body towel will spread to your new clean face. 

Woman washing face with wash cloth over sink, side view

After the face is clean and dry, we need to tone. Toners rid the skin of any extra dirt the face wash didn’t catch and restores the natural skin pH. I recommend witch hazel for this step. It is a natural remedy that has been used for many years. Some witch hazels partially contain alcohol, which may be too drying for people with normal to dry skin types. Another natural suggestion would be the mixture of one part apple cider vinegar diluted with three parts water.

The final step is moisturizing. There are two big issues I have with this last step. Most people with oily skin feel as if they don’t have to moisturize because they believe it would just make their skin more oily. This is a huge misconception. The skin needs to be moisturized regardless if the person has dry or oily skin. If the face isn’t hydrated, it will produce more oils that will compensate for the moisturization that wasn’t provided. Most people with dry skin will often use products that contain non-absorbing ingredients such as mineral oil and petrolatum. These substances sit on top of the skin, blocking the surface to the rest of the environment, which will causes pores to clog and acne to form. There aren’t many natural moisturizer options, but two of my favorites are aloe vera, more aimed for oily skin, and natural oils that everyone can use. Oils such as jojoba, grapeseed, and rosehip are closely related to the natural oils our face produces. Because of this, the skin will be able to absorb these oils instead of just sitting on the surface. Other moisturizes can be used, but just make sure to read the ingredients list and check for harmful substances.

Next post will be about makeup since we are now masters of skincare. I hope you try this simple effective routine that will result in healthy beautiful skin. 

Beauty

Jackie-Aina-Makeup-Tutorial-BellaNaija-May-20150011Nikkie_medium

What is beauty? It is a hard question that people answer in many different ways. According to Google, beauty is defined as “a combination of qualities, such as shape, color, or form, that pleases the aesthetic senses, especially the sight.” I would have to agree with this definition, as I think beauty is something that is external and physical and shouldn’t be used  to define someone’s character. Beauty is based strictly on appearance, so that is what I want my blog to be based around.

Society has defined beauty as anything youthful. The youth has all qualities that most people strive for. We find ourselves constantly trying to find different products that will give us things like smooth skin and strong healthy hair. Companies make it their duty to create these products for consumers.

Of course there are different aesthetics, so everyone has a different way to express a specific style. The goal of this blog isn’t to show the perfect way to do something. It is rather more based on the different products and techniques to use that will help people achieve a good foundation that they can enhance in any way they like. So each post is going to be heavily focused on health and the way people should take care of their hair, face, and skin.

I consider myself qualified to make a blog on beauty because it is something  that I have been passionate about since the eighth grade. I became so obsessed with makeup, natural hair care, and skincare that I would spend countless hours researching the best products and techniques to achieve the look I desired. I have perfected my craft and I am now able to advise other people who are interested in the same thing.

My infatuation with beauty is not only a hobby, but something that I want to focus my career around. I plan on becoming a cosmetic chemist who will create personal care products that are healthy and safe for consumers and environmentally friendly. As I go behind the scenes in the beauty industry, I will learn more about my passion. I believe my knowledge given in each post can help someone perfect his or her appearance so that he or she can feel beautiful.

photociara-ombre-brazilian-hair-lace-wig-clw26-3a6804c1

Hello world!

Welcome to Sites At Penn State. This is your first post. Edit or delete it, then start blogging!

Skip to toolbar