Users are able to map network drives that they have been granted access to, such as the Pictures drive, or departmental drives. No administrative password is required to accomplish this. From time to time a user may find that a networked drive no longer appears on their PC; use the steps below to reconnect it.
1. Open the File Explorer (right-click on the Windows icon and choose “File Explorer” from the list). At the top menu bar, click “Computer;” then click the icon for “Map network drive.”
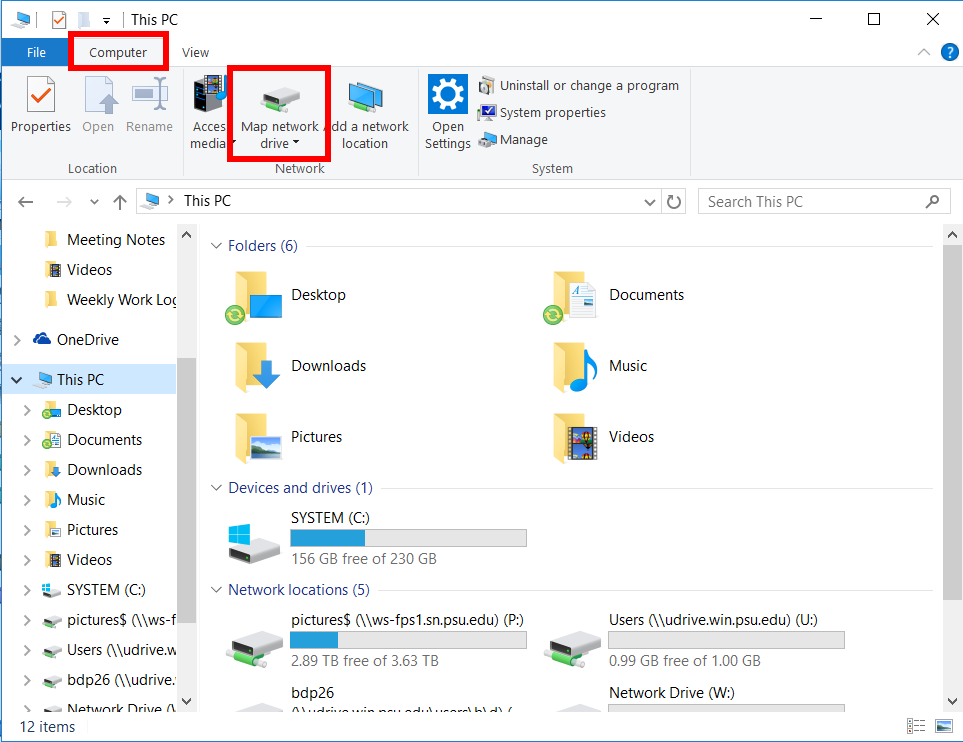
2. The “Map network drive” setup window will appear, where you will need to choose the drive letter you want. The network drives have no set letter, but you must choose a letter that is not already in use from the list. Provide the address to the drive’s location in the “Folder” field. Make sure that the check box “Reconnect at login” is checked.
All drive locations are as follows: \\ws-fps1.sn.psu.edu\DRIVE_NAME$
In the place of DRIVE_NAME, provide the exact name of the drive you want to connect to, such as “pictures” (without the quotes). Be sure to include the $ at the end.

3. Click “Finish,” and the network drive you specified should open in a new window. It will now appear in the File Explorer under the “This PC” section, and should be there each time you login.