All posts by Xavier Mack

Eastern White Pine Propagation Guide

Pines Background & Reproduction 

Evergreens are plants that retain their leaves year-round. There are tropical evergreens like palm trees, but most evergreens that grow in temperate and cold regions are hardy trees such as pines and conifers as well as cone-bearing shrubs like firs. The temperate and cold regions evergreens have specific adaptations to help the survive in cooler climates such as tick bark to protect against the cold, thin, waxy needle-like leaves to reduce water loss, and cones to protect seeds. (Encyclopedia Britannica) Unlike deciduous trees, the leaves of evergreens can remain on the tree for two years or more.  

Like most evergreens, pines (Pinus) retain their leaves all year, have needle-like leaves, and protect their seeds with cones. Some pine species can produce edible seeds that are sold commercially, but they are even more well-known for their being cultivated as ornamental trees. Many pines are propagated from cuttings, but growing pine trees from seed is an exceptionally economical method of producing many trees at a low cost (Mattern, 2013) 

Eastern White Pine

https://www.thetreecenter.com/eastern-white-pine/

Eastern White Pines (Pinus strobus) are native to the Eastern United States and thus are easy to propagate in the Middle Atlantic and Northeastern regions. Eastern White Pines grow to heights of 50-80′ and have spans of 10-20′. They are highly prized as ornamentals being used for windbreaks and even Christmas trees. They are also easy to grow from seed, easy to transplant, and fast-growing making them an ideal evergreen to demonstrate propagation from seed. (The Morten Arboretum) 

Close-Up of Eastern White Pine Cones

https://www.arborday.org/Trees/TreeGuide/treedetail.cfm?itemID=903


Pines Seed Prep 

As previously noted, cuttings are often used to propagate pines, but growing them from seeds is easier, cheaper, and also fairly common.  

1) Seed Collection 

  • The best time to collect Eastern White Pinecones is in the fall when they are brown or slightly green. Look for closed cones only. If the cones have opened, they’ve already released their seeds. Place the cones on a rack at room temperature. When they’re dry, the cones will release their seeds. Collect the seeds.  

Botanic Visual Guide to Eastern White Pine Leaves & Cones 

https://www.invasive.org/browse/detail.cfm?imgnum=1379009

2) Seed Viability 

  • To determine which seeds are viable, fill a bucket with water and place the seeds in it. Good, viable seeds will sink to the bottom. Discard any floating seeds since their embryos are likely dead. 

Eastern White Pine Seeds 

https://de.wikipedia.org/wiki/Datei:Pinus_strobus_seeds.jpg 

3) Stratification 

  • To increase the chances of successful germination, a process called Stratification is often used. Stratification involves bringing the embryo of the seeds out of dormancy before planting.  
  • In nature, the process occurs naturally as seeds over-winter on forest floors(Garber, 1965) For seeds that will be sown in the Spring of the following year, stratification is vital to prepare seeds for germination. 
  • To stratify the seeds, place them in a Ziplock bag filled with a moisture holding medium such as perlite and/or sphagnum moss. Store them in a refrigerator for 2-3 months. Whenever the perlite and/or sphagnum moss feels dry, re-moisten it with water.  


Germination Process from Seeds 

1) End of Stratification 

  • Remove the seeds from the refrigerator and bag to begin sowing process.  

2) Sowing 

  • Poke a hole approx. ¾ inch deep in the potting mix in 3-5-inch-deep pots. 
  • Sow seed inside horizontally.  
  • Cover with sphagnum moss to help retain moisture.  
  • Spread a 1/8-inch-thick layer of potting mix or sand over the sphagnum moss.  


Post Planting Care 

1) Germination Environment 

  • After sowing, place pots outdoors if it’s warm enough or in a greenhouse or cold frame.  
  • Place pots on a growing mat.  

2) Germination Requirements & Maintenance 

  • The greenhouse or coldframe must have insulated glass.  
  • Growing mat temperature must be maintained between 70- and 85-degrees Fahrenheit.  
  • Ensure the potting mix and sphagnum moss are moist throughout.  
  • Wait for germination in 2-6 weeks.  
  • After germination, harden off the seedlings by setting the growing mat temperature to 65 degrees Fahrenheit during the night. Turn it off during the day.  

3) Transplanting 

  • Transplant the seedlings into larger pots filled with half loam and half sand once they reach 2 inches in height.  
  • Transfer them outdoors in partial shade with 1” of water for the first summer.  
  • In autumn, transplant the seedlings into a permanent bed. Space them 20 feet apart.  
  • Spead a 2-inch thick layer of pine mulch around the bases of the seedlings. This will retain moisture, warmth, and prevent the growth of weeds.  

Eastern White Pine Seedling 

https://sequoiatrees.com/western-white-pine-small-tree-seedling.html


Works Cited 

Graber, R. E. (1965). Germination of a White Pine Seed as Influenced by Stratification. Washington D.C.: United States Department of Agriculture. 

Mattern, V., & Ogden Publications, Inc. (2013, October 2). Growing Pine Trees from Seed – Organic Gardening. Retrieved November 20, 2019, from https://www.motherearthnews.com/organic-gardening/growing-pine-trees-from-seed-zm0z13onzsor. 

McMullen, S. (2016, October 7). How to Grow White Pines from Seeds. Retrieved November 21, 2019, from https://homeguides.sfgate.com/grow-white-pines-seeds-46237.html. 

The Editors of Encyclopedia Britannica. (2017, June 9). Evergreen. Retrieved November 20, 2019, from https://www.britannica.com/plant/evergreen-plant. 

The Morten Arboretum. (2019). Eastern White Pine. Retrieved November 21, 2019, from https://www.mortonarb.org/trees-plants/tree-plant-descriptions/eastern-white-pine. 


Apple Tree Deciduous Grafting

Background: 

Apples (Malus domestica) are best known for their role as a cheap, convenient, and nutritious snack. The fruits are native to what is now Central Asia, its wild ancestor being Malus sieversii. (Encyclopedia Britannica) Apples later made their way to Europe and the Western Hemisphere via travelers and trade. The apple fruit itself contains a ripened ovary surrounded by crisp, fleshy, and sweet tissues. Apples are also a highly diverse fruit with over 2,500 varieties grown in the United States and 7,500 varieties grown around the globe. (University of Illinois at Urbana-Champaign) Depending on the type, apples come in all shapes, sizes, and colors. Apple trees are easy to grow and provide a bounty of fruit each year after they reach maturity.  


Grafting Background

Grafting is the practice of joining two or more plants together so that they can grow and act as one. The more closely related the plants are to each other, the more likely a graft union will be successful. In other words, the two plants being grafted together must have a relationship such as being in the same family or being the same species. Grafting is a useful method to produce plants that aren’t reproducible by other methods, produce specific clones, hasten reproductive maturity, repair damage, and develop seed trees of older, superior plants. There are many different methods of grafting, but this tutorial in deciduous apple tree grafting will focus specifically on the whip and tongue method.  


Materials:

  • Healthy rootstock.  
  • Healthy scion. 
  • A sharp knife.
  • Grafting tape. 
  • Plastic wrap.  
  • Gloves (to protect hands).  


Graft Information & Requirements

Some Terms to be Familiar With:  

Scion – a detached but living portion of a plant to be attached to a rootstock. 

Rootstock – underground and/or near above-ground part of the plant from which new growth can be formed.  

Cambium – location of cell division.  

  • In grafting, the vascular cambiums of the scion and rootstock must make intimate, direct contact to allow for the wound to heal and for xylem and phloem to redevelop to transport nutrients and water from the roots to the top of the plant. 

Understock – location where the scion and rootstock make intimate contact.  

Requirements for a successful graft include:  

  1. Scion and rootstock must be compatible.  
  2. Close cambial proximity between scion and rootstock.  
  3. Rootstock and scion must be in the proper physiological state.  
  4. Cut surfaces must be protected from desiccation.  
  5. Appropriate care and environmental conditions must be given for a period following the grafting procedure. 


Procedure

1) Collect scion wood to graft onto rootstock.  

  • Collect scion wood early in the day when temperatures are cool.  
  • The best type of scion wood to collect is from the current season’s growth or dormant wood that grew the previous year. (Penn State Extension) 
  • To store, place the scion wood into airtight plastic bags, label them, and promptly put them in a refrigerator if they’re not going to be used immediately. Optimum temp to store scion wood at ranges from 32-45 degrees Fahrenheit. 

Before Grafting: 

High success rates are seen with whip & tongue grafts due to high amounts of surface contact between the cambial layers.  

Splice grafts are simple versions of whip & tongue grafts. While easier to do, splice grafts are not as ideal due to not being as stable as shown in the comparison image below:  

https://courses.cit.cornell.edu/hort494/mg/methods.alpha/WTMeth.html

  • According to the North Carolina State Extension, the best way to make a whip and tongue graft is to “make similar cuts on both the stock and scion. These cuts should be made with a single draw of the knife and should have a smooth surface so that the two can develop a good graft union.” 
  • The graft process relies on “interlocking” between the scion and rootstock.  
  • Make sure that the scion and rootstock are of similar diameter, so they fit together.

2) Cut the scion.  

NOTICE: It is very easy to cut yourself during the cutting process. Wear gloves to protect hands and fingers during steps 2 and 3. 

  • You should use a scion section that contains 2-3 buds.  
  • Identical cuts are made at the top of the rootstock and the bottom of the scion, so they can fit together to form the graft union. 
  • The first cut is about 1-2.5 inches long and made at an angle with one long and continuous motion of the knife. This first cut should be made on the scion in the internode area below the two or three buds. (North Dakota State University) 
  • Cut should be made in the proximal end of the scion (end that was closest to the original rootstock) as shown in the diagram below: 

http://irrecenvhort.ifas.ufl.edu/plant-prop-glossary/06-grafting/02-graftingtypes/10-grafting-root.html

  • Smooth cuts are essential so that good cambium layer contact will occur. 

https://courses.cit.cornell.edu/hort494/mg/methods.alpha/WTMeth.html

3) Cut the rootstock.  

  • On the rootstock, an identical cut is then made.  
  • A second cut is started about 1/3 of the way down from the tip of the first cut. This second cut should be about half as long as the first cut and made parallel to the first. (North Dakota State University) 
  • Once the second cut is made, the rootstock and scion should interlock as show below:  

https://courses.cit.cornell.edu/hort494/mg/methods.alpha/WTMeth.html

4) Making the graft union.  

  • Interlock the scion and rootstock. Make sure the cambial layers make intimate contact.  
  • Holding both the scion and rootstock in place, wrap with parafilm and grafting tape to keep the union together for healing and to seal in moisture. 


After Care

  • After the grafting process is complete, the tree(s) should be moved to a warm area with high humidity to allow the area of the union to heal.  
  • During the healing process, the scion and rootstock will grow onto each other as new xylem and phloem are formed to allow water and nutrients to be transported from the roots up into the new scion.  

NOTICE: Not all graft unions are successful. Failure of the graft union can result in any of the following symptoms of incompatibility:  

  1. Yellowing of foliage or defoliation.  
  2. Premature death.  
  3. Differences in growth rate between the scion and rootstock.  
  4. Overgrowth.  
  5. Suckering.  
  6. Graft breaks completely.  
  7. Plant just dies.  


Works Cited:

Aasheim, M. (n.d.). Propagation of Apple Trees. Retrieved October 31, 2019, from https://www.ndsu.edu/pubweb/chiwonlee/plsc368/student/papers02/maasheim/appleprop.htm. 

Apple Facts. (2019). Retrieved October 31, 2019, from https://web.extension.illinois.edu/apples/facts.cfm. 

Crassweller, R. (2019, October 16). Fruit Tree Propagation – Grafting and Budding. Retrieved October 31, 2019, from https://extension.psu.edu/fruit-tree-propagation-grafting-and-budding. 

The Editors of Encyclopedia Britannica. (2019, February 4). Apple. Retrieved October 31, 2019, from https://www.britannica.com/plant/apple-fruit-and-tree. 

Weinmann, T. (n.d.). Grafting and Budding Fruit Trees. Retrieved October 31, 2019, from https://www.ag.ndsu.edu/hort/info/fruit/graft.htm. 

Whip & Tongue Grafting. (n.d.). Retrieved October 31, 2019, from https://courses.cit.cornell.edu/hort494/mg/methods.alpha/WTMeth.html. 

Cauliflower Tissue Culture Guide

Background:

Cauliflower (brassica oleracea) is a member of the mustard family and a long-domesticated food crop. The vegetable is grown for its massive, edible flower structures. Cauliflower is rich in several vitamins and nutrients including Vitamins C and K. They are an annual, cool weather crop that thrive best in temperatures of around 60 degrees Fahrenheit. The plants can reach 1.5 feet tall and have large, round leaves. White flowers are the most commonly grow commercially, but purple, orange, green, and brown cultivars exist as well.  

Cauliflower is also an easy plant to reproduce through tissue culture. Tissue culture is defined by the growth of cells derived from living tissue in an artificial medium. The technique has been used to produce vaccines, viral inhibitors, and most importantly, the commercial production of plants.  

Cauliflower is an ideal plant to use to demonstrate tissue culture for several reasons. First, its rapid growth allows the entire tissue culture growth process to be completed in 6 weeks. Second, growth requirements for cauliflower are minimal. Third, cauliflower is cheap and easy to obtain from supermarket. Additionally, its capable of withstanding a thorough sterilization treatment, reducing the loss of explant material to contamination during the preparation process. The cauliflower used should be as fresh as possible and contain no marks, wounds, or discoloration.  


Materials:

  • Cauliflower flower sections.  
  • Prepared Murashige & Skoog (MS) Medium. 
  • Sterile petri plates containing around 25-30 milliliters of culture medium.  
  • sterile petri plate to use as a stage for cutting tissue.  
  • Sterile boxes for rinsing and containing clean tissue
  • Sterile water for rinse.  
  • Sterile Tools: 
    • 1 scalpel.  
    • 1 tweezers (forceps). 
    • Tool rack.
  • Disinfectants: 
    • 95% alcohol.  
    • 10% Clorox solution.  
    • Antimicrobial cleaner.  
  • Bacticinerator 
  • Parafilm to wrap finished plates.


Sanitation Tips and Requirements:

The sanitation of the cauliflower, tools, and growth environment cannot be stressed enough. The sterility of the environment is the ultimate deciding factor in the success of the tissue culture explants. All tools should be sterilized in either an autoclave or a small machine called a Bacticinerator. A Bacticinerator is a small machine that sterilizes small tool such as scalpels, tweezers, and forceps by heating them up to high temperatures.  

Example of a Bacticinerator:

https://www.carolina.com/microbiology-supplies/bacti-cinerator-iv/FAM_703420.pr

In addition, the growth environment (countertops, tables, etc…) should be disinfected before the experiment. When preparing the explant, preparation should be done in a laminar flow hood. All jewelry and watches should be removed, long hair tied back, and hands washed up to the elbows. The flow hood generates a stream of air that flows outwards away from the hood reducing the risk of air-borne pathogens contaminating the explants or media.  

Details on how explants must be sterilized can be found in the “Preparation of Explant” section below.  


Media:

The most widely used medium is called the Murashige & Skoog (MS) basal medium. The MS medium should be prepared so that it has enough time to gel before performing the tissue culture propagation. It generally consists of a mixture of common macro- and micro- nutrients, sucrose, vitamins, hormones including Benzyladenine (BA), and Naphthalene acetic acid (NAA), and contains an agar base. The MS medium often comes premixed which saves both a tremendous amount of time as well as keeping track of an extensive inventory of media components. Directions are included with the purchase. The medium’s pH should be adjusted to 5.7 and autoclaved for 15 minutes before being poured into petri plates and allowed to gel.  

Murashige & Skoog Media:

https://phytotechlab.com/murashige-skoog-modified-basal-medium-m401.html


Preparation of Explant:

1) Selection:  

Select enough cauliflower flower pieces to make 3 petri dishes worth. Choose pieces that are healthy and not diseased or bruised.  

2) Disinfection: 

Wash all pieces in a solution containing water and several drops of soap. Drain the soapy water from the container. Replace soap solution with a solution made of 675 mL of distilled water and 75 mL 10% Clorox bleach. Take cauliflower pieces in disinfectant solution down to Laminar Hood room. Leave cauliflower tissues in solution for 15 minutes. (Be careful. Don’t leave tissues in disinfectant solution for too long or too short. Set a timer on phone or watch.)  

3) Personal Cleanliness: 

In the room with the laminar flow hoods:  

  • Remove all jewelry and watches.  
  • Wash your hands with soap and water up to your elbows. Rinse and dry.  


Transferring Explant to Media:

1) Move to laminar flow hood: 

Wash the work area with disinfectant.  

  • Pour sterile water into the 3 sterile rectangular boxes with lids to rinse your tissue. Keep in mind that the outside of the boxes isn’t sterile.  
  • Sterile forceps and scalpel in the bacticinerator and place on rack.  
  • Use forceps to remove your leaves from the bleach and rinse in the sterile water.  
  • Move through the 3 rinses in turn from 1 to 3.  
  • Place your tissue in an empty sterile petri dish which you’ll use as a work stage. Replace the cover carefully to keep the tissue clean until you’re ready to use it.  

2) Wash the work area again with disinfectant.  

3) Sterilize your forceps and scalpel in the bacticinerator again.  

4) Transferring Explant to Petri Dishes: 

https://cedars.inverclyde.sch.uk/senior-school-blog-2014-15-archive/cell-and-tissue-culture

  • Open the petri dish with your tissue and set the cover to the side. Do not let the bottom part of the cover touch the work surface.  
  • Use your scalpel to remove all damage tissue and cut the cauliflower tissues into smaller pieces. 
  • Place each tissue piece on the surface of the medium, evenly spread out from each other.  
  • Use your forceps to gently press the pieces down onto the surface of the media to ensure adequate contact. Do not press too hard.  
  • Wrap the petri dishes with parafilm to seal the edge between the lid and the base of the plate and label it with your initials and rate.  
  • Place the finished plates into the incubator on the rack underneath lights.  


What to Expect and Care:

After approx. 1 week, the effectiveness of your sterility techniques will reflect in the results. If good, there will be no visible contamination on the cauliflower tissues or media surface. The plant materials should start to develop with roots and/or shoots visible in 4-6 weeks.  

Some examples of results:

https://www.saps.org.uk/secondary/teaching-resources/706-cauliflower-cloning-tissue-culture-and-micropropagation

If a few pieces in a petri dish are contaminated and a few are not, you can salvage the ones that aren’t contaminated by taking them and placing them into sterile petri dishes with fresh media.  

Once plantlets have established themselves, you must acclimate them to conditions outside the media and incubator. Carefully remove the cauliflower tissue from the medium and transfer the plantlets into a new environment with lots of humidity and moisture such as a greenhouse. To acclimate the new plantlets to a variety of conditions outside the greenhouse, you can gradually lower the humidity in the greenhouse.  


Works Cited:

Enders, J. F., Rogers, K., & Singh, S. (2015, July 7). Processing of Cultured Cells and Tissues. Retrieved October 22, 2019, from https://www.britannica.com/science/tissue-culture/Processing-of-cultured-cells-and-tissues. 

Haldeman, J. H., & Ellis, J. P. (1988). Using Cauliflower to Demonstrate Plant Tissue Culture. The American Biology Teacher50(3), 154–159. doi: 10.2307/4448679 

Petruzzello, M. (2019, February 25). Cauliflower. Retrieved October 22, 2019, from https://www.britannica.com/plant/cauliflower. 


Rose Deciduous Shrub Cuttings

https://homeguides.sfgate.com/trim-rose-bush-summer-40192.html

BACKGROUNDDeciduous shrub cuttings are cuttings taken from non-woody plants. Growing new plants from deciduous cuttings is generally fast, easy, and cost-effective. In this example, rose cuttings (Rosaceae rosa) will be used. Rose cuttings are easy to take and plant but require certain care after planting. Environment also plays a role in the success rate of the cuttings. If cuttings are grown indoors, they will need a period of “hardening off” to adapt to conditions outside. (Plant Natural Research Center, 2019) 


MATERIALS: To make propagate roses from cuttings, you’ll need the following items: 

  1. Razor blade or pruning shears.  
  2. Growth medium.
  3. Plastic containers.
  4. Rose plant.  
  5. Rooting hormone (can be liquid or powder). 
  6. Water and paper towels (to keep the cuttings moist). 
  7. Small stick to make planting holes. 
  8. Dish for rooting hormone. 
  9. Plastic (to cover cuttings and ensure high humidity).  


CONTAINER: The containers must be sterile and have holes on the bottom to allow for drainage. Plastic containers are recommended. For small quantities of cuttings, 3-3 ½” plastic pots are recommended. For larger quantities, 5-6″ containers are adequate. For transplanting, biodegradable pots of the same dimensions as above are ideal to avoid root disturbance after establishment of the root system.  


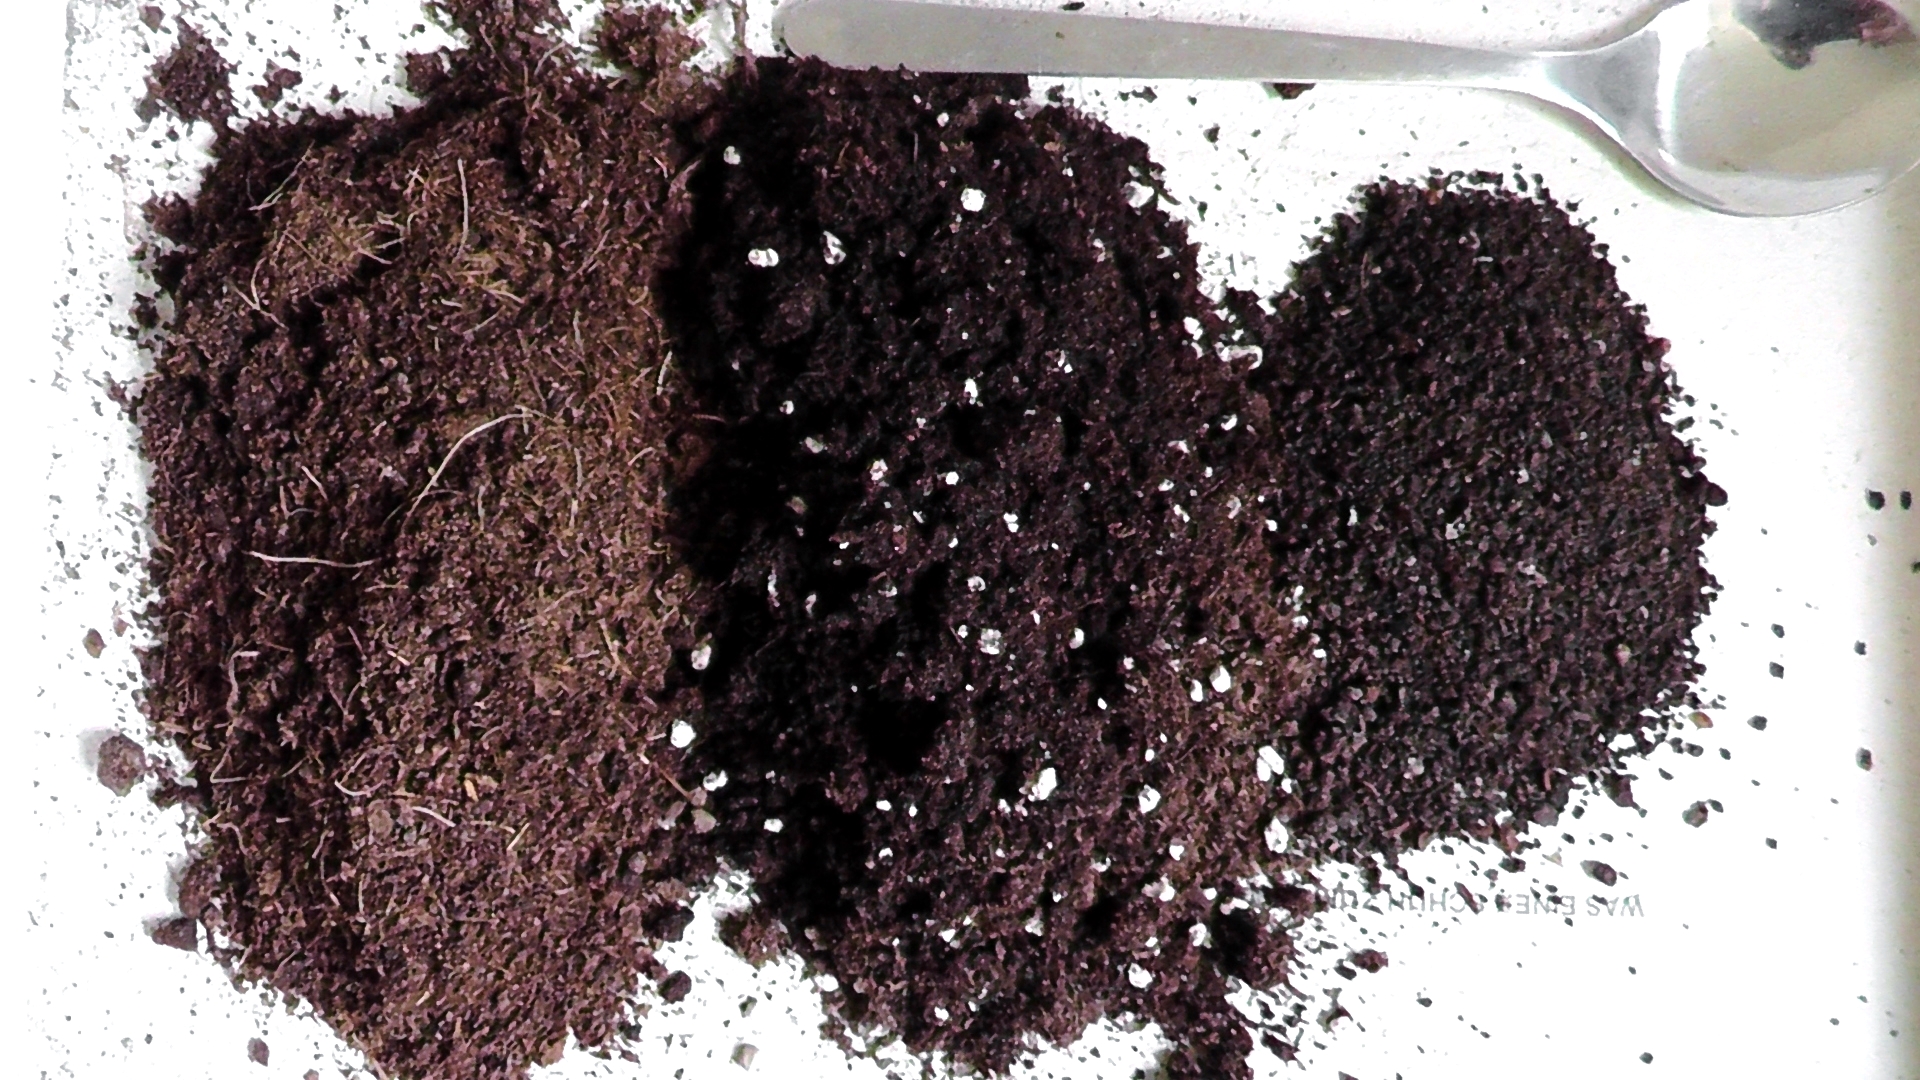
TIPS FOR PLANTING MEDIUM: Growing medium should be a good quality growing mix that is light and fast draining. It should also contain organic matter to ensure moisture and nutrients for the cuttings. Good materials to make the growing medium from include perlite to ensure light weight and pore space, potting soil, vermiculite to attract certain nutrients such as potassium and calcium and trap moisture, and organic matter such as compost. Medium should be watered, but not to the point where its soggy.  

Related image

How To Make Your Own Potting Soil & Growing Mix…


TAKING CUTTINGS: Cuttings should be taken from roses in spring when they are still dormant and so that the cuttings will have the upcoming growth year to mature. Rose cuttings should be taken from new growth which is located at the top of each plant. Material with flower buds should be avoided. Take cuttings from healthy, disease-free plants. (Evans, 1999) 

1) Before you take cuttings, sterilize your tools by washing with soap and water or use an alcohol solution.  

2)  Locate a stem segment that is 6-12 inches long and has a couple of leaves attached.  

3) Use a razor blade or pruning shears to slice of the stem at a 45-degree angle. (Hansen, 2018) Make this cut just below a leaf node. You’ll want about 4 nodes on each stem.  

Image titled Take Rose Cuttings Step 1

https://www.wikihow.com/Take-Rose-Cuttings

https://www.pinterest.com/pin/39828777932247952/

4) Remove lower leaves from the cutting except for 1 pair of leaves at the top. (BBC Gardeners’ World Magazine, 2011) Also, remove any flower buds since they consume the plant’s energy. If there is a delay between this step and dipping the cutting in rooting hormone, store cuttings in refrigerator (see STORAGE OF CUTTINGS).  


STORAGE OF CUTTINGS: Cuttings can be stored in a plastic bag wrapped in moist paper towels in a refrigerator. This can be done in the event of a delay in between making the cuttings and dipping them into the rooting hormone for planting. Refrigerator should be 34-36 degrees Fahrenheit. Cuttings can keep in fridge for 2-3 weeks.  

Warning: Herbaceous cuttings MAY NOT be frozen at any time.  


ROOTING HORMONE: The best rooting hormones to treat rose cuttings are IBA Auxin or NAA Auxin. Do not use IAA Auxin. IAA is naturally occurring in plants. IBA or NAA can be used in either liquid or powder form. Store rooting hormone in plastic dish prior to and during use. Remember to follow concentration instructions on package. If you are using liquid hormone, calculate the amount of hormone needed per the amount of water you have. Powdered hormone is generally the easiest to work with since you are given a set concentration.  


PLANTING THE CUTTINGS:

  1. Dip the bottom 2 inches of the cutting into a rooting solution. Rooting solutions are most commonly liquid or powder forms of IBA or NAA Auxin.  
  2. Use a small stick to poke a hole into the growth medium and insert cutting into the pot. Make sure cutting stays upright before moistening the soil. 
  3. Cover the cuttings with plastic to retain humidity and moisture during the growing process. (Iannotti, 2019) DO NOT wrap the cuttings or the pot in plastic wrap. Cover with a clear plastic bag. (Rohn, Chapter 7)If you’re growing cuttings in a plug tray, cover the plug trey with a clear plastic top.   

https://www.thespruce.com/can-you-grow-roses-from-cuttings-1403059


CARE AND GROWTH: Rose cuttings will require high moisture, high humidity, and plenty of warmth and sunlight. After covering cutting pots with plastic, place cuttings near a window with plenty of sunlight if growing indoors. If growing outside, plant cuttings directly into soil if conditions are moist and warm enough (above 65- and 80-degrees Fahrenheit). Keep growing media or soil moist until roots begin to appear in 10-14 days. (UC-Davis) If growing cuttings indoors, allow them to “harden off” before transplanting them. When ready to be transplanted, remove plastic and place directly in the ground. 

Image result for transplanting rose cuttings

https://www.gardenersworld.com/how-to/grow-plants/how-to-take-rose-cuttings/


RESOURCES:

BBC Gardeners. (2019, June 26). How to take rose cuttings. Retrieved October 8, 2019, from https://www.gardenersworld.com/how-to/grow-plants/how-to-take-rose-cuttings/. 

Evans, E., & Blazich, F. (1999, January 31). Plant Propagation by Stem Cuttings: NC State Extension Publications. Retrieved October 8, 2019, from https://content.ces.ncsu.edu/plant-propagation-by-stem-cuttings-instructions-for-the-home-gardener. 

Hansen, J. (2018). Reproduce and Grow Roses from Cuttings. Retrieved October 9, 2019, from https://www.gardentech.com/blog/how-to-guides/growing-roses-from-cuttings. 

How to Propagate Roses. (2019). Retrieved October 9, 2019, from https://www.planetnatural.com/rose-gardening-guru/propagating/. 

Iannotti, M. (2019, October 8). Create New Roses by Rooting Stem Cuttings. Retrieved October 9, 2019, from https://www.thespruce.com/can-you-grow-roses-from-cuttings-1403059 

Rohn, M. A. (2012). Caring for Roses: Learn How to Grow Roses from Seeds, Cuttings, in the ground, and in containers. Noah Publishing. 

University of California-Davis, “Softwood Rose Cuttings,” UC Division of Agriculture and Natural Resources.