The end

Welcome back everyone! Hopefully everyone is gearing up for finals and ready to finish out the rest of the semester. For the final passion blog this semester and the last post of Yoga Yourself, I want to give a brief overview of yoga’s origin. Unfortunately, the exact origins of yoga are clouded in mystery because it was first only document from oral traditions onto parchment that had pieces become lost or damaged. While true age of the practice is unknown, it is estimated that the practice originated in ancient India possibly 10,000 years ago.  The word “yoga” is Sanskirt and is a Hindu practice. From this point until now, the history of yoga has been split into four periods: Pre-Classical, Classical, Post-Classical, and Modern.

Pre-Classical Era of Yoga

At this time, yoga was just beginning to gain its foothold in literature. It was first seen in a collection of works called The Vedas and Upanishads which two of the foundation works of Hinduism. Vedic priest would use The Vedas to story their chants and songs to be used while practicing, similar to Christians’ Gospel. The Upanishads can be equated to the Bible. It had scriptures about the Hindu beliefs and stories. During this period, yoga was first formed and found its center focused on self-awareness as the means to bettering oneself.

Classical Era Yoga

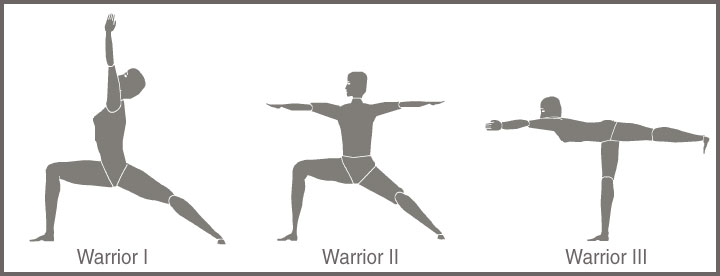
During the classical era, the philosophical attributes that surround yoga were beginning to form. Yoga itself makes up one of the six total areas of philosophy in Hinduism. The most influential work from this time being Yoga Sutras of Patanjali. This is the work that describe the fundamentals of yoga’s philosophy. It was in this work that the eight limbs of yoga: Yama, Niyama, Asana, Pranayama, Pratyahara, Dharana, Dhyana, and Samadhi are first outline and discussed. If you haven’t read the post on this part of yoga take the time to check that at after this! (Click here and here)

Post-Classical Yoga

At this point, in the history of yoga, a few centuries had passed since many of the mainstream postures had been created. This is the period in which restorative yoga was created. For more information about this form of yoga check back to my previous blog post about restorative yoga posture. (Click here)

Modern Period of Yoga

Finally, this period of yoga was when it was vastly popularized in the West as yogis began traveling the world gaining followers. The pioneer of this was Swami Vivekananda who began traveling and giving lectures on the concept of yoga. After this, yoga schools began to pop up all over the West. Overall, it finished with the founding of Indra Devi’s school in Hollywood. As a note, Hatha Yoga was the form of yoga that was popularized during this time.

Hopefully everyone has enjoyed learning about yoga these past two semesters as much as I enjoyed sharing my passion with you. With the summer coming up, you will all definitely have the time to practice up on your yoga! Namaste!

Lizard Posture…Among Others

Hi everyone! Welcome back to Yoga Yourself, hopefully everyone was getting their yoga on last week in the absence of blogging! In case anyone has not been keeping track, this is the second to last blog for CAS 138T :(. So, with that being said, I want try and cram in one last posture tutorial (as that is the main purpose of this blog) and a quick overview of some of imple poses that are used in many yoga class that I have not yet addressed in some of the past posts from the fall semester or earlier in the current semester.

The posture I will be talking about today is called Utthan Pristhasana, or as it is more easily said and better known by most novice yogis, Lizard Pose. Similar to Pigeon Pose, Lizard is also a hip opening posture and one of my favorite!

The steps…

  1. Start on your hands and knees (table pose) in the middle of your mat. Per usual, take a moment to ground yourself and focus on your breathing. If it helps you can try have your exhale and inhale to be about five counts.
  2. From here, transition into Downward-Facing Dog. Pedal your feet and begin to warm up prior to transitioning into the next step.
  3. Then, as you inhale extend your right leg behind you and on the next inhale bring the leg forward and place your right foot on the outer side of your right hand (the pinky). While doing this, allow your left leg to lower onto the mat.
  4. At this point, make sure that your hips are square with the mat and your knee is not past your ankle. Then, begin to lower your elbows to the mat but keep you shoulders and head up. If this is not comfortable, feel free to continue the pose with your forearms extended.
  5. Once into the position, I would recommend holding it for up to 10 breaths to get a really good stretch.
  6. To remove yourself from this, place your hands on the mat and step back into Downward-Facing Dog.
  7. Finally, repeat this steps for the left leg.

This stretch is excellent in helping to stretch the quads and hamstrings and also helps with the alignment of your hips. For an increased challenge, you could replicate how the pose is being done in the image in which you would take the resting leg and raise it off of the mat. This will increase the depth of the stretch and intensity helping to strengthen your leg muscles even more.

Now I will be onto some of the common postures or moments that can occur during a typical yoga class. The first is generally called Mountain Pose in which you are standing erect at the front of your mat with your shoulders rolled back and core engaged. Happy Baby Pose is usually done before shavasana. In this pose done lying on your back, you raise your feet in the air, grab hold of them with your hands and sway back and forth. Shavasana is the period of time after the practice is complete that people lie still for a few minutes to recompose themselves and relax. Lastly, there is often times forward folds of bends from side to side, and, as the name implies, you move your torso in the directionality indicated.

Hopefully everyone now has a full arsenal of poses at their disposal and would be comfortable jumping into a class!


Meditation Practices

One more week closer to the end of the semester…meaning that my work load is once again fully loaded, and I am guessing that all of yours are back to normal too (if they weren’t already last week). With the weight of work once again resting upon our shoulders, relaxation is a hot commodity that is pretty hard to come by. Therefore, I am going to continue the conversation dealing with meditation by discussing a few different types of meditations that in which you can easily partake. The goal of these practices is to help reduce stress, lower blood pressure and decrease anxiety.

The first that I am going to discuss is Zazen. This form of meditation that is associated with Buddhism, and as such, you may have seen it on television shows or in movies. In this form, just as discussed in the previous post, the space in which you practice is important;for Zazen I would recommend your dorm room or another open space with enough room for a cushion to be placed on the floor for comfort when you sit. On the cushion, you can sit in a variety of ways, as long as it is comfortable for you. The position that you choose will most likely be dependent on how your body feels at that time, so I would recommend implementing the same Yoga routine each time before practicing this to ensure that you can have some control over how you feel. Once seated, it is time to focus your attention. To do this, make sure that your gaze is unfocused; then, rock side to side three times before settling in by resting your hands facing palms up on one another. Then, shift your focus to your breath, and allow your thoughts to move freely out of your brain.

The next meditation practice is “Mindfulness.” This form of meditation can be practiced in almost any quiet setting or wherever you can refrain from focusing on only external occurrences. The goal of this form of meditation is to become aware of the present state of yourself without judgement. Basically, you must allow yourself to get lost in the moment. So, once in the area and seat in which you are going to practice Mindfulness, simply begin to allow your thoughts and emotional and physical feelings to pass being acknowledged, however, without judging or questioning them. This is probably my favorite firstly because of the end goal to stop judging yourself and secondly because of the fact that it can be practiced anywhere. Once you attain the ability to stop judging yourself, I believe that it is much easier to stop caring what others think of you and vice versa.

Finally, the last meditation practice I am going to discuss is Transcendental Meditation. In this practice, just like the last, you can be seated in any comfortable position. In this form of mediation, you pick three words that become your “mantra.” While seated, you will link these three words with each breath. For example, if the words you chose were “strength, honesty, and courage” with one breath you would say “strength” in your mind, on the next breath you would say “honesty” in your mind, and so on repeating the cycle of the words.

Hopefully, you try out some of these forms of meditation and they help aid in your relaxation during the semester.

Oooommm

Welcome back everyone! I hope that all your spring breaks were relaxing enough for you to help you make it through the next six or so weeks of classes and then final exams. I went to Gainesville, Georgia for a Spring Training trip with the crew team, so I did a little more work than I am used to on a break, but it was a great time! Better yet, the weather allowed for shorts and a t-shirt every day, in comparison to this winter Iceland where three layers isn’t enough some days. Unfortunately, until mother nature decided, we will all have to make do with what we get :(.

As our arsenal of yoga poses and practices increase and the semester moves on, I am planning to move into some meditation practices and possibly talk a little bit about the history of Yoga to spice things up a bit!

With that being said, I want to start by taking the time to explain what the purpose of meditation is, because when speaking of it in terms of Yoga, it is not defined as contemplation or deep thought; rather, meditation deals with resting one’s mind. When practiced properly, it is supposed to give a euphoric feeling of consciousness that differs from what you normally feel in your day-to-day life. During meditation, you are still fully awake and conscious; however, your focus is shifted into yourself instead of the events occurring externally. In a way, it being selfish enough to take fifteen to twenty minutes (or more if you are feeling it) to concentration on nothing but yourself. It’s human nature to be curious. From the moment we are born, we are exploring that world around us, very rarely do we ever take the time to examine the world within us. In my opinion, meditation is one of the hardest aspects of Yoga to practice. With the hustle and bustle of school, work, friends and family, it is hard to stop your mind from wandering or skipping ahead to plan what is going on tomorrow.

With the non-stop motion of life, the key to successful meditation is learning how to be still. Think about it: when was the last time you were still? Personally, I am one of those people that shake their leg when sitting which is the closest to still I come on some days. The first step of finding stillness is learning to be comfortable being motionless. (yes, this means learning to ignore that insistent need to get the itch on the tip of your nose). When motionless, most people sit in your imaginable meditating Buddha pose with legs in the crisscross-applesauce formation and hands resting comfortably on the knees, but you do not have to sit this way if you aren’t comfortable with it. After you achieve the level of comfort needed, you must then find a quiet place void of distractions. This could be your dorm room during times your roommate has class or even a quiet area in the library. Meditation also it involves focusing on your breath (like many aspects of Yoga). Lastly, when meditating in general, it is important to make sure you don’t get lost in the river of thoughts that is constantly running through your mind. When a thought comes up, simply acknowledge it for what it is at face value and allow it to move on without getting caught up in it.

In future posts, I will discuss some of the various type of meditations practiced in more depth, which will help give you all a more structured system for meditation. Until next time, I will leave you with the majestic words of University of Pennsylvania’s team muscle coach’s words: “calm feet make a calm mind.”

Restorative Yoga

The day we have all been waiting for is finally upon us…the last day before break. I could not be more excited for a whole week of not having to worry about the stress of a full course load of work weighing me down. With that in mind, I want to talk Restorative Yoga. This has a very special place in my heart. As I mentioned in some of my earlier posts, I did the second summer session this past year and took KINES 077 (aka Yoga I). If you are lucky enough to get the chance to take this course do it, it was one of the most relaxing (and easiest) courses that I took. Every day the class we began with laying on the mat for anywhere between 10 and 15 minutes of breathing techniques I have discussed in previous posts and meditation. So, every class was great, but nothing beat Friday’s classes. Each Friday we would do Restorative Yoga. Basically, this meant that we would come into class and participate in extended postures that take the level of relaxation from a 7 up to a 10. The only problem with the classes was that I had to snap myself out of the relaxed trance to actually make the rest of my day productive. The postures that we focused on were mostly prolonged (10-15 minutes) child’s pose, crocodile, pigeon pose, etc., however, in addition to the steps I previously discussed, Restorative Yoga poses rely heavily on the use of props such as blankets and neck pillows. The main posture that we would focus on was Supta Baddha Konasana (reclining angle pose) and this pose is going to be taught today.

The Steps…

  1. For this pose, you are going to need some props including: about four thick blankets (you could also use a body pillow), a strap (or something that can be used to hold your feet together), a neck pillow, and two blocks (something to support your legs).
  2. Set the blankets (or body pillow) up on the floor horizontally allowing your back to be raised slightly off the ground. Next, bind your feet together and open your legs out (almost in the shape of a diamond) and place the support structures under your knees. Finally place the neck pillow onto the blankets so there is no gap between your neck and the blankets to avoid any neck pain.
  3. Take a moment to ensure that while you are laying back you are not uncomfortable. A slight twinge in the beginning can become a large pain after 10 or 15 minutes of not moving. Make any adjustments you feel necessary now.
  4. Finally, take a moment to center your breathing before settling into the pose. Once into it, hold this pose for about 20 minutes to get a full felling of relaxation and rejuvenation.

Hopefully everyone has an amazing spring break, whether it is planned with exotic travels or a simple staycation, make the most of it! Restorative Yoga will be a great way to ensure that you are ready to power through the rest of the semester!

Hatha vs Vinyasa

Hey everyone,welcome back! I hope that you all had an amazing time at THON, I know that I did! Hopefully the Warrior posture were helpful in stretching your legs before or after you were standing for hours on end. This week I’m going to deviate from the typical practice of teaching a yoga pose or breathing technique and I’m going to talk about two different types of yoga that are practiced: Vinyasa and Hatha. If anyone read had look on the Penn State Fitness Schedule I linked to one of the previous posts, you may have seen these two names being thrown around and wondered what they are.

To start, I will tell you all about the similarities between the two types of yoga. Both of the two variations still work on the same core values of yoga that were discussed in the three part blog series “Yoga’s Recipie” early in the last semester (Go check them out if you have not already!). The also both work to increase an individual’s overall health, strength, flexibility, and mental strength. Also, the postures that are practiced in each are usually the same variations of asana such as Downward-Facing Dog, the warrior poses, Triangle and Bridge (which I will be discussing shortly). Additionally, they each usually use a systematic flow of these poses in orders usually called salutation (for example, sun or moon salutations). Obviously, depending on which type of salutation the class incorporates, there may be slight variations to the type of poses encompassed.

Moving on to the difference, I will start with Vinyasa, as it is the harder of the two types I am discussing. This practice is very fast paced in comparison to Hatha. When moving through the motions of Vinyasa, it is extremely important to have a good control over your breathing. In this practice, you are typically changing from one pose to another with each exhale and inhale. For example, you would inhale into Downward-Facing Dog and then on the exhale you would move into a lunge position before moving into Warrior I on the next inhale. The fast paced movement causes for this form of yoga to be very strenuous; however, in this type of class there is typically more of a flow that can be formed. It also is more of a heart-pumping, sweat-dripping class. In Hatha Yoga, on the other hand, the poses are held for a longer duration of breaths. The number of breaths range, but most of the classes that I have been in hold them from anywhere between 5-10 breaths, like you would do if you were practicing one of the poses I’ve discussed. With this in mind, this type of class allows for a more relaxing practice. It also allows for you to take the time to better stretch areas that you would like and take the time to ensure that you can focus on the form of the pose. I also believe that this practice helps to increase your flexibility better than Vinyasa.

Personally, I would recommend starting off with Hatha Yoga classes. The added breaths in between the poses is beneficial to people who are just starting off practicing because it allows them to get acquainted to the various postures at a slower rate. Then, once comfortable with that, you could transition into Vinyasa to add a little spice to your work out. Let me know what you guys think about these class types if you have ever been to any of them! If you haven’t, I definitely suggest Hatha Yoga 8-9PM Mondays in the white building with Lindsay.

Warrior Poses

Welcome back to Yoga Yourself! I’m sure that everyone is as excited for THON this weekend as I am. Being that there is no sitting, we are going to be doing A LOT of standing in the days to come. With this in mind, everyone is going to want to strengthen their legs and give them a good stretch. So, I am going to continue our lesson on the warrior poses.

The next one up is Warrior II. This one is basically just a more difficult deviation from Warrior I, so hopefully you practiced this one a little bit over the past week. Warrior II, similarly to Warrior I, stretches the legs and it can help with lower back pain. Let’s get into it!

Warrior I steps…

  1.     Just as in Warrior I, start by standing at the center of your mat. Remember, take the time now to focus on your breathing, especially have and equal count for both your exhale and inhale.
  2.     Next, turn to one side (left or right) and step your feet as far apart from each other as you can. While doing this, turn your front foot perpendicular (90 degrees) to your front foot. Your back foot will most likely feel more comfortable being shifted in (probably at a 45 degree angel).
  3.     Then, raise your arms horizontally outward and gaze toward the hand that is in front of your face while shifting forward on your front leg (making sure to keep the knee above or behind the ankle, bad things happen if you don’t do this). Here you should start to feel the stretch in legs and possibly the lower back.
  4.     Repeat this to the opposite side, holding each for about 5 breaths.

A quick note: unlike in Warrior I, your hips are not facing toward the front of the room, they are straight with your legs.

Also, if you are having difficulty doing this posture, you can opt to shorten the stance that you so your legs are closer together.

Moving on, Warrior III is much more difficult in the rankings. Just a warning, it’s going to take an extreme amount of balance and some core strength never hurt. This posture will stretch you legs the most.

Warrior III Steps…

  1.     Just as in the other warrior postures, Warrior III beings in the front of your mat. Again, take the time to focus on your breathing. This will be especially important for this posture because of the amount of balance that it requires.
  2.     Next, shift your weight onto one leg and feel yourself become rooted in the ground through this foot.
  3.     Following that, raise your other foot and extend it behind your body. As you do this, raise your arms and lower your torso onto a horizontal (as straight as you can) plane. At this point your leg, upper body and arms should be a straight line.
  4.     Hold this pose for about 5 breaths (or as long as you can) and then repeat this for the other leg.

Trust me when I say that this is a difficult pose so it’s perfectly ok if you don’t get it at first. The key is practice. You may also try having your arms at your side rather than extended out in front of you if this helps. Also, to help with the balance try to engage your core and fix your gaze on a specific spot on the ground that is not moving.

Hopefully, with a combination of the warrior poses everyone will be able to ready themselves for the weekend to come. Have fun at THON, FTK!


Spring Break Countdown: 14 days

Warrior I

Welcome back to Yoga Yourself! I hope everyone’s semester is off to a great start. I just had my first week of tests and am looking forward to the salvation of the weekend!

I’m assuming that, like me, many of you are counting down the days until Spring Break. (It’s 21 if you count the weekends and 15 if you only count the actual days of classes for those of you who aren’t, now you can start!) Unfortunately, until then, we must still persevere and struggle through the daily grind of our workload. So, this week I am going to teach you to channel your inner warrior to help conquer your inner procrastination monkey (flashback to last semester’s TED unit).

There are three warrior poses and like most series, they tend to increase in difficulty In this post, I am going to teach you Warrior I, the easiest of the three.

The Steps…

  1.     Beginning by standing at the top of your mat. Take a moment to ground yourself here before transitioning into a high lunge. You can have you back foot raised or, if it is more comfortable, turned perpendicularly to your front foot and resting on the mat.
  2.     Once comfortable in the high lunge, place your hand (with elbows bent) on your hips and make sure they are aligned facing the front of the room.
  3.     Then, raise your arms above your head with your palms facing each other. Additionally, you may gaze up towards the ceiling to release any tension that you may feel in your neck.
  4.     For more of a stretch, you can bring your palms together and arch your back stretching the upper torso slightly back.

This pose is great for strengthening your legs, a needed trait at this point in the semester when the workload is starting to weigh you down.  

New York City Style

Hey everyone! Hopefully you’ve been practice your breathing, and, if you are new to the blog, have give a look over the past postures from last semester because as this semester advances, so too will asana discussed. Today is one of the first postures that will use a past practice (downward dog) to move into one of my personal favorite poses: Pigeon Pose. The steps I am discussing are just one variation of the pose which works to really stretch and open up your hips.

The steps…

  1. Start on your hands and knees in the center of your mat and take a moment to focus your breathing.
  2. From here, move into downward dog and take a few breaths to stretch the hamstrings and get your muscles warmed up.
  3. Then inhale and extend one leg straight out behind you. Moving from this, on the exhale, draw your knee to the parallel shoulder while simultaneously twisting the leg so that your ankle is resting on the mat as close to the opposite sides hand as you can manage.
  4. Now, ensure that your hips are facing forward and if possible place your forearms on the ground and lay down over the leg to get a full feeling stretch. If you can’t do this, no problem! Just lay over the knee as far as you can.
  5. Repeat these steps for the opposite leg holding the stretch for about 5 breaths.

This is a great pose to help open up your hips. It also can also function as a lower back stretch if you are capable of laying over the leg.

Hopefully you all enjoy this pose as much as I do and are able to incorporate it into your yoga routine if you have one. Also, I thought I should mention that anyone who has a fitness membership to the gyms here on campus also has access to yoga class offered almost every day. I highly recommend give one a try!

MOO-MOW: Cat-Cow Pose

Hey guys, hopefully everyone preparing themselves (both mentally and physically) for the massive amounts of food that’s going to be consumed this Thanksgiving. To go along with your preparation, I wanted to teach you guys a stretch that will focus on spine flexibility and abdominal strength. Both of which are going to be extremely crucial to prevent back pain from holding the food baby you are going to be adopting after the Thanksgiving feast. The pose is called Cat-Cow and is extremely simple to master.

The Steps…

  1. Start on you hands and knees with your naval in the center of your mat, knees under your hips and wrists under your shoulders (this will even out the pressure you are placing on these places in your body).
  2. Then, transition into cow by curling your toes under and raising your tailbone while dropping your stomach. You may choose to look upward to get a fuller stretch.
  3. After a few breathes, transition back into the starting position.
  4. Following this, you will transition into cat by lowering the tops of your feet to the floor and rounding your spine by bringing your pelvis and tailbone forward.
  5. These steps can then be repeated multiple times, transitioning between inhales and exhales or another pattern of breathing you find comfortable.

When doing this, you should be able to feel your vertebrae transition between the movements. This will help to ensure a good stretch of the spine.

I hope that with the proper practice of this posture and some of the previously mentioned poses (possibly child’s pose and cobra) you will be able to manage the surplus of wait that will be hitting your stomachs this Thanksgiving Break.

about-a3-catcow-019-570d44f83df78c7d9e3c571e about-a2-catcow-017-570d44f55f9b581408773407

Cow                                                                        Cat

Skip to toolbar