• Log In
 Visit the Pennsylvania State University Home Page

XR Explorations

By Alex Fatemi

Non-Human Avatar Development

A while back, while working on the IVAN project, I developed a simple non-human character for use in the experience’s tutorial. A small floating screen with a line that approximates soundwaves as it “speaks”. This character was meant to provide a focus point in the tutorial and experiment with using the current avatar tech I had been working on with a non-human character. original non-humanoid

We’ve decided recently to begin earnestly developing this character into something that can be used in more experiences. As such, we opened things up to a group discussion on changes and ideas to explore with it, as well as naming the character. From our discussions a few names have come up, but I’m currently leaning on the name “Customizable Immersive Experience Liason – CIEL”. As part of the exploration, I took a lot of the ideas for changes and tried mixing and matching various ones onto new versions of CIEL as seen below. THese changes ranged from changing the antenna of CIEL to changing the screen to look more like an oscilloscope than it already does.

new CIEL concepting

After some more discussion, I also took a shot at a more drastically changed design from my colleague who made her own concept art. This one is more inspired by old Macintosh computers and even has some coloration design to it that we can modify as needed. Of course, all the experimental bits from before may also apply to this version of CIEL, so further testing and development is sure to follow.

alternate CIEL concept

Soon we’re hoping to have this new version of CIEL finalized so we can bring it into new projects going forward. One such project we specifically started this process for involves attempting to utilize AI chat programs within Unity and having a “talk” with an NPC character in an AR space. The issue with this project was that a humanoid character wouldn’t know how to properly emote from just AI text prompts, so we decided it’d be a perfect job for CIEL, who can speak without emoting and still come across as charming and appealing.

Home Well Experience for Farm Show

This is a small summary for my part in the VR experience we developed for a local Farm Show with members of the College of Agricultural Science. They wanted a VR guide through the mechanics of a home well system. My part, as usual, was in the development of the 3D assets and working out animation concepts.

The structure of the well is very simple, a cylinder running deep under a plane. A hole was cut into the plane to allow for an “elevator” to be placed that the users would ride down into the well, observing the way the structure changes and goes through layers of material. It was decided after some testing that cutting the cylinder in half longways, with the pipes of the well dipped into the center point, created a more pleasing effect of “going underground”. I also added a layer above all the ground parts that would be used to showcase water flowing through the sediment so it could pool at the bottom.

full view in maya

The parts of the well itself were modeled in more detail as they’d be examined closely. All piping and layers of grout or cement were chopped in half so they could later be toggled on and off to create cross sectional views.

well cross section

The top of the well was left mostly empty, using just a large grass plane around the center point of the well. A “house” was added to the top to give a sense of how far out the well should be and demonstrate where the outward heading pipe was going. The house being just a flat PNG worked surprisingly well.

top of well

The only major technical hurdle that came up was the effect of the water filling the ground. Initially, I created an effect that was convincing within Maya using a layered shader (that is, one using two shaders that interact with each other). One half had the lattice of the water flowing through the sediment while the other had a mask that was half transparent and half solid. Then, by scaling the mask up and down, it created an illusion of flow with the water as it filled in the space of the object covering all the walls. This proved to be an issue in Unity, however, as this kind of layered shader is not commonly available. The solution wound up being surprisingly simple though: just adding an additional object. I called it the “water curtain” and gave it a script I found for masking specific objects, even when the object on top is transparent. Essentially I split the layered shader into two objects: the base water which is actually always present, and the masking object sitting in front of it that we move and scale to create the flowing effect. This mask worked super well and we’ve already started considering other ways to use this script in some other projects.water curtain

Overall, the project went very smoothly. After passing the assets off to my coworker to do the functionality, we got the result to the Farm Show with minimal issues. We’re excited to do more work with the College of Ag Science in the future.

Environmental Development 2022

With the fiscal year coming to an end, I want to go over some of the environmental development works we’ve done for various projects I haven’t yet covered on the blog. There’s been a few different smaller projects and experiments that involved creating some varied VR spaces.

First, a modification of an old project space. The office from the IVAN project actually works very well for many small office experiences. One such experience we’re working on required an interview space, so we consolidated the IVAN environment and removed the excess models/materials to have a simple office package.

office space overhead

office space side

Next up, we have a small café environment we’re developing for another nutrition based project, this time involving the Oculus’ visual passthrough to test mixed reality eating. I’ll probably be making a more in depth post about this at a later point, but for here’s a sample of how the café shaped up, with some placeholder NPC characters around to create more atmosphere.

cafe

Finally, we go into a more fantastical concept. For this project, we’re exploring the effects of misinformation within a VR space. As such, we needed to create our own “VR Hub” like one would find in a game like VR Chat. We had several concepts we worked through, before deciding on this open, circular design partially inspired by the level selection hub from Crash Bandicoot 3, with spokes leading to different “portals” to other VR worlds. There’s also two variations of the world, one with more realistic texturing and one with flat 2D textures as part of the experiment.

misinfo hub full

misinfo hub toon

Developing 3D Areas from Point Cloud Data

We took some time recently for an experiment in digitizing a bit of Penn State’s campus through the use of point cloud data. By taking a lot of images of the area and putting them through a program, we generated a fairly large point cloud of one of the greenhouses on campus. From there, the point cloud was given to me as a blocky 3D mesh and I attempted to make a workable VR environment from it. There were a lot of issues in the process however which we need to keep in mind when going forward with future attempts.

To start, here’s one of the images of the greenhouse from the data gathering.

real greenhouse

A few big issues stand out that came up from the choice of location. Firstly, the point cloud really did NOT like recreating the semi-transparent tarp the greenhouse is wrapped in. This may have also been due to the fact that the chosen area was simply too large. The resulting point cloud had some clear features present and captured the ground well enough, but the top part was almost entirely missing. A bigger issue that came up, however, was that we couldn’t get the color values of the point cloud to transfer over to Maya correctly. As a result, I ended up having to work off of an incomplete grey blob of a mesh. The point cloud was also absolutely massive in Maya, which would have been an issue if not for the high end computer I use for CIE work.

how it imported

It wasn’t all bad, however. There was enough visible structure to get the most important thing down here: the shape of the area. Luckily, despite the size, the greenhouse is structurally a simple pattern of metal frames lined up with the tarp on top. Within the point cloud, even without color, you can clearly make out where the metal frames jut out from the rest of the data, which let me create the greenhouse’s “skeleton” fairly easily. Then it was a simple matter to put the tarp part on top and match the ground shape somewhat. This is the general benefit of using the point cloud as everything comes out at least proportionally right. The scale was a bit off but as long as I had one point of reference with a measurable value (i.e. a doorway) I could scale everything else up to match it.

wip greenhouse

After this I went in and did some refining to make the ground match the point cloud well enough. Since the plants couldn’t be discerned from the ground in the point cloud, I just followed a general shape with some grooves. I also added in more details from the structure of the greenhouse like the black cloth on the sides and some props (i.e. the boxes in the back and hoses going along the length). This was also a chance to try some simple plant modeling with the spinach present in the greenhouse. I created two leaf patterns and arranged them in two different setups. Once in Unity, I made prefabs of the plants and spread them all along the rows in somewhat random patterns. I also gave them a script to randomize the scale and rotation of each plant somewhat to create some more variation. At this point, most of what I was doing was based more on the real picture references we had rather than anything of the point cloud data. After all the material application and cleanup, the final result turned out pretty well. The overall proportions are very close to the original, though some aspects clearly didn’t transfer over cleanly.

greenhouse in Unity

Overall, this process has some promise but I think we need to pick our subjects a bit better. A higher quality point cloud would certainly provide better results, which would mean it’d be better to pick a smaller area that can have a finer detail count. Getting the colors into Maya would also help immensely as that would let me more easily differentiate parts of the cloud when it’s not super clear like with the ground vs the plants. The big takeaway should really be that point cloud data is only really good for expediting some initial setups within the modeling though. It only helps with getting the proportional placement of things quickly. Once those objects are placed, everything else was better handled via just looking at the direct reference photo.

Microsoft Rocketbox Avatar Library Review

Recently I took a look at Microsoft’s publicly released “Rocketbox Avatar Library”. Developed and released specifically for research applications with a focus on VR, it seems like an excellet tool to add to the Center for Immersive Experiences catalogue. From my explorations, I’ve come to the conclusion that it is indeed something we’ll get use out of, though there are aspects of it that are limiting so it is not a wholesale solution or replacement for use making our own custom designed avatars. In this post, I’ll go into detail about the pros and cons of this library.

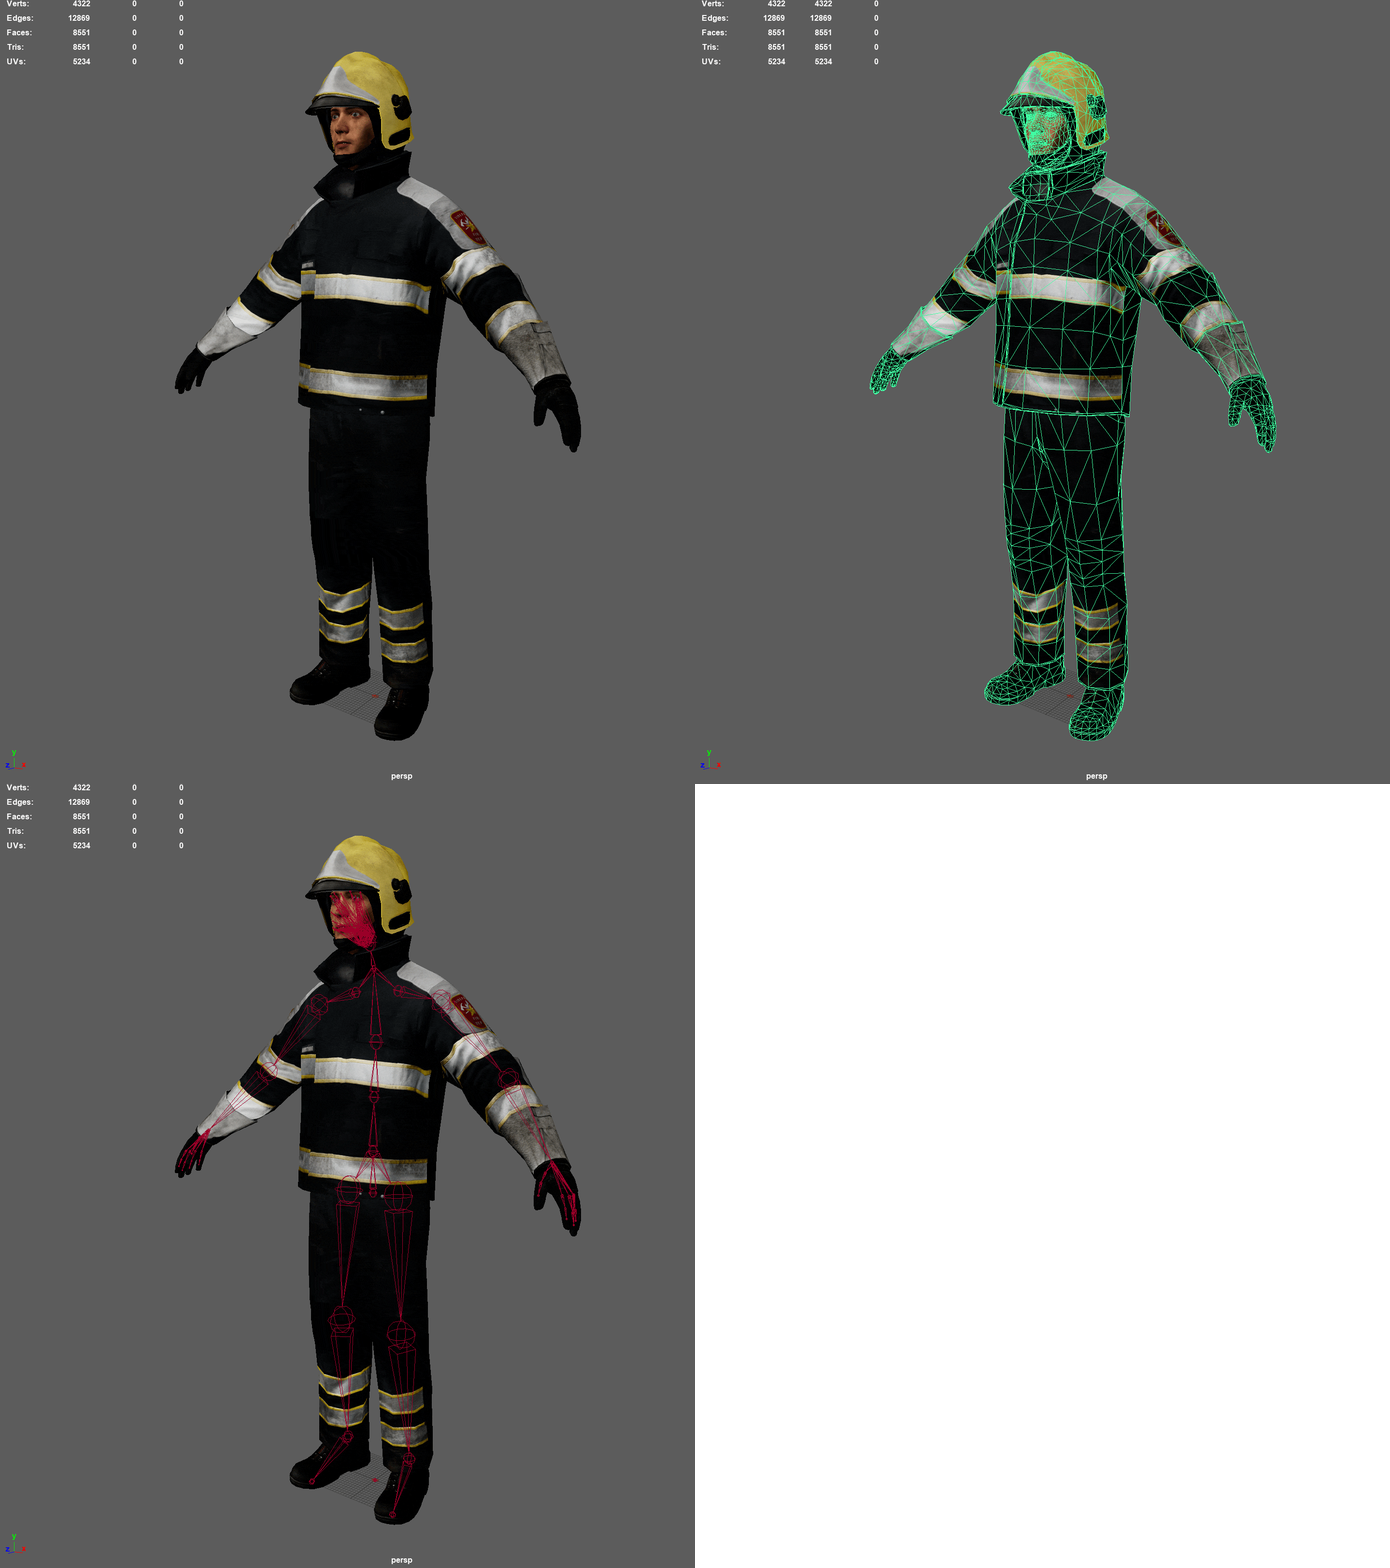
First, let’s talk about the structure itself. The Rocketbox collection comes with over 100 avatars ranging from various occupations, gender, race, age, etc. It even includes some animal avatars for use. Also included in the package is all the textures for the avatars, their source files (in .max format), and a large collection of animations for the humanoid avatars, images of each avatar for easy lookup, and scripts to assist in Unity and Unreal integration. Each human avatar also comes in two varieties: one using a full facial rig for facial animation and one using facial Blendshapes. This adds up to a very massive 26 GB repository of assets. Luckily, it is quite well organized making it easy to find the assets you’re looking for as needed. This means that for our uses, it’s best to just take what avatars we need on a project by project basis and create new isolated packages of them. This is required due to some other issues I’ll be going into anyways, so it works out in the end regardless.

Rocketbox Avatar Showcase

Moving onto the quality of the avatars themselves: they’re highly professional and very well made. All avatars are incredibly efficient in their polygons and come with high quality textures with color, normal and specular maps. They are also fully rigged with well weighted skeletons that allow for very simple and clean animation. As stated above, each humanoid also comes in two versions: face rig and Blendshape. There’s benefits to both of these styles depending on the use. Full face rigs allow for more detailed animation and programmatic nuances like allowing for face-tracking possibilities. On the other hand, Blendhapes allow for easier setup of automated systems like emotional overlays and talk loops. Salsa Lipsync, the plugin we’ve been using focuses on Blendshapes, so we’ll likely be using those ones for the most part.
The main issue with the models and rigs is the lack of customization options. The avatars are built in an incredibly efficient way, which includes making them all singular meshes. Their clothing is hard modeled into their bodies, not being able to be separated or swapped around like you can with custom made CC3 characters. This lack of customization also applies to their style: all the avatars have a sort of “realistic” look. Not quite an extreme level of realism like some CC3 characters, but convincing enough. The detail on them can be a bit uncanny in some lighting though. Changing their textures is certainly possible, though it would certainly be limited by the extents of the model, especially if they have specific work outfits. These issues make it clear that these characters aren’t really built for being the primary focus of an experience. Under close inspection they likely would come off as off-putting. But as background models or distant characters meant to fill in a virtual environment, they should work quite well. If a more “stylized” look is needed, we can also use similar techniques to modify their textures to what I did with high fidelity food models prior.

Showcase of Rocketbox characters in Unity

Moving on, let’s talk about implementation. As stated, the collection comes with scripts to assist in the transfer into Unity and Unreal. The Unity script is very welcome after my initial explorations in Maya of the models. Another issue with them that had me worried was their naming structures for the bones. It was very messy which could have had issues within Unity. However, library came with an editor script that specifically goes into the avatar’s skeleton and renames things as best suited for Unity. This made the automated processes of turning the avatars into Humanoid rigs smooth. As such, actually bringing them into a scene is a simple click and drag. A similar process of standardizing them to the characters I made before is also easily possible, with one exception I’ll go into in the cons below. Within Unity, even in URP, the characters look great. Opacity on hair and other map issues are all automatically resolved without issues from what I’ve seen. The animations included in the library are also easy to process in a similar way and apply to our character animation trees. They seem to be similar to the animations that can be found on Mixamo.
Cons on the implementation side involve some issues with the naming conventions of other aspects not addressed in the Unity Editor script, and the limitations of the animation library. While the skeleton is renamed and fixed up, there’s no standard “mesh” naming scheme among the avatars like there is in the CC3 characters. As such, if left alone we can’t share Blendshape animation details among them. This is a fairly simple fix however, as I just need to give them a similar name among them. This does still need to be it’s own animation set as opposed to the CC3 characters though due to the Blendshape nodes within the characters themselves being very different. With the animation library, a similar issue of lacking customization comes up. The animations are high quality, but also very high keyframed, meaning editing them is hard to do within Unity itself. Even in Maya there’s issues that can come up with trying to customize such premade animations. We’ll need to consider our options when it comes to what animations we want to apply to the characters. One last minor con is in how the characters use their eyes. While they do have eyeball joints, their eyes are semi-spheres rather than full spheres. Meaning with my eye tracking script, it is possible to turn their eyes so much the edge becomes visible. This could be fixed in a few ways if it ever becomes a real problem, so for now we won’t worry about it.

As a final positive note, I want to talk about their animal models a bit. The provided animals range vastly from multiple types of dogs, to chickens, to even camels. These characters obviously don’t have animations with them due to not using humanoid rigs. However, they are all still well rigged. The chicken for example has full bird wing joints going to wings hidden within the model. This allows for some animations where the wings come out that should be rather convincing when not examined closely. I can easily see many situations where some simple looping animations would be possible to make the animals fit into a virtual environment. I’m really excited for the potential with them.

Demonstration of animation on Rocketbox characters

Overall, the Microsoft Rocketbox Avatar Library is a fantastic tool. It will provide us with a lot of useful assets for fleshing out environments with characters. While they have limitations that keep them from being the main focus of an experience, they still provide plenty of utility as props within an experience. Using both the premade avatars from the Rocketbox collection and our custom made characters will give us many new avenues of exploration.

Character Creation Pipeline 2022

We’ve started work on a variety of other projects requiring a few new approaches to aspects. First one I’ll be discussing here is our updated pipeline utilizing Character Creator 3 and modern URP Unity.

Creation aspects within CC3 haven’t changed too much since my post back in 2020 on the subject. We are using some new bases and outfits, but overall the creation process is the same, including clothing reduction and game-ready base model within CC3 once finished building the character up. What starts to change up is in our export. Overall a lot of the settings are the same: Clothed FBX export “To Unity 3D”, with or without LoD based on use case. Turns out we don’t have to include the T-Pose every time now as that seems to be set up properly regardless.

Within Unity is the real update. It seems over the last couple years Reallusion themselves dropped their personal pipeline support for newer versions of Unity. Instead, they released the plugin source code and some other members of the Reallusion forum took it upon themselves to develop a solution for the various Unity pipelines, including the Universal Render Pipeline we at CIE are focusing on. Luckily, the solution is set up in a convenient Git Package which we have become well versed in integrating to our projects. This new solution also comes with some unique aspects and options that we’ll be looking into in the future, but for now the main factors is the automatic Prefab setup that is similar to the old system. Unlike that system, this one easily supports multiple character imports, organizing them into a list for easy switching and applying the construction process. It also sets up all the materials for proper URP readability.

From there, cleanup on the models is fairly simple. First, a quick texture fix needed for these stylized models. For some reason the occlusion map on the eye comes in at 100%, causing the area around the eyeball to be darkened to the point it turns black. This may work for subtle eye movements where the eye doesn’t move much as it creates a nice shading effect, but with larger eye movements the forced shadow becomes obviously off. Turning this down or off is required for these characters at least.

Next is a new setup for the character animator to make sharing animations easier: the main body is given a “CharAnim” controller that contains the Humanoid rig animation data we’ve gone over before. This allows them all to use the same humanoid animations made by the Center or pulled from Mixamo. Back when first talking about this character pipeline I mentioned issues with the Blendshape animation not being able to share between characters. I didn’t realize it at the time, but the solution was quite simple: using a second animator entirely for Blendshapes. Every CC3 character is structured the same way, with a unique name on the top level but sharing the name of the pieces beneath, particularly “CC_Base_Body”. This is the skin of the character and where the Blendshape data is actually controlled. The reason I couldn’t share the animation data between things before was cause I was trying to do it from the same top level animator. As such, every character had a unique path to their Blendshapes (i.e. “Neurtal_Female_Base/CC_Base_Body” vs “Neurtal_Male_Base/CC_Base_Body”). By creating a second animator on the CC_Base_Body object itself, the path is now uniform, meaning every CC3 character can share Blendshapes as long as they all have those Blendshapes named the same way (which they do by default). So we can place things like blinking and mood shifting into this animator and connect it to the Dialogue System I developed to work with these previously.

Finally we apply the eye tracker setup I used previously. Take two Empty Objects from the positions of the eye joints and pull them forward. Create a new Empty Object under the facial joint so it remains connected when not tracking that is between the two eye objects. Place the eye objects under this tracker. Then simply apply Look At constraints to the eye Joints, pointing them at the original Empty Objects we dragged from their position. Make sure the eyes are facing forward in the Look At and the eyes should now track the Tracker as it moves. Then I put the simple “Eye Tracker” script I put together on the tracker object which creates a gizmo for easy visualizing and the option to stick the Tracker to a specific object in the scene (i.e. the Player Camera).

All of this means we now have a much more streamlined pipeline for getting characters into our projects. This was done based on one we’re working on which will involve interacting with stylized characters that use the same model but different skin tones, so we needed a nice process for developing nuance with iterations within the characters. Below is the WIP characters we developed to start with as we established this updated pipeline. We’ll share more about the project as it gets going, but for now, the system is progressing smoothly.


Model Fidelity Exploration

As part of our continuing research explorations with the College of Health and Human Sciences, we decided to run an experiment involving participant reactions to virtual models of food. This was to see if there was a notable difference in how a participant would react to a “high fidelity” virtual food and a “low fidelity” version of the same food. If the difference turns out to be not as substantial as we assumed, then it opens up more development options using lower fidelity models and unique stylization without worrying about these options affecting their reaction as to how it presents as food. To that end, I set up a pipeline to take high fidelity photogrammetry models we purchased and reduce their visual quality through removal of details and stylization.

The models were purchased through Turbosquid. We went with this model package from evermotion as it included a lot of high quality food objects that clearly used real photographs for the modeling and texturing to provide a good high quality standard to start with. We wanted the high and low fidelity versions to remain relatively close for the sake of comparison, and when it comes to something like that it is much easier to remove detail from something than it is to add it. This reduction process started with some experimentation in reducing the poly count of the objects and modifying the textures through various methods.

Poly reduction is an automatic process that can easily be applied to all sorts of models. The percentage some get decreased had to be adjusted due to some models being more or less poly dense. For example, the bread above was easily dropped through a 90% poly reduction as the original was fairly dense and the shape allowed for way fewer polygons while retaining relatively the same form. But when tried with some grape models in the package we bought, where each grape was a lower poly sphere, the reduction had to be reduced to around 50% or else the grapes began to just turn into cubes or triangles.

The texture reduction took a bit more processing. The first attempt was done by merely reducing the actual image quality of the texture. This effect somewhat works, but the result wasn’t quite as strong as we had hoped to make it appear “less detailed”. After a while, I found a good process in applying the Cutout filter in Photoshop. The filter settings had to be adjusted on a case by case basis with each food (some contained more colors or small details than others that were lost with lower Cutout settings) but overall the process of applying the Cutout option to each food texture worked perfectly to reduce the fidelity of the foods while retaining just enough visual distinction.

As one final step of obstruction to lower the visual fidelity of the food, a toon shader was applied within Unity. A toon shader is a material shader that takes lighting effects within the program and applies them along flat levels onto the texture. So rather than having smooth shading on the object, it is shaded in steps based on certain light thresholds. This creates a kind of “flat” look to the object when set up properly. Toon shaders also include an outline around the object to make it stand out distinctly. For this project, we used the Flat Kit package from Dustyroom, purchased through the Unity Asset Store. The result when paired with the lower poly models and cutout textures was a perfect balance of reducing the quality of the models while retaining just enough fidelity to tell they are the same food object. This pipeline provided us a ton of food options for this small study along with some tools we may use in the future if we desire projects using some more stylized setups.

Nutrition Project Part 2 – Realistically Scaled Modeling

Haven’t talked about the progress with the Nutrition project in a while. The experience is now in full production mode and on the research side the prep for the study is well under way. As a part of the production work I’ve started tackling issues involving developing a stronger sense of realism to the experience, particularly in the scale of the food models. As we want things to translate from the VR experience to the real world, we need to enforce a strong sense of proper scale to the food items to match their caloric and weight value. As scale is a relative concept, this means we have to ensure the entire scene is of a realistic scale.

[Read more…]

Further Avatar Development

Showcased below are some new avatars I’ve developed for CIE projects. We’re currently looking into the strengths and weaknesses between realistic and stylized avatars.

floatingAvatars

standingAvatars

[Read more…]

WRXR Rocket Experience (VRTK Implementation 4 of 4)

It’s been a long time since I made a post about the WRXR project. To start, the project is pretty much finished at this point. Any further work will be use adjustments once things get back to some sense of normalcy and we can actually get people testing the project where it is meant to be used. Below is a video running through current experience in full, minus any personal explorations.

[Read more…]

  • 1
  • 2
  • Next Page »

Recent Posts

  • Non-Human Avatar Development
  • Home Well Experience for Farm Show
  • Environmental Development 2022
  • Developing 3D Areas from Point Cloud Data
  • Microsoft Rocketbox Avatar Library Review

Recent Comments

    Archives

    • February 2023
    • August 2022
    • June 2022
    • February 2022
    • September 2021
    • August 2021
    • November 2020
    • October 2020
    • August 2020
    • July 2020
    • June 2020
    • May 2020
    • April 2020
    • March 2020
    • January 2020
    • December 2019
    • November 2019
    • October 2019

    Categories

    • Assets
    • Mechanics
    • Personal Exploration
    • Pipeline Development
    • Project Development
    • Research Exploration
    • Uncategorized

    Meta

    • Log in
    • Entries feed
    • Comments feed
    • WordPress.org
     Visit the Pennsylvania State University Home Page
    Copyright 2026 © The Pennsylvania State University Privacy Non-Discrimination Equal Opportunity Accessibility Legal