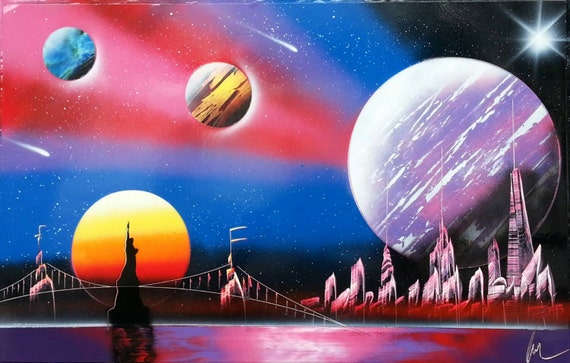
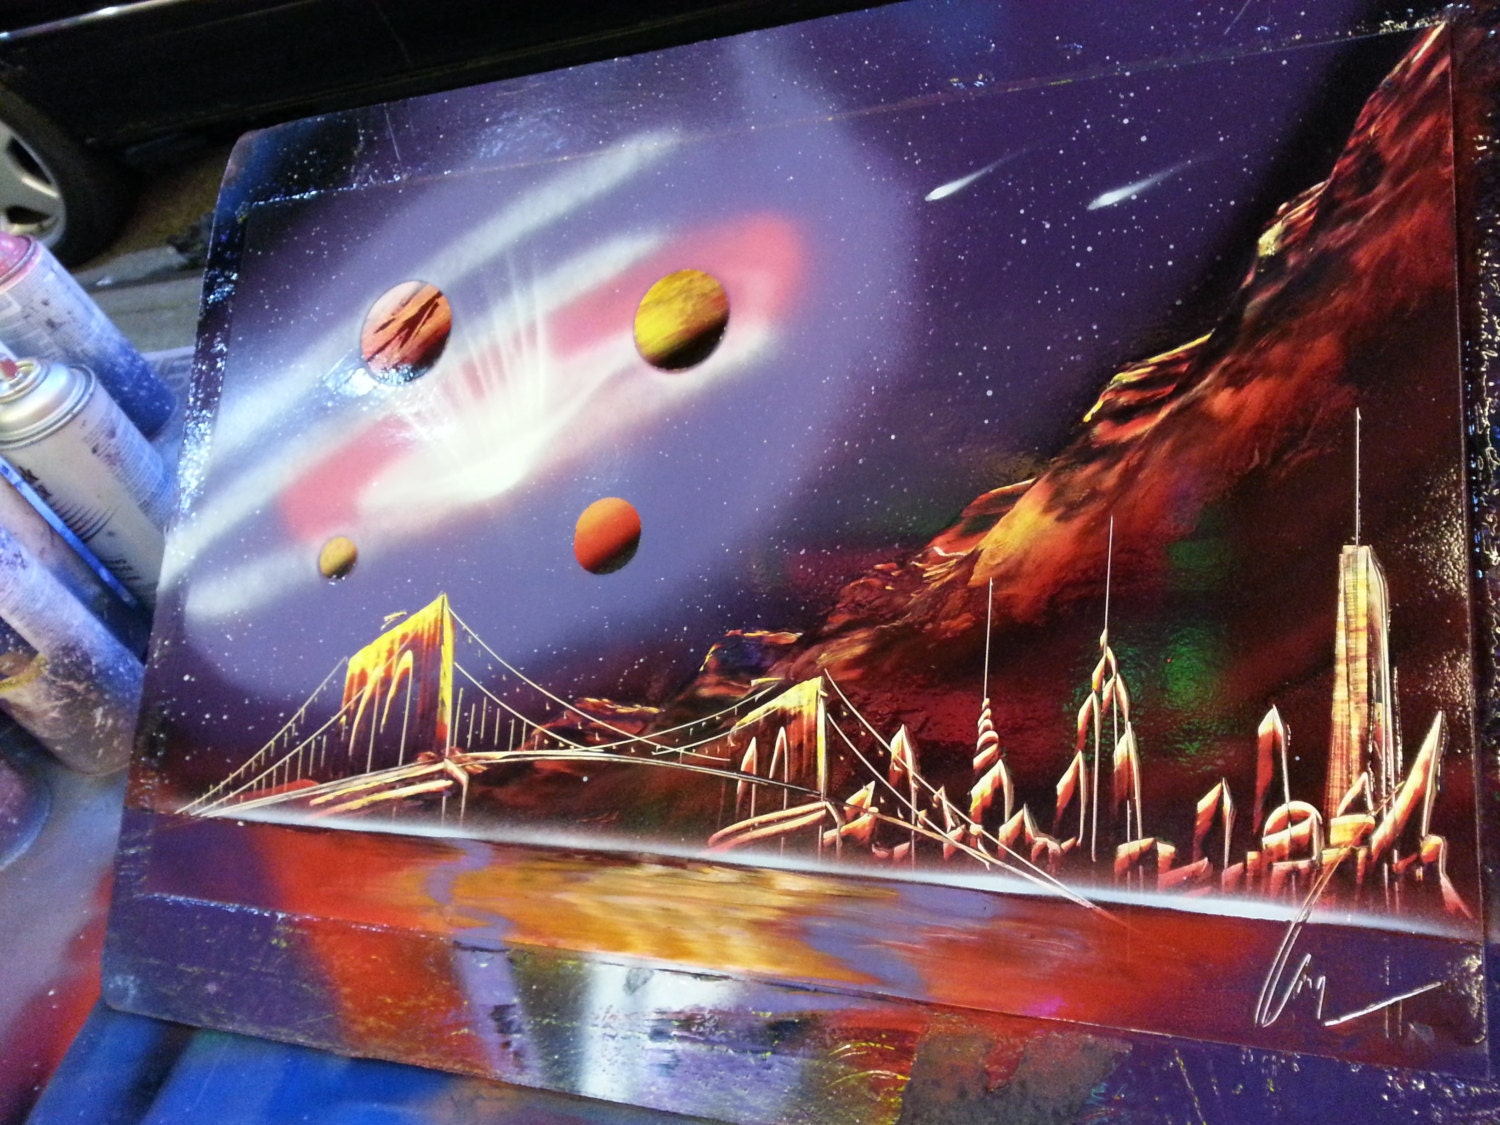
Ever since I was little, I have always admired the people who sit on the boardwalk and do art, specifically those who spray paint. If you have never seen or experienced this, I have attached some example pictures below:


I have always wanted to learn some of the techniques that these artists use to produce these pieces and, finally, I am able to do so. It seems so complicated at first, however the more I watch the process the more simplified it actually seems. The materials that are needed are things that you can obtain from any local art store, such as Michael’s or AC Moore:
Materials:
- 3M Mask 502: this is important for the finish of the piece
- Spray Paints: A commonly used brand is Rust-Oleum Painter’s Touch (which again can be purchased at any local art store); you can pick the colors you want, such as black, white, yellow, red, silver, purple, metallic blue, etc.
- Poster Board: this is what you will be spray painting on. You can get this from Target or, again, any art store. Make sure you use the glossy side when you start painting
- plastic pots, cans, lids, or anything with a round shape and raised or hollow side so it doesn’t touch the paint when it’s placed over the painting. Also, make sure that you obtain different sized lids/round shaped objects so that you can vary the sizes of the planets you paint
- newspaper
- gloves
- small piece of thick paper (anything like a magazine cover will work)
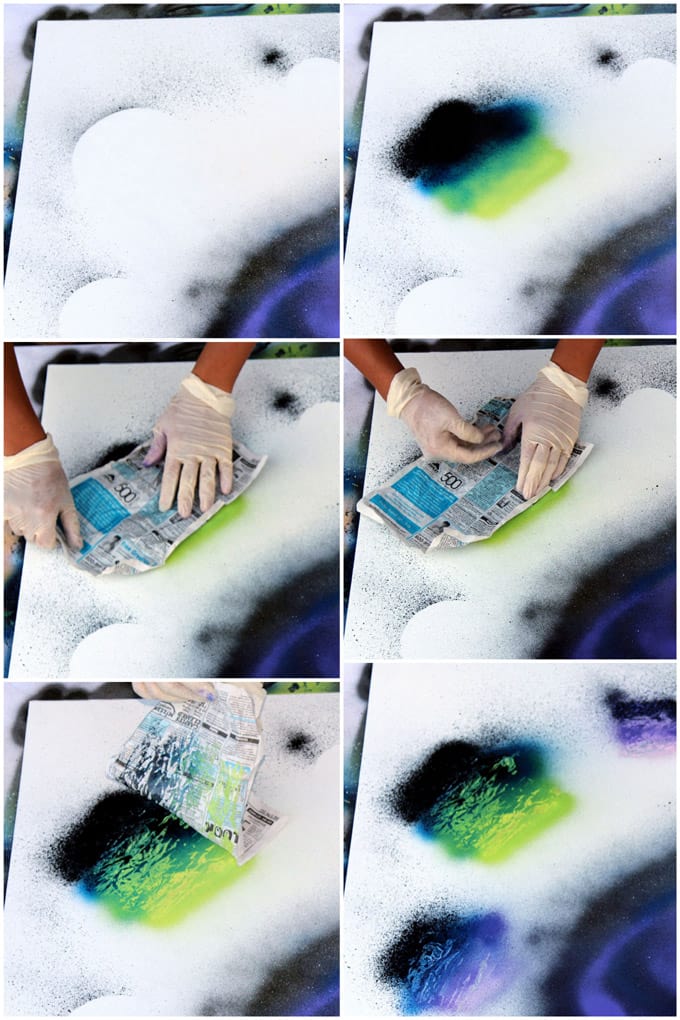
One of the central aspects of this type of artwork is the planets:
- Place your desired sized circular object where you want the planet to be in the piece and spray a little bit of black paint around the circular object so that the location is marked
- Take the circular object off of the piece
- Choose the planet you wait to paint first and the colors that you want to incorporate into it (pick about 3/4 colors). If you want a darker planet, start with the lightest color and quickly go to the next darkest shade until you get to the darkest, overlapping adjacent colors as needed. If you want a lighter planet, you could start with the darkest colors and get progressively lighter
- Don’t be too concerned with staying within the lines of the planet you marked. This won’t really matter later
- While the paint is wet, quickly crumble up a piece of newspaper, open it, and lay it on top of the area of the planet that you painted
- Carefully run your fingers over the top of the paper. Then life the paper off of the planet
- This will lift off some of the paint and create a texture for the planet
- **Repeat this Process for all of the planets you marked on your piece. Here is a detailed picture of this process if there were any steps that were a little bit confusing as well**
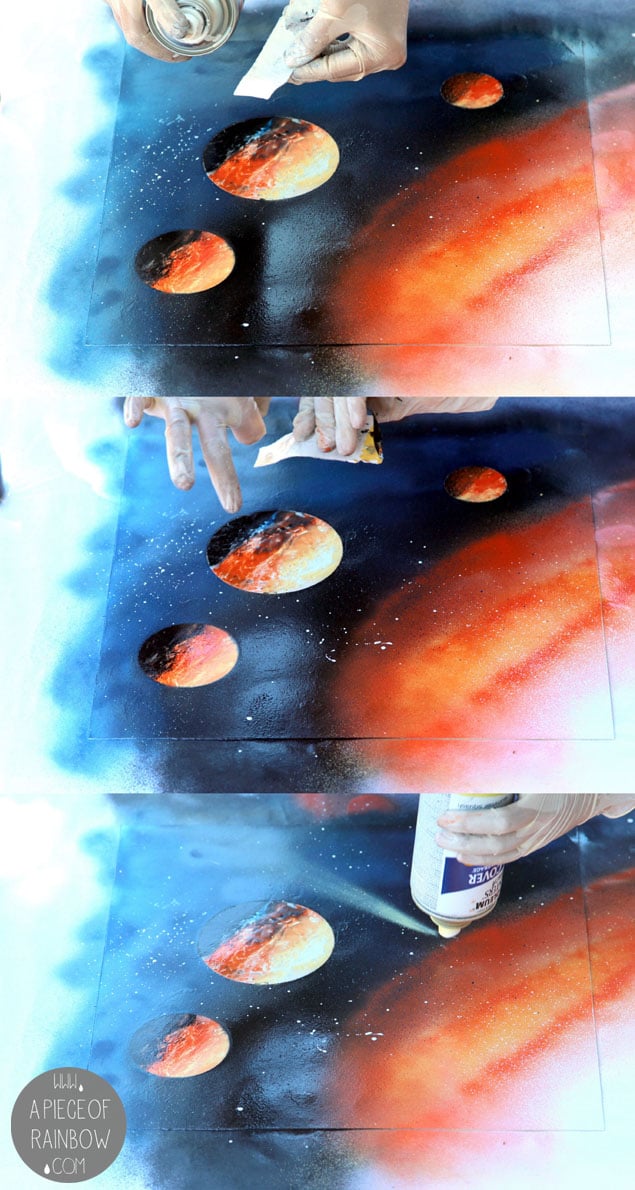
The next essential aspect of the painting is the background (aka Space):
- Cover the planets back up with the exact same circular objects you used to mark them in Step 1
- To paint space in the background, start from the corner of the piece with darker colors (such as black then blue in this order) and progress to lighter colors (such as orange then yellow then pink).
- Note that the colors are your choice. These are just some good options if you want to create the feeling of light moving through space
After you are satisfied with the colors of the background you have created, you can move on to other aspects of space and the background of this piece, such as the stars and comets
- To create stars: spray white paint onto a small piece of thick paper (such as a magazine cover)
- There should be a good amount of paint on the paper but not too much for the paint to drip
- Face the side of the paper with the wet paint down right above where you want to place the stars and tap the back of the piece of paper (kind of like splatter paint)
- To create comets: place the spray paint can filled with the color you want the comet to be (preferably white) upside down, face the nozzle of the can towards the direction of the comet, and quickly tap the bottom of the can
- These steps are a little confusing so here’s a picture of what I mean by this:
I really hope you enjoyed this passion blog; I know I did 🙂 Can’t wait to try this simple process overbreak when I actually have free time lol
– Em
For more info go to : https://www.apieceofrainbow.com/diy-spray-paint-art/2/
I saw the pictures first and immediately thought of the boardwalk artists that are honestly so fun to watch. I never thought that anyone, but the street artists could do this. I think this would be so fun to try in the summer and might actually be possible for someone as artistically challenged as I am.
Emily,
Those spray paint projects are really neat. I think the way the colors blend and the dusty texture patterns make it very unique. The process of making this art is surprisingly simple, although I must say it probably requires quite a bit of time and attention to detail.
I literally have no artistic capabilities whatsoever but your instruction were so easy to follow and I don’t think I can screw it up. I always thought that artists on the boardwalkl are just naturally talented and have a certain affinity to creating these images but after reading your blog, I definitely want to check out the process.
There are dozens of YouTube videos that demonstrate basic spraypaint art techniques. What makes you think your instructions are useful since you can’t actually perform the techniques very well yourself? Attempting to instruct with a couple of paragraphs and a few photos is useless since you have no real idea of what you’re doing. You might want to become proficient in the basics before think you’re ready to teach anybody anything. For example, your approach to making comets is the least realistic technique there is. Your other lame instructions are less than rudimentary and you leave out some essential information for the easiest parts of the craft. Also, the paint you recommend is useful for some things and worthless for others. Basically, you have no idea what you’re talking about. Just because I can play “Row, row, row your boat” on the guitar doesn’t mean I’m ready to start giving guitar lessons to others. You are a perfect example of the “Dunning-Kruger effect”. You should look it up if you dont know what it is. After all, ignorance is bliss. For others who want to learn spraypaint art, this individual knows next to nothing and that’s exactly what you will learn from her.