The Cobra

Welcome back! Hopefully by now you have started to work a yoga routine with the previously discussed postures in this blog. Today I want to add another more core-centered movement to that list, so hopefully you’re all ready! I know summer far off but it’s never too early start working on that summer bod ;). The movement is called cobra.

The steps…

  1. Lie on your stomach on the center of your mat face down. Take a moment to focus on your breathing and to clear your mind.
  2. Point your toes behind you and bring your legs together in order to have your legs straight.
  3. Next, bring your hand in toward the center of your body with your palms pressing into the floor.
  4. Inhale and raise your torso off the ground by pressing your palms into the ground and opening your chest outward by bringing your shoulders back and look upward towards the sky. Your lower body (pelvis and legs) and hands should be the only body parts in contact with the floor.
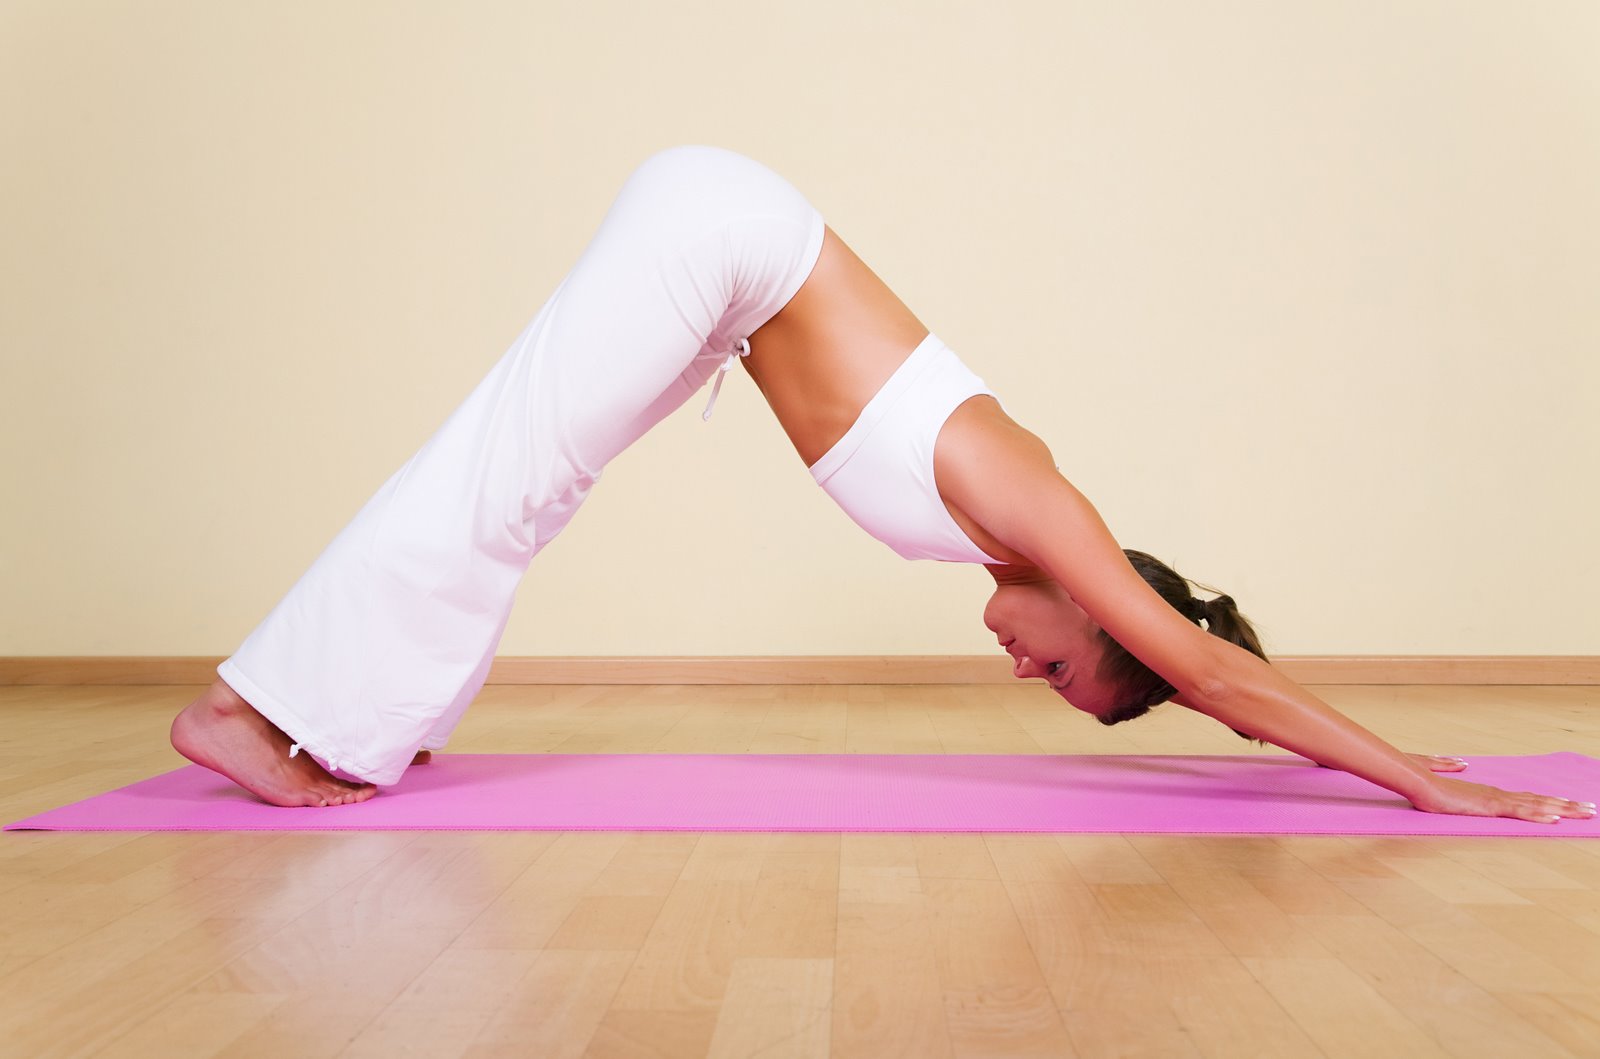
  5. Hold this for 30-60 seconds and transition into another pose such as downward dog afterwards.

In this pose, the weight is going to be mainly centered in your hips and lower pelvis region so, if you have problems in this region, I would advise you to withhold from this posture completely or at least not go fully up into it. This posture is extremely good for stretching the lower back. For an extra stretch, in the pose, look over the left shoulder for a few seconds and then switch to the right.

This is a great addition to any work out. Enjoy!

cobra-yoga-pose

Swayin’ in the Breeze

Hey guys! This week I’m coming at you with another more complex posture but not because you need strength to hold it. The asana practice I am going to be teaching you is called “tree pose,” and unlike those taught before, this movement is all about balance. My best advice if you’re typically off balance: pick a spot of the floor and focus on it and your breathing. If you have balance, then this shouldn’t be too difficult.

The steps…

  1. To begin, walk to the front of your mat and ground yourself through your feet into the base of yourtree-pose2 mat.
  2. Next, center your weight as evenly as possible and take a moment to focus on breathing properly.
  3. Following that, shift the weight of your body onto your right foot and slowly begin to bring the left foot off of the ground and have it rest in a comfortable position on the right leg. Important note: resting your foot on your knee will cause serious problems; however, anywhere above or below it are acceptable.
  4. Once in a comfortable position, take a moment to find a natural spot to fix your gaze. Your hands may rest on your hip bone, float above your head (like branches), or in any other position comfortable for you.
  5. When ready to release this pose, slowly repeat these steps when shifting to the opposite leg.

To modify this pose if you lack the balance to stay up, try standing with a wall at your back for extra support in keeping you upright, or rather than lifting your foot as high, try lowering it to rest just above your ankle.

Hopefully, you had enough balance, or the modifications worked well enough, to become a sturdy tree, or at least one swaying in the breeze!

Breathing, It’s harder than you think

I’m assuming many of you read the title and thought something along the line of “I know how to breathe. I’ve been doing it my whole life.” Well you’ve probably been doing it wrong (at least I was). It may seem hard to do something you don’t even need to think about, but if you place one of your hands on your belly-button and take a deep breath it becomes clear. Now, notice: did you breathe from your nose; did your stomach expand; did the breath fill your body? If you answered no to any of these questions, in terms of practicing yoga, you breathe wrong (sorry to break it to you).

In yoga, breathing guides movements so it is important that it is done properly. Breathing through your nose prepares the air prior to reaching your lungs. I understand this may be impossible to do if you suffer from allergies. If that’s the case, you may have no choice in the matter. For those who can, a fun fact about breathing in from your nose is that each nostrilbreathing-exercise does not take in an equal amount of air and typically they switch in dominance about every hour and a half.  To test this, simply cover one nostril and breath from the other alternating between the two. Moving on, allowing your stomach to expand stabilizes you and releases tension on your upper body. Lastly, allowing yourself breathe to fill your body may be a harder concept to grasp. When you breathe, you should feel three “diaphragms” open. The most obvious is your actual diaphragm, but before this you have the “vocal diaphragm,” and after there is the “pelvic diaphragm.” When you breathe, focus your concentration to these areas to see if you can feel the movement in each region.

Overall, this may seem new  -and slightly absurd – but it really makes a difference in helping relax your body as fully as possible.

Upper-level: Up-Dog

Hey guys! Hopefully you’ve been practicing some of the postures that we’ve talked about previously because this week’s pose is a little more difficult than the rest. I call it up-dog (I think it’s really called upward-facing dog), and it’s almost the opposite of downward-facing dog. This posture works to open the chest and truly puts your core strength to the test.

The steps…

  1. To start this, lie prone with your naval in the middle of your mat (once you get the movement down, you could also start in other postures like downward dog)
  2. Next, place your feet soles facing toward the ceiling.
  3. Then, place your palms about shoulder-width apart and elbows bent perpendicular to the floor.
  4. Now, simultaneously press into the mat with your feet and lift your body up. Also, it is important to draw your shoulder blades together and down (don’t over-do this motion).
  5. Your chest should naturally open up, allow this to happen, and if it is not too much of a strain on your neck you may want to shift your gaze toward the ceiling.
  6. At this point, the only parts of your body that touch the mat should be your hands and feet. Your knees and lower legs should be slightly off the floor.

After reading this, you could probably assume that this puts a significant amount of pressure on the wrists. It goes without saying but I’ll say it just to make sure you know, if you feel discomfort stop the pose. Give it an honest effort but remember, this is the most complex posture we’ve discussed thus far so, if you are having trouble with it, don’t be afraid to look up a “How To” video. b917b65828ed4b74

Yoga’s Recipe Part 2: The Potatoes

It’s time to add to our pot! Continuing on the eight limbs of yoga, the main discussion of this blog will be the niyamas (the potatoes of our recipe, if you will). If you remember from the last time we discussed the limbs of yoga, the yamas focused on “the moral values of your life in the treatment of others and yourself.” Similarly to the yamas, the niyamas also have five subcategories; that said, they focus on how to live “soulfully.” They include: shaucha, santosha, tapas, swadhyaya, and ishvarapranidhana.

Starting off, shaucha, or purity, deals with being clean in mind and body. To achieve this, you should be focused on refraining from eating junk along with participating in or watching acts that are negative to yourselves. Moving on, shaucha, more easily translated as contentment, deals with accepting your current situation. This does not mean become complacent; when following this, you should still have aspirations, yet they should just be able to accept that work is still needed to attain these dreams. Moreover, swadhyaya, translated to “self-study,” pertains to anything that makes you analyze yoursef. This could be anything from rethinking your major to looking at your strengths and weaknesses. This is important to do to ensure that one is living a life that is fulfilling themselves. Lastly, we have ishvarapranidhana: the idea of putting meaning behind your life. Actions speak louder than words, but actions with no purpose get you nowhere.

So, we almost have everything that we need to finish our recipe. Now that you know about the niyamas and yamas, we know how to live morally and soulfully. In the final part of this piece, I’ll discuss the final six limbs of yoga and finally complete the meal.

Relaxation 101

In this post, I want to teach two basic relaxation postures in yoga. I think most have heard of the one, child’s pose, but the second (probably more obscured) may be new to most, crocodile pose. These two posture can be worked into a work out or daily life for periods to steady breathing a feel a sense of relaxation.

The steps to child’s pose…

  1. Start on hands and knees with your naval in the center of the mat.
  2. Next, while keeping your hands extend and shoulder with apart, touch your big toes together and spread your knees apart. While doing this, bring your knees down and rest your butt on your heels.
  3. Then, make sure your arms are extended wide and knees are spread far enough apart to allow for your stomach to expand when breathing. Rest your head on the mat and relax.

Modification: rather than having arms outstretched, you may choose to rest your arms to the side of your body with palms facing upward.

If a deeper stretch is sough, you may wish to spread your knees wider or have a friend place slight pressure on the sacrum.

The steps to crocodile…

  1. Start by lying down on your stomach with feet relaxed behind you.
  2. Then, cross your arms underneath your head
  3. Finally, rest the forehead on your wrists.

Modifications: In this pose, you may also, rather than resting on your wrists, raise your shoulders and rest your chin in the palms of your hands.

While in either of these poses, to get the maximum amount of relaxation focus on breathing fully with equal inhales and exhales. Hopefully these posture will give an outlet for relaxation in your busy and stressful day! makarasana4Crocodile Pose

The Low-Down on the Downward Dog

In addition to explaining the core concepts of yoga, I want to teach some basic yoga postures: the first of which is the downward dog.

Downward dog is one of the main postures in any salutation or basic flow in yoga. Speaking from experience, the posture can be difficult at first, due to the pressure that it places on your hands and understanding the basic components required to perform it properly.

The steps…

  1.     Start in a hands and knees position in the center of your mat. During this, be sure to have your wrists underneath your shoulders and knees under your hips (this helps to alleviate pressure).
  2.     Next, spread your fingers out as if giving a High-5 and extend your arms to the front of your mat. At this point you should be in a child-like posture.
  3.     After this, pick your knees off the floor and raise your pelvis toward the ceiling. Try to distribute your weight as evenly as possible; otherwise, the increased pressure may irritate your wrists.
  4.     Now, your body should be in the shape of an “A” with your heels slightly elevated off the floor (this will vary based on your flexibility) and knees slightly bent.
  5.     Then, imagine as if your hips are simultaneously being pulled up and backwards
  6.     Congratulations! You’re doing the downward dog! To gain more of a stretch you could alternate “walking” your feet by touching the heel of one to your adho-mukha-svanasanamat while bending your other slightly to allow this to happen.

Keep in mind, if this is your first time practicing this pose, it may feel uncomfortable. Give it time. Unlike an actual dog, it takes time to make you feel relaxed and happy.


Yoga’s Recipe Part 1: The Meat

Yoga, as stated previously, encompasses eight so called “limbs.” However, in my opinion, yoga itself is more of a recipe than a tree, because all its aspects work together to balance life. The ingredient list includes eight parts: the yamas and niyamas, asana, pranayama, pratyahara, dharana, dhyana, and samadhi (it’s ok…I can’t pronounce them all either). Sticking with the analogy, the yamas and the niyamas would be the so called “meat and potatoes” of Yoga while the others add the gravy among other factors that keep people coming back for more.

The yamas, has five parts: ahimsa, staya, asteya, brahmacharya, and aparigraha. All of which deal with the moral values of your life in the treatment of others and yourself.  The first, ahimsa, loosely translates into non-harming. Acting upon this in daily life pertains to have compassion towards the world around you, as well as inward benevolence. For instance, recycling when capable or rather than looking in the mirror and zeroing in on “flaws” working to accept yourself for you. The next two, staya, truthfulness, and asteya, not stealing, play into each other. To follow these, one must do the obvious implications (abstaining from cheating, lying, etc.), but also, the sometimes unconsidered aspects, such as not stealing time from others or yourself or being truthful to your belief system regardless of temptations. Brahmacharya, is tricky in two ways: its pronunciation but also understanding. This happens because it is modernly considered to be moderation. Unfortunately, this is a relative term, so it varies for every person. Lastly, the ability to let go, or aparigraha. To complete this, you simply have to allow the universe to turn and for change to happen as it does and, rather than fighting it, accepting it.

Hopefully by now you’ve realized that these practices, and yoga in itself, aren’t a checklist to be marked off as complete. Nor are they meant to fly solo. Let’s be real, what’s a steak without seasoning or the potatoes on the side?

Sweet Beginnings

When you think of yoga, I’m assuming images of complicated postures, hippie dippy instructors, or the scene from Couples Retreat come to mind. At least, that’s what came to mine prior to walking into my first class. Fortunately for me, my expectations were shattered from the moment the instructor walked in. First off, she looked more like my AP Biology teacher than a hippie (not that there’s anything wrong with looking like or being a hippie) and in addition, she spoke of yoga as an ancient science composed of eight limbs, and informed my class that the poses, called Asana, make up only one.94a95e2d252d95c66ea23f926afe271e

“Eight limbs, isn’t this just about the weird stances you see on TV or social media?”—I thought the same thing and I’ll explain all eight in a future post. For now, the main idea is that practicing yoga deals with more than just contorting your body into a pretzel or working up the flexibility to put your leg behind your head. It has to do with a set of life choices, which, in theory, gives those practicing the major principles in day-to-day life a more peaceful and well-rounded experience.

After my many revelations that day, along with starting to practice asana, class was a success and it had far exceeded my expectations. With my first “Namaste” I rolled up the mat and off I went to complete the rest of my day per usual with the added bonus of feeling unexplainably and completely relaxed, a feeling I rarely feel in the midst of the schedule of events I call my day. After that, I was hooked on yoga. Not only for the increased flexibility, but the overall ability to escape from the commotion of life into myself rather than having to rely on a book or a TV show.

My best advice: go try out a yoga class, it may surprise you!

Passion Possibilities

One possible theme for my “Passion Blog”, and probably the one I will end up choosing, is Yoga. Over the summer, I attended Penn State during Summer Session II and took BIOL 110 and KINES 077: Yoga 1. For as entertaining as Biology may seem, I, not surprisingly, enjoyed the stress relieving and relaxation periods that were allotted during the class. Throughout the class, the instructor taught not only the postures (Asana) but also meditation and breathing techniques that can be practice almost anywhere to calm nerves and re-center one’s self. The class also taught a basic understanding of the limbs of Yoga. I enjoyed the class so much that currently, I attend the fitness classes offered by Penn State including Hatha Yoga and Vinyasa Yoga. In each of these classes, I get to further practice Asana and Yoga as a whole. In my blog, I would want to expand upon these ideas and further my interest and knowledge of the ancient practice.

The second possibility that I am considering for my passion blog would be travel. As a whole, my family travels as often as we are possible whether it is exploring within a few hours of our home town, Harveys Lake, PA or around the globe. Preferable, I enjoy to go out of the country or at least into a part of the country who has a different life style than the one in my region. I love being able to compare and contrast the differences between the varying regions. Places that my family and I have traveled include: Chicago, Illinois, Cancun, and San Francisco, CA. If I were to select this blog topic, I would want to focus on comparing life in my region, described as rural Pennsylvania, to that of the numerous places in the world I have or wish to visit.

Skip to toolbar