
Looking for help with a particular Technology topic? Just select the link you want from the list below.
Saving a Draft Before You Publish
Getting Fancy With Posts: Video, Images, Links, Bullets and Markup
Getting Fancy With Comments: Live links and HTML Basics
Changing the Way Your Name Appears on the Blog
Adding Your Headshot To the Blog
Connect to the Penn State Wireless Network
Posting to the Course Blog
We will begin our FAQ where all things begin… at the beginning. In SC200, you’ll be expected to do quite a bit of blogging, so we want to make sure you are comfortable getting in and getting your post on. If you’ve never used the Sites blogging platform, here is what you need to know to get start.
- Go to sites.psu.edu and click the “go to my sites” button. If you are not already logged in with your Penn State userID and password (ex. abc123) you will be prompted to do so.
- Once you login, you will be taken to the blog dashboard page. Every personal and academic blog you have access to post on in sites will appear here. Look for “SiOWfa15: Science in Our World: Certainty and Controversy” and click the “visit” link below it.
- You should now be on the SC200 course site… a strange sequence, since you were obviously here if you were reading this FAQ. But we leave nothing to chance!
- Now that you are logged in, you should see a black toolbar that borders the top of your screen (see image below). Toward the center of that box, you should see “+ New”. If you rollover that link, additional options should drop down. One of those options should be for “Post”. Clickity clack!.

- You should now be looking at a text editor. Give your post a title, add some words (hopefully in a coherent, captivating and grammatically correct way) and when you are finished, click the publish button on the right hand side of the screen. Thats it! Congratulations – internet fame and a good grade in SC200 await you!
Saving a Draft Before You Publish
Whether you can bang out a flawless post in 10 minutes, or you prefer to chip away for hours when you write, saving early and saving often is always good advice. But obviously you don’t want to submit a half written post to the web for everyone to see. Whats a SC200 student to do? The answer, thankfully, is pretty simple.
When you start a new blog post, just change the Publishing Status (on the right side of the screen) to “Draft”. Even if you have already published your post, changing it’s status to draft will take it down from the public course site. As long as your post is in draft mode, you can work on it for as long as you want and you are the only person who will see it. Just remember to change the status back to “Published” when you are finished writing – unpublished drafts won’t be graded. 
Editing Your Posts
Did you write up a fantastic post, only to later realize that you spelled “the” wrong… 12 times? Make reference to a link or an image that you totally forgot to include? Or did you just decide, after a bit of reflection, that you’d like to clarify some of the points you’ve made in an entry? Regardless of the reason, you have the ability to edit any of your posts anytime you need to.
- First, make sure you are logged in to the course blog (follow steps 1-3 in the “Posting to Course Blog section” if you don’t know how to login).
- Once you are logged in, find the post you want to edit on the course blog. At the bottom of that post, you should see a link to “Edit”. Click that link.

- You should now be able to edit you post as needed. Be sure to click “Update” on the right hand side when you are finished – this will save your work and update your post on the site.
Though you can edit entries whenever you want, keep in mind that your Professor will be grading what you’ve written at set times throughout the semester, so making changes to your post after that time may not impact your grade. Check the course schedule for information on blog grading periods.
Advanced Posting and Editing
There is a secondary way you can add or edit the content on the SC200 blog. If you login to sites.psu.edu and click “Dashboard” instead of “Visit”, you will be taken to the blog dashboard page. This is where you would come if you really wanted to customize your own site, as opposed to post content to an existing site, so generally speaking, its not necessary to visit the dashboard page for the SC200 site. So why are we telling you about it at all?
If you need to edit a post that is difficult to find (for example, because its more than a few days old), it can be easier to access it via the dashboard. Once you are on the dashboard, rollover “Posts” on the left hand side of the screen, then select “All Posts”. This will show you a list of all of your posts. Click on the title to make any edits you need. Rolling over the post menu will also let you add new posts, should you choose.
Getting Fancy With Posts: Video, Images, Links, Bullets and Markup
If the year were 1995, plain text might be an acceptable way to post your thoughts on a course blog. But if it were 1995, we’d all be listening to Coolio and watching reruns of Saved By the Bell. The what? Did I lose everyone yet? If you want to draw attention to your posts – spice them up by including media like video clips or images. Add links to other relevant posts, news articles or journal articles. How? Thanks for asking.
Adding Video Clips: Want to add a YouTube clip to your post? Cake. All you need to do is copy the URL to the video clip you want, then post it into the body of your post. When you publish your post (or preview it), the system will take care of the rest. NOTE: WordPress (the system Sites is built on) is designed to easily embed YouTube clips. If you are trying to share video clips from another video sharing service, it may require a bit more work.
Adding Images: When you are writing or editing a blog post, click the “Add Media” button to add in image to your post. “Insert Media” should be highlighted by default (though click it if if not) and make sure to select “Upload File”. Drag the image you want to upload into the space provided and when you are done updating the metadata (if you want) click the “Insert Into Post” button. Two Important Notes on using images:
- Always be mindful when you are using images that you have not created yourself. Copyright is important. Always credit sources when you use someone else’s images and whenever possible, its good practice to use creative commons images. Check out the Media Commons for more information about copyright.
- It might be tempting to click “Insert from URL” instead of “Insert Media” (it is a bit easier). But if you insert an image from a URL, you are relying on whoever posted the image to keep it there. If they ever take it down or move it, your link to the image will break and that could negatively impact your score. Its best to play it safe and upload the image yourself.
Adding Links: To add links to your posts, all you have to do is highlight the text you want to link, then click the link button in your toolbar (it looks like a piece of chain… I see what you did there). Paste the link in the URL space, click “Add Link” and you are good to go. If you do not have any text highlighted, the link button will be greyed out and unavailable. 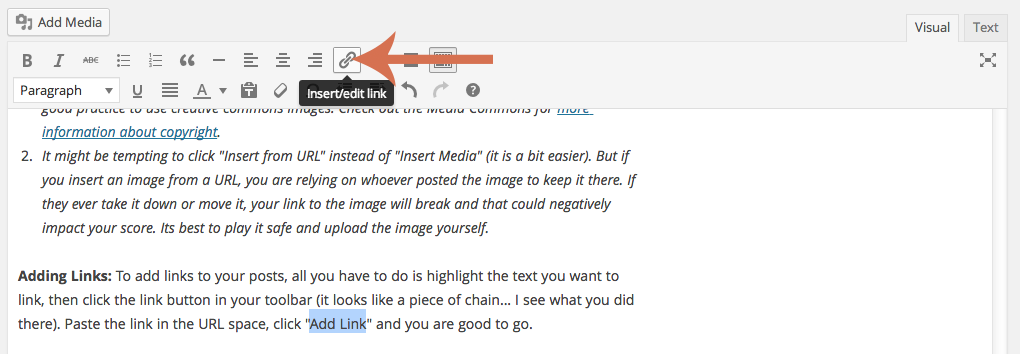 Other Markup: As you can see from the image above, the blog markup toolbar has quite a few options for you to use to edit your text, beyond video, images and links. You can bold or italicize your text, add numbered or bulleted lists, change text color (don’t be a crazy person), add special characters and more. Its not quite as robust as Microsoft Word, but it has most everything you’ll need to format your blog posts the way you want.
Getting Fancy With Comments: Live links and HTML Basics
While the sites platform makes it really easy to kick your posts up with fancy markup, most of those options are not available when commenting on posts. That means you’ll have to roll up your sleeves and use a bit of the programming language of the web, HTML (dun dun DUN) to gussy up your comments.
Links
To add a link to a comment, you use the <a href> tag. There are two elements to linking. 1) Where you want the link to point to, and 2) what you want the link to look like to the end user.
So if I wanted to create a link to psu.edu, this is what I would write:
<a href=”psu.edu”>What you want the link to say</a>
This is how it would appear:
What you want the link to say
Note: for reasons we do not understand, it sometimes does not work if you copy and paste the html code (<a href=”psu.edu”>What you want the link to say</a>). You need to type the code in fresh. Beats us why, but **sometimes** that makes things work…
Obviously you can do a whole lot more with HTML than just links – if you’d like to explore more about HTML, visit the W3Schools HTML Tutorial page.
Blog Entries Not Appearing?
Are you writing great content for the SC200 blog only to have it not appear on the site? Assuming you are not crazy (and you know what happens when you assume), there are two likely reasons why content you have saved is not appearing on the course blog.
Reason #1: You Wrote it On the Wrong Blog For users with more than one Penn State site who use the advanced/ dashboard view (see above) to create content, adding content in the wrong site happens. I mean, it doesn’t happen to us… but no judgement. A simple check if you are worried you are posting to the wrong site is just to look at the black bar on the top of the screen. It should say “SiOWfa15: Science in Our World…..”. If it says something different, you are probably on the wrong site. One quick way to flip between sites is to roll over “My Sites” at the top of the screen to open a list of all sites you currently have access to. If you’ve actually published content to the wrong site, you’ll need to make sure you copy it over.
Reason #2: Your Entry Isn’t Published Some people have set their account to automatically save their posts to draft instead of to publish. Or perhaps you intentionally saved your post as a draft and forgot. Either way, take a look at the “Saving Your Draft Before You Publish” help section to see if your post might be in draft mode.
Changing the Way Your Name Appears on the Blog
Did PSU import your really embarrassing middle name onto the course blog, killing all the sweet street cred you’ve built… from awesome blog posts? The nerve. Thankfully, changing how your name is displayed is a pretty quick fix.
- If you are not already logged into sites, go to sites.psu.edu, click on “Go to my sites” and login with your PSU username and password.
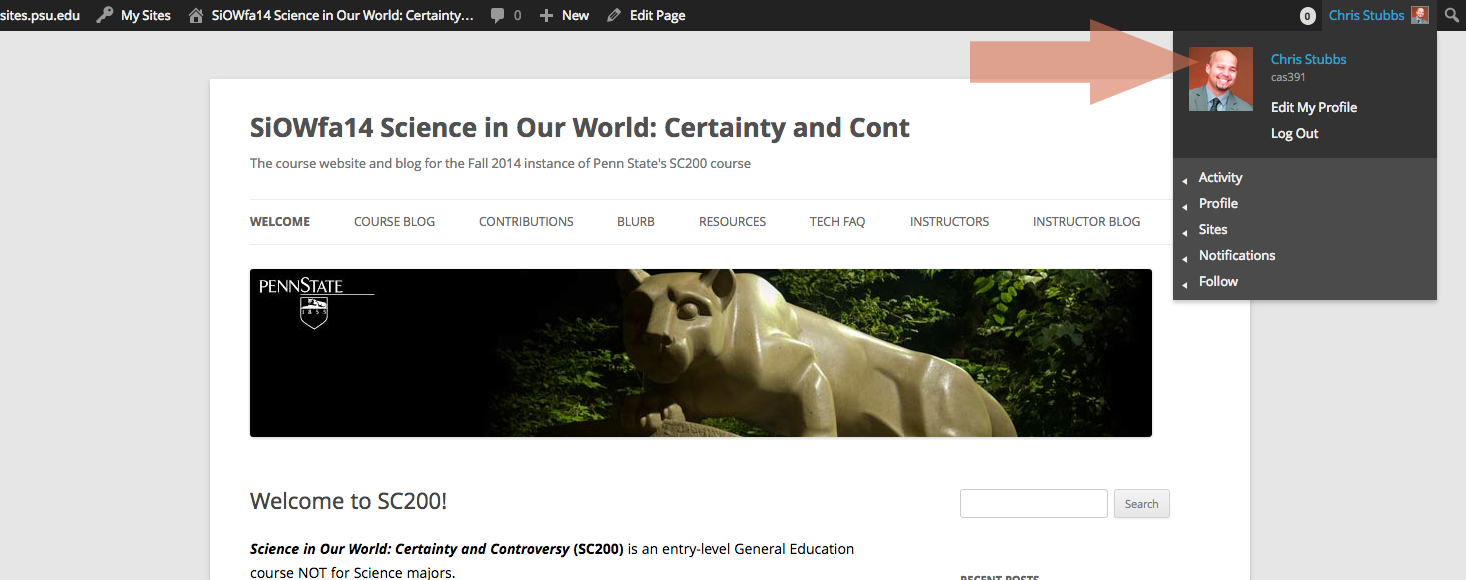
- Look for your name in the top right corner of the screen (it should appear in a thin black box). Roll over your name and a menu should appear – in that menu, click on “Edit My Profile”. (take a look at the next section, “Adding Your Headshot to the Blog” for screenshots on part 2).
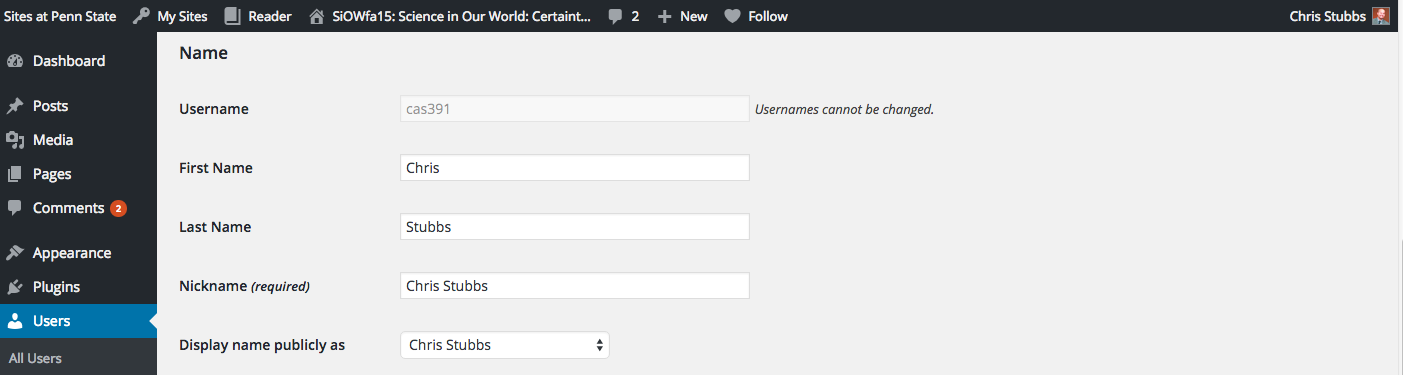
- Scroll down to the Name section of the page. For those of you who want to change your name, this is where they will make the adjustments they’d like. For students whose name does not appear at all, you’ll likely need to fill these fields out.

- There should be a drop down menu that says “Display name publicly as”. Once you have added the name option choices you want, you’ll need to select the one you you want to show to world (you’ll be able to pick from username, first name, last name, last name + first name, or nickname – which is the option most people chose).
- Once finished, you’ll need to scroll to the bottom of the page and click “Update Profile”. Occasionally, depending on computer settings, some students will need to log out of sites and log back in to see the changes.
Adding Your Headshot to the Blog
At some point you may have noticed that some users have swanky headshots that appear next to their entries on the contributions page. Overcome with jealousy, and channeling your favorite bizarre, sudo Shakespearian era english accent you cry out – “hark! Lo that I too might grace the world with my face, in blog form!”. Fear not gentle blogger, we come to you with aid – just follow the steps below.
- If you are not already logged into sites, go to sites.psu.edu, click on “Go to my sites” and login with your PSU username and password.
- Look for your name in the top right corner of the screen (it should appear in a thin black box). Roll over your name and a menu should appear – in that menu, click on your name.

- You should now be looking at a profile screen. The tab labled “profile’ should be highlighted. If not, click it.
- Click the “Change Avatar” button, then upload the image you would like to use for your profile picture. The cheesier the smile the better (see below).

- Once you upload your image, you will be asked to crop it. When you are finished, press the “Crop Image” button and you are all set.
Though you are not obligated to use an actual picture of your face as your profile image, it is a nice way to get to know some of your classmates in a large course like SC200.
Additional Blog Help
If you are having trouble accessing or using the blog, or if you run into some kind of error or just have questions that this tech FAQ can’t answer, visit the sites @ PSU help page to review documentation, ask questions to the sites community, or fill out a help request to get personalized support from our help desk.
Angel Help
If the Angel course management system is new to you, or if you are just looking to figure out what exactly you can do with it, stop by the Angel Help and Information Guide. If you are having a problem with Angel (for example, you can’t login or can’t see your course), submit a ticket to the Angel Support Team.
Connect to the Penn State Wireless Network
If you’d like to connect to Penn State’s wireless network in class (or anywhere else on campus) visit wireless.psu.edu/wireles.html for how to and troubleshooting information. If you are totally lost with getting wireless setup on your laptop or mobile device, ITS also offers stop by support (in 204 Wagner by appointment and in 6 Willard walk in). For more information, check out helpdesk.psu.edu.
Poll Everywhere
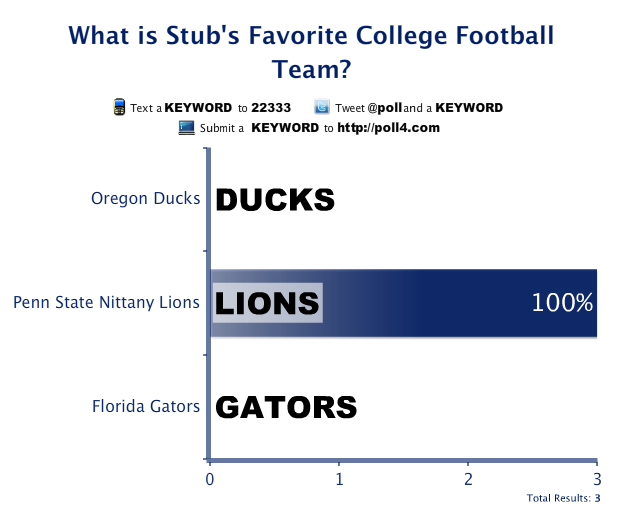
Poll Everywhere is a great tool for giving the audience a chance to be heard during presentations and lectures. How does it work? Very simply actually. Your instructor will create a poll or pose a question to the class. Then text, type, or tweet your response. Not convinced it could possible be so easy? We’ll show you exactly how it works.
At some point during class, your professor will pose an open ended question or a poll to the class. Right underneath the question different options will be available for how to respond (in this case, a number you can text to, an account you can tweet at, or a website you can submit your answer to.

If you are a texting machine (and we know you are… you’re texting right now aren’t you?) then you can text your response to the number provided.

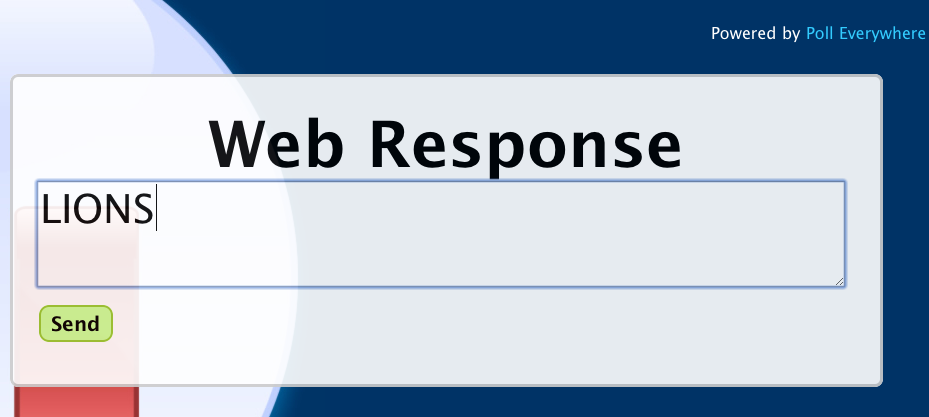
Or if twitter is your fancy, go to twitter.com or open your favorite twitter client, and tweet your response @poll.

Then just sit back and watch in class as the results from you and your classmates roll in. You responses are anonymous to the rest of the class, so feel free to be honest. But always be respectful of your Professor, your classmates, and any guest speakers you may have when using the freedom Poll Everywhere provides.
Last updated Aug 30, 2015