
(Bakin’ and Shakin’)
Here is the second installment of our acorn squash adventure! This may be tricky for all you college students, but I have faith in you! Now, Halloween has long past, but don’t let this deter you from making this super simple and delightfully delicious dish. Acorn squash is still in season; plus it makes a fantastic little addition to a homey Thanksgiving dinner. The seeds of the acorn squash also make a great treat! They are the perfect snack for later and/or a fabulous appetizer for your guests. However, we may have had a few bumps along the way of this edible craft-esque segment of An Utter Craftastrophe…
Alright, you ready? Let’s get squashed (and seeded)!
What you will need for this not-so-daunting task:
- A Squash (acorn squash, specifically) (if buying the squash a bit farther in advance, store it in a cool dark place until use)
- A Knife (something sharp with sharp ridges – because they cut hard things better)
- A Spoon
- Foiled Tin (a.k.a. tin foil – c’mon, folks, I’m trying to fancy things up a bit)
- A Cookie Baking Sheet (or just a baking tin)
- Parmigiano Reggiano (the most Italian of the cheeses – making it the best)
- A Little Salt ‘n Pepper
- Olive Oil
- A Full-Size or Toaster Oven (preheated to 425°F, please)
- Cooking Spray (or, I suppose, you could just use olive oil)
- Frank Sinatra’s and/or Michael Buble’s Christmas Album(s) (Oh wait, too soon? I DON’T THINK SO.)
Step 1: The Slice, Dice, Scoop, and Rinse (It’s like a dance move or something!)
(Preheat your oven to 425°F… NOW!)
Picking your soon-to-be-baked squash is a challenging task! You want something firm and preferably something hopefully tasty. Pick a firm (dark green skin with some orange – and no soft spots) and decently sized acorn squash (you can make multiple acorn squashes – don’t be afraid); then, please proceed to thoroughly clean and wash your selection.

Chop off the top of your acorn squash(es), as shown in the previous section of “The Art of Acorn Squash.” Use a spoon to scoop out all of the seeds and guts of your squash. Set the seeds aside and throw those guts in the garbage (or double dog dare your siblings to eat them for $1 and laugh as they have trouble swallowing the raw nastiness – then just let your dog have them because she is your very own life-like human garbage disposal). Then, lightly rinse out the inside of your squash! Don’t waste your time and tastebuds flooding the squash like I did… all for that one neat picture… Not worth it! After the rinsing, let it dry a bit.

Rinse out the seeds however you see fit! Make sure they are all clean, shiny, and gut free!

Then, dry them out on a towel of some sort. Make sure they are completely dry; otherwise, the soggy seeds will not bake properly.

Step 2: The Half-Baked Scheme
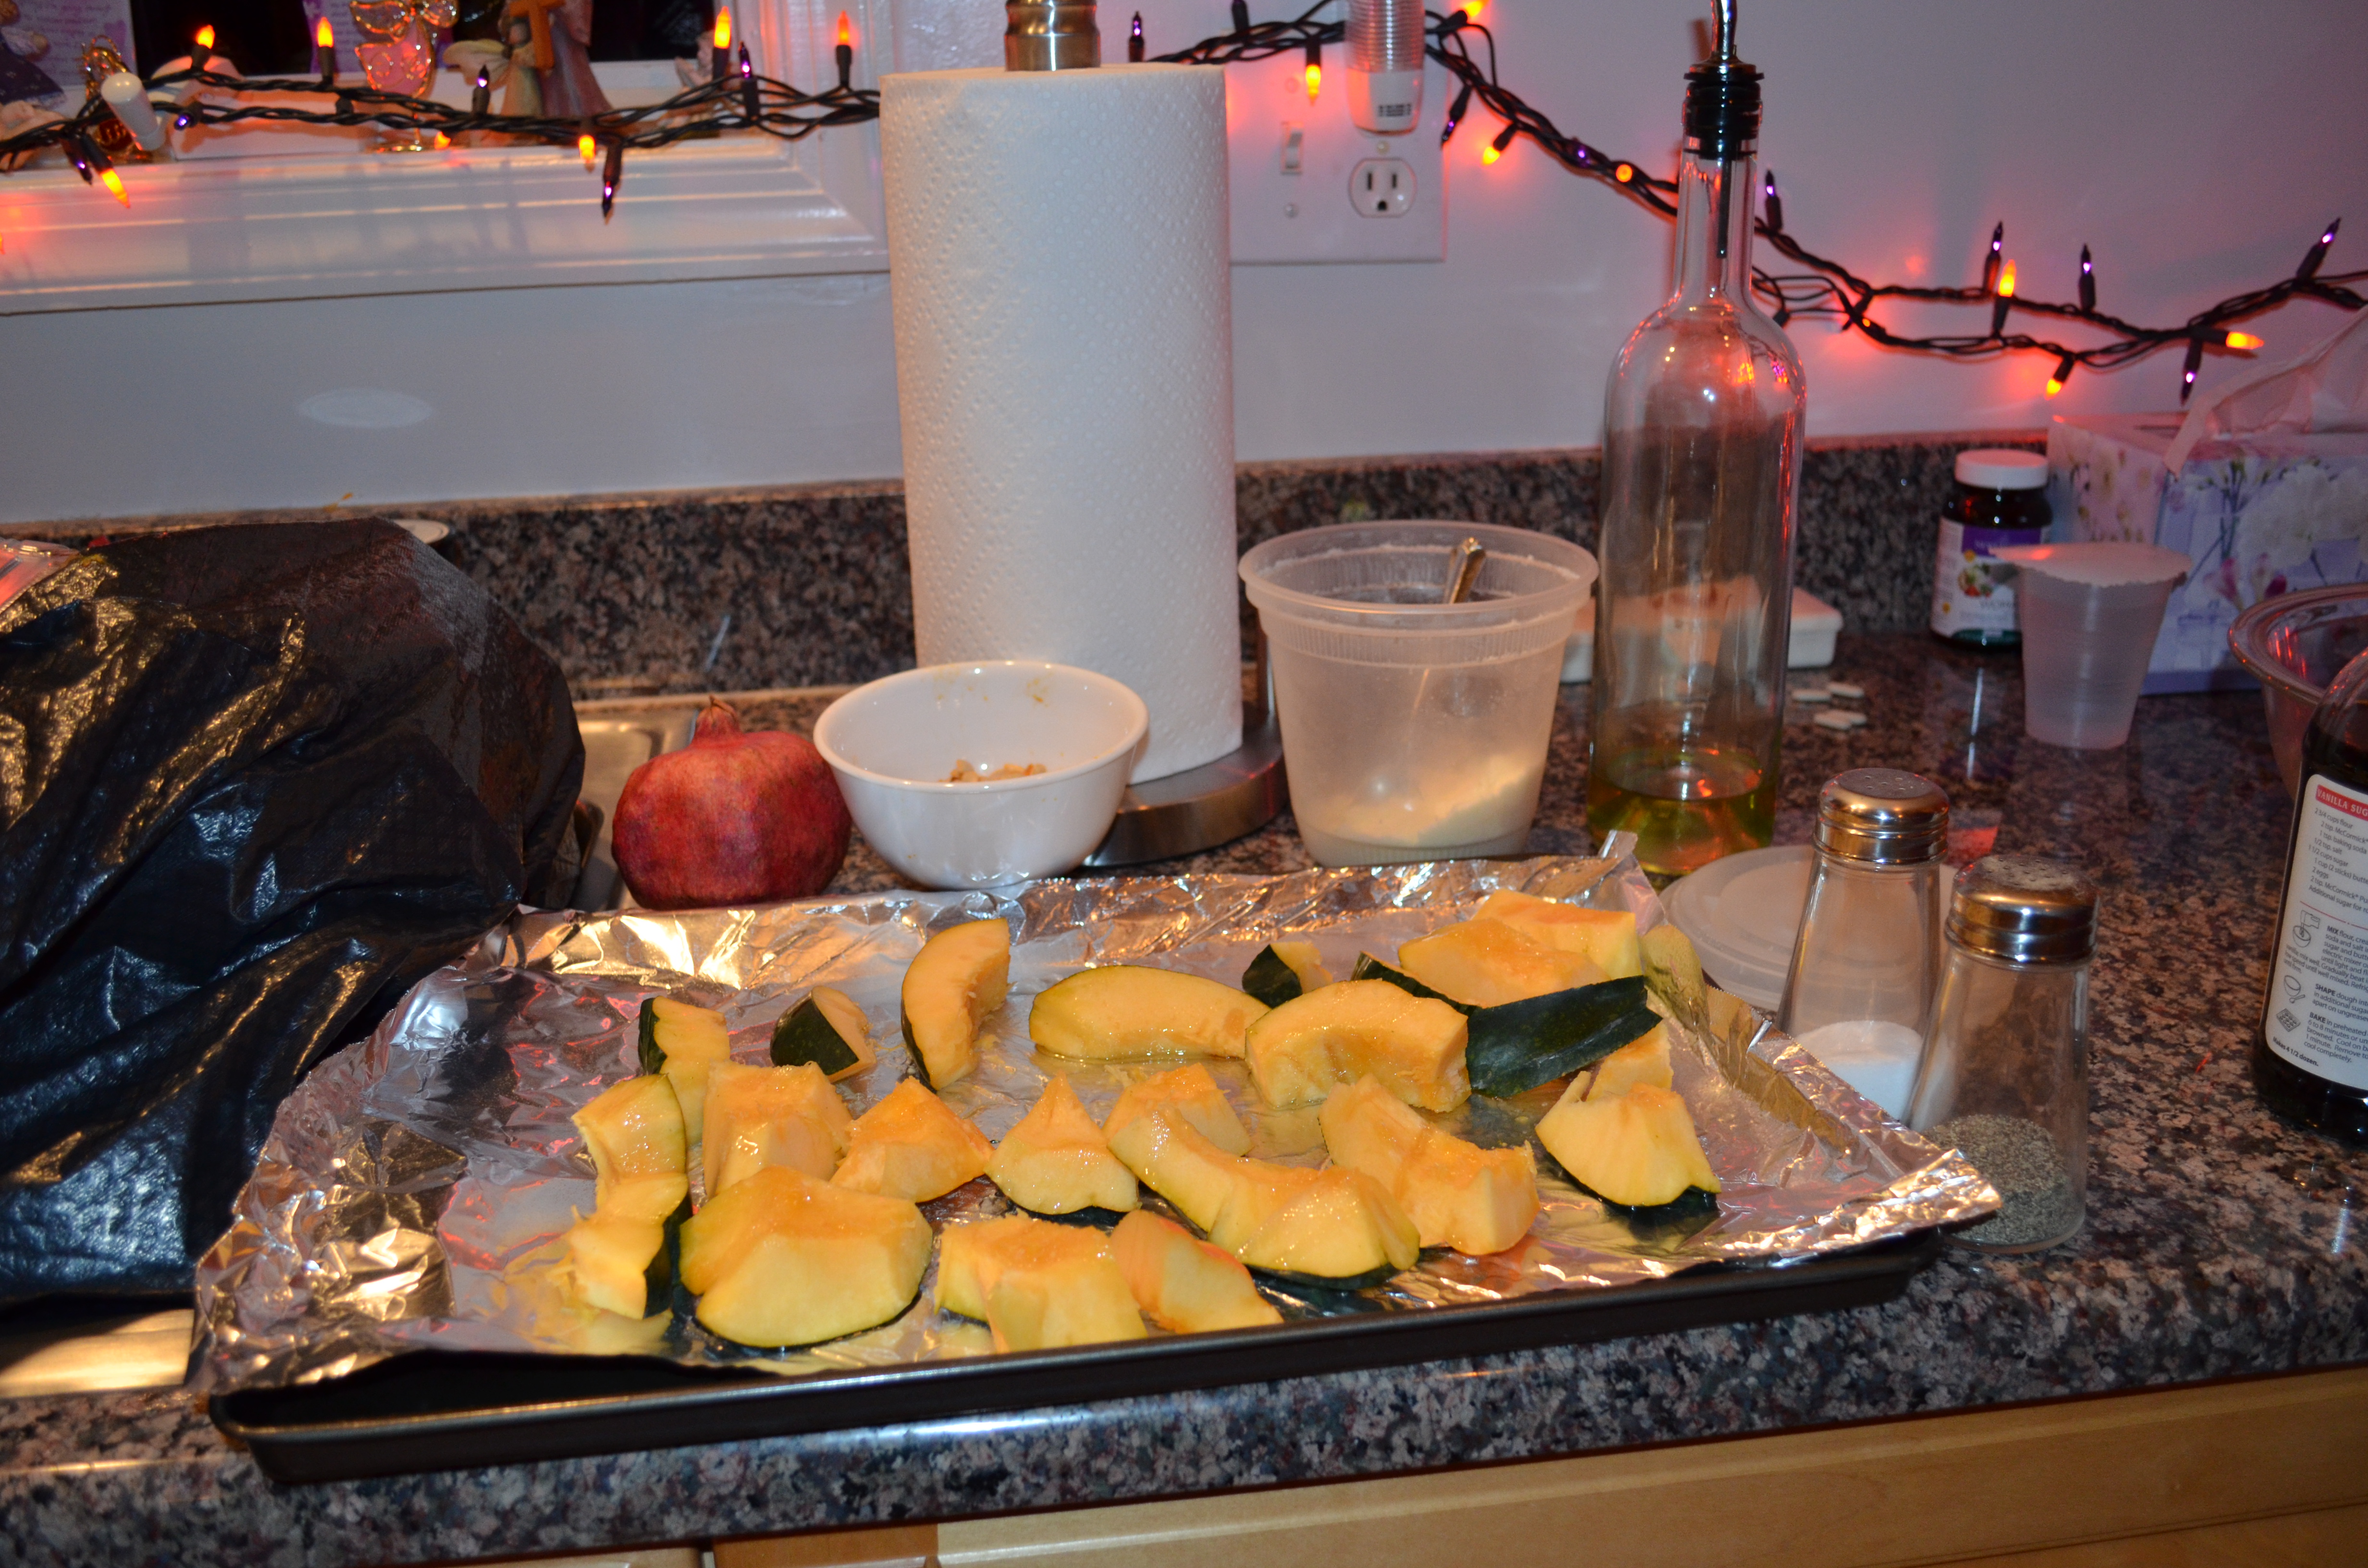
Carefully slice up your acorn squash as you deem acceptable and pretty. Make sure that the squishier yellow-ish/orange-ish side is facing up! Strips often seems to work out best. Before placing any squash or any seeds on any piece of tin foil, spray and spread a bit of cooking spray – or olive oil – so that nothing sticks where it shouldn’t be sticking! Place the acorn squash on one tray (somewhat spread out) and the seeds in a sort of pocket – or ball – of tin foil. Now, the pocket was not displayed here seeing as I didn’t realize that acorn squash seeds popped open when not contained in a covered, enclosed environment. This was something of a craftastrophe within my recipe… Just put all the seeds on a separate sheet of tinfoil; then, ball up the sheet of tinfoil after you put what you want on the seeds.

Drizzle a little olive oil on top of it all. Don’t drown it – drowning anything never works out well!

Then a little dash of salt!

Then a little sprinkling of pepper!

Then, take your parmesan cheese and dash a desirable amount over top of your acorn squash strips. Heck, you could even sprinkle some over your seeds, if you’d like! Darn, I wish I had thought of that one sooner…

Then throw that thing into your 425°F oven! Don’t let your dog (or other animal or human figure) stand in front of the oven while you do it. Although it makes for a cute picture, it is not a very safe decision…
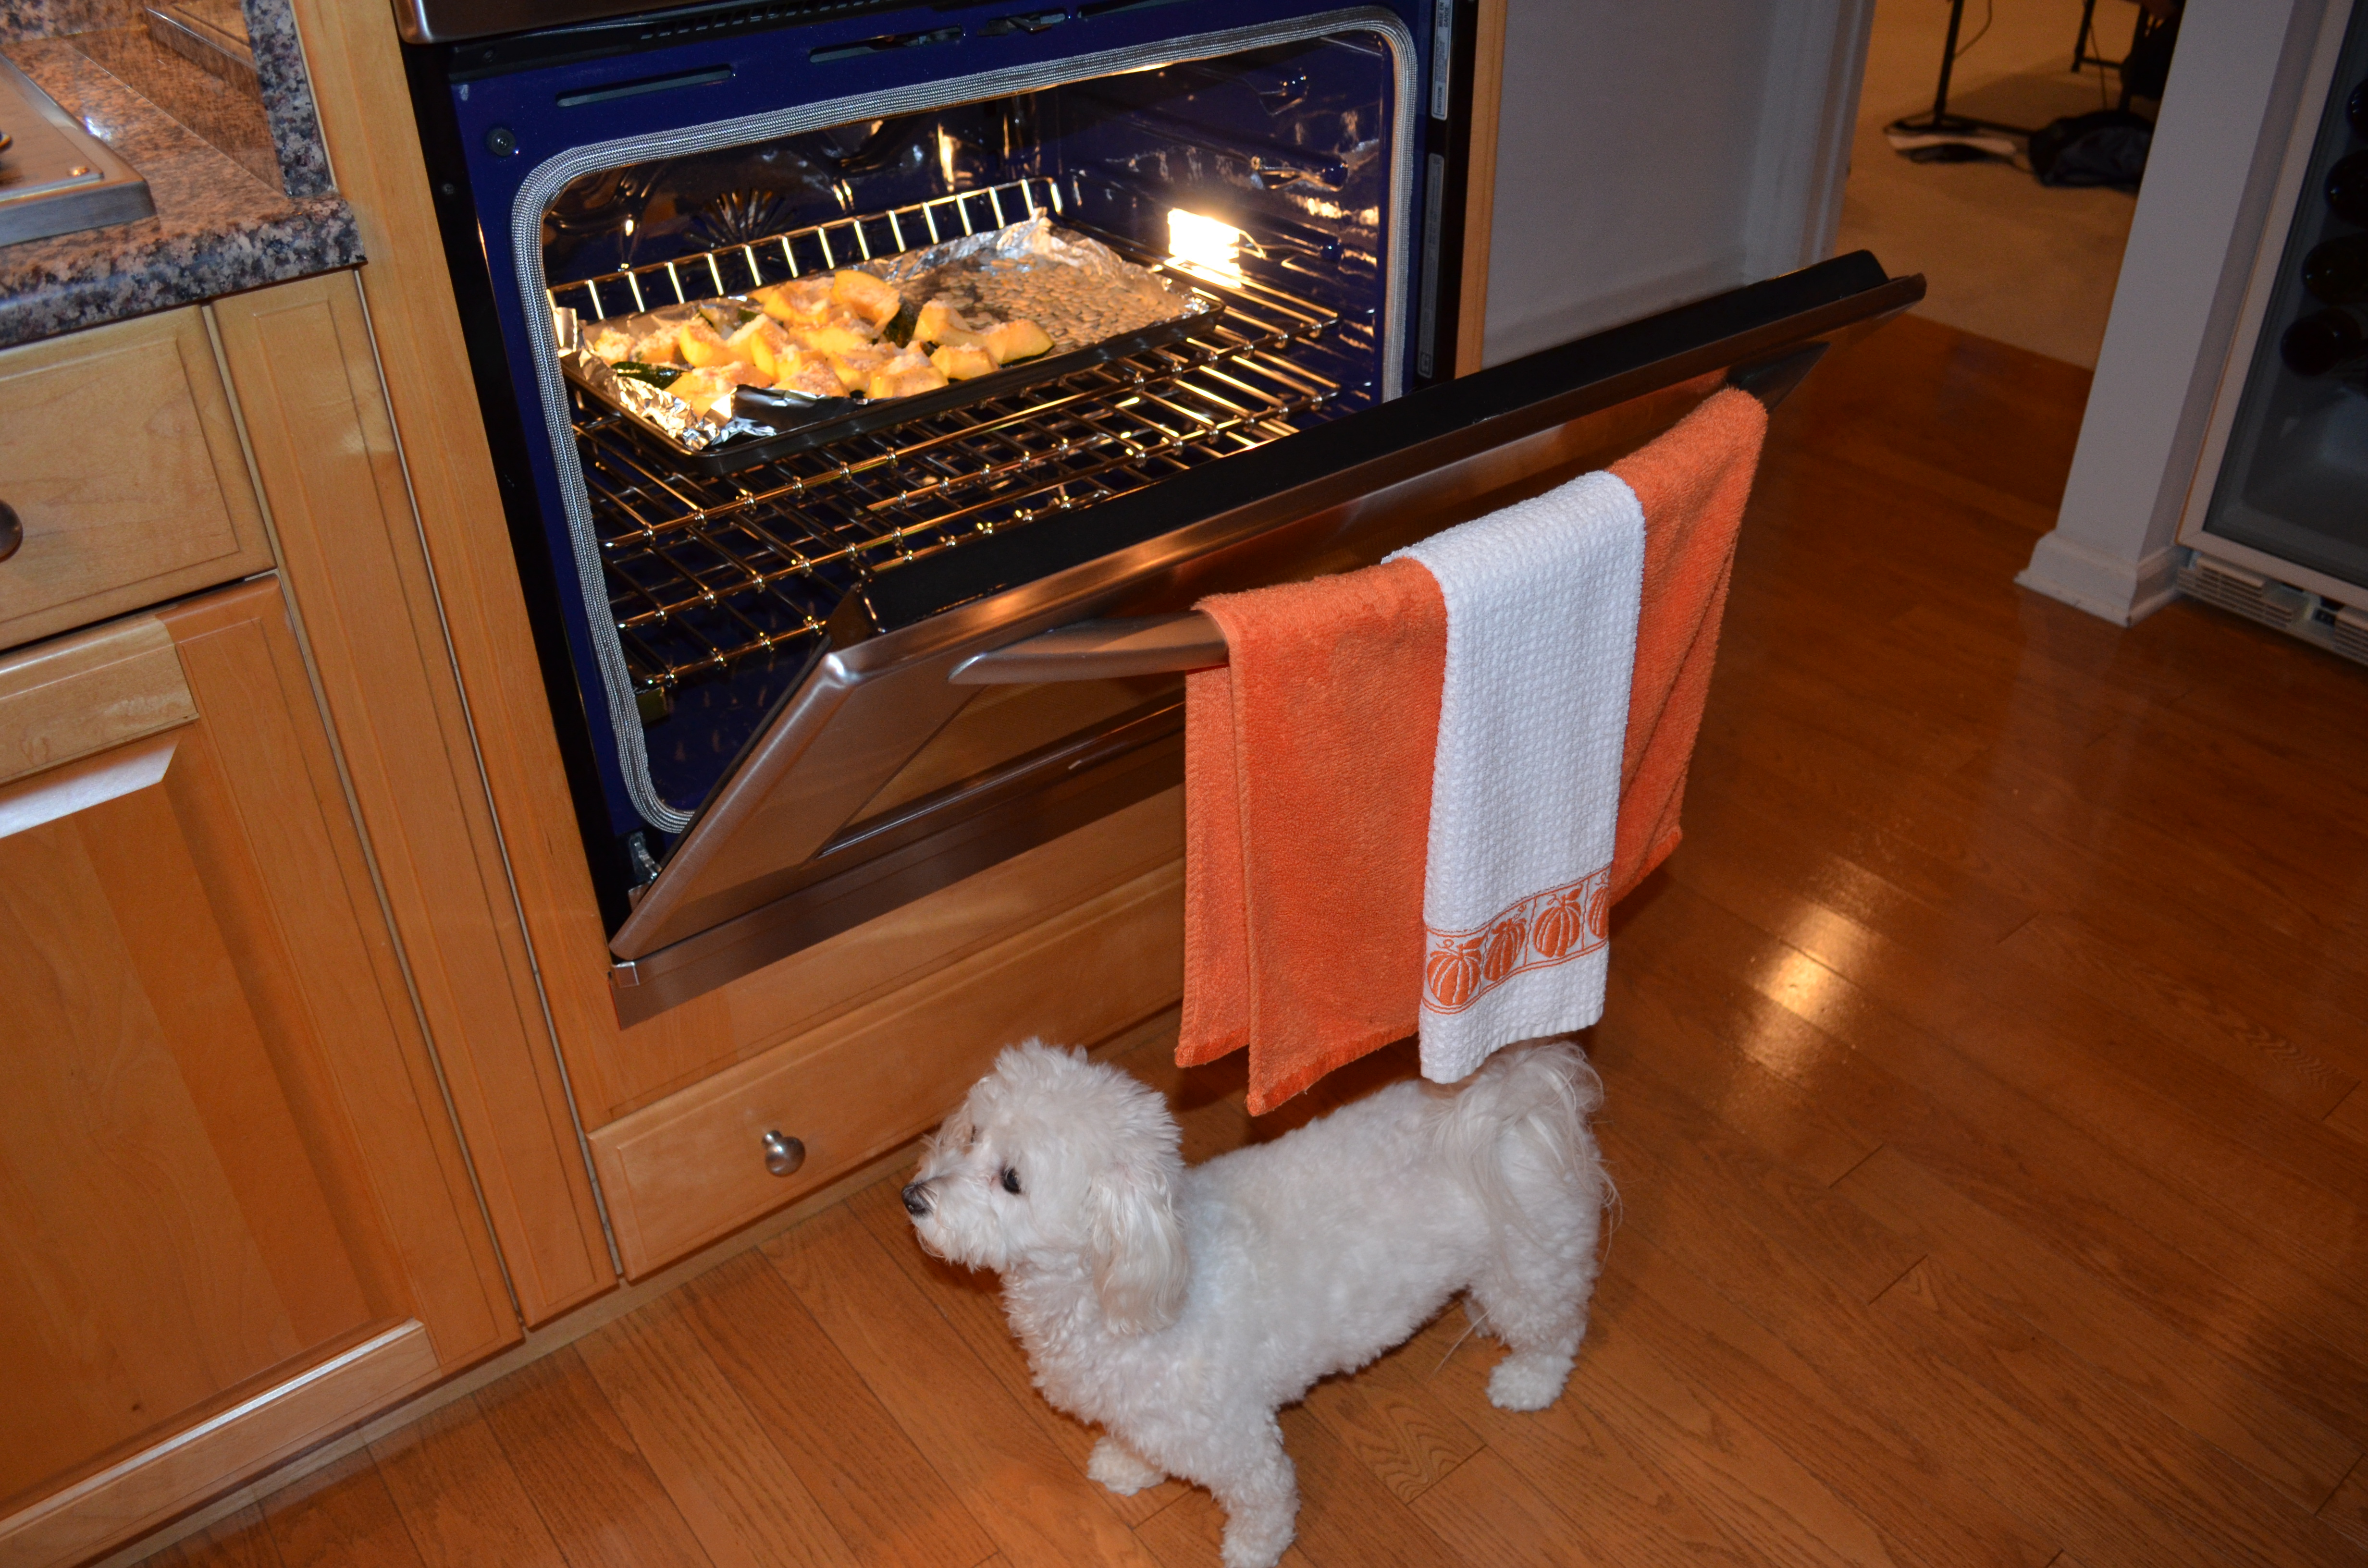
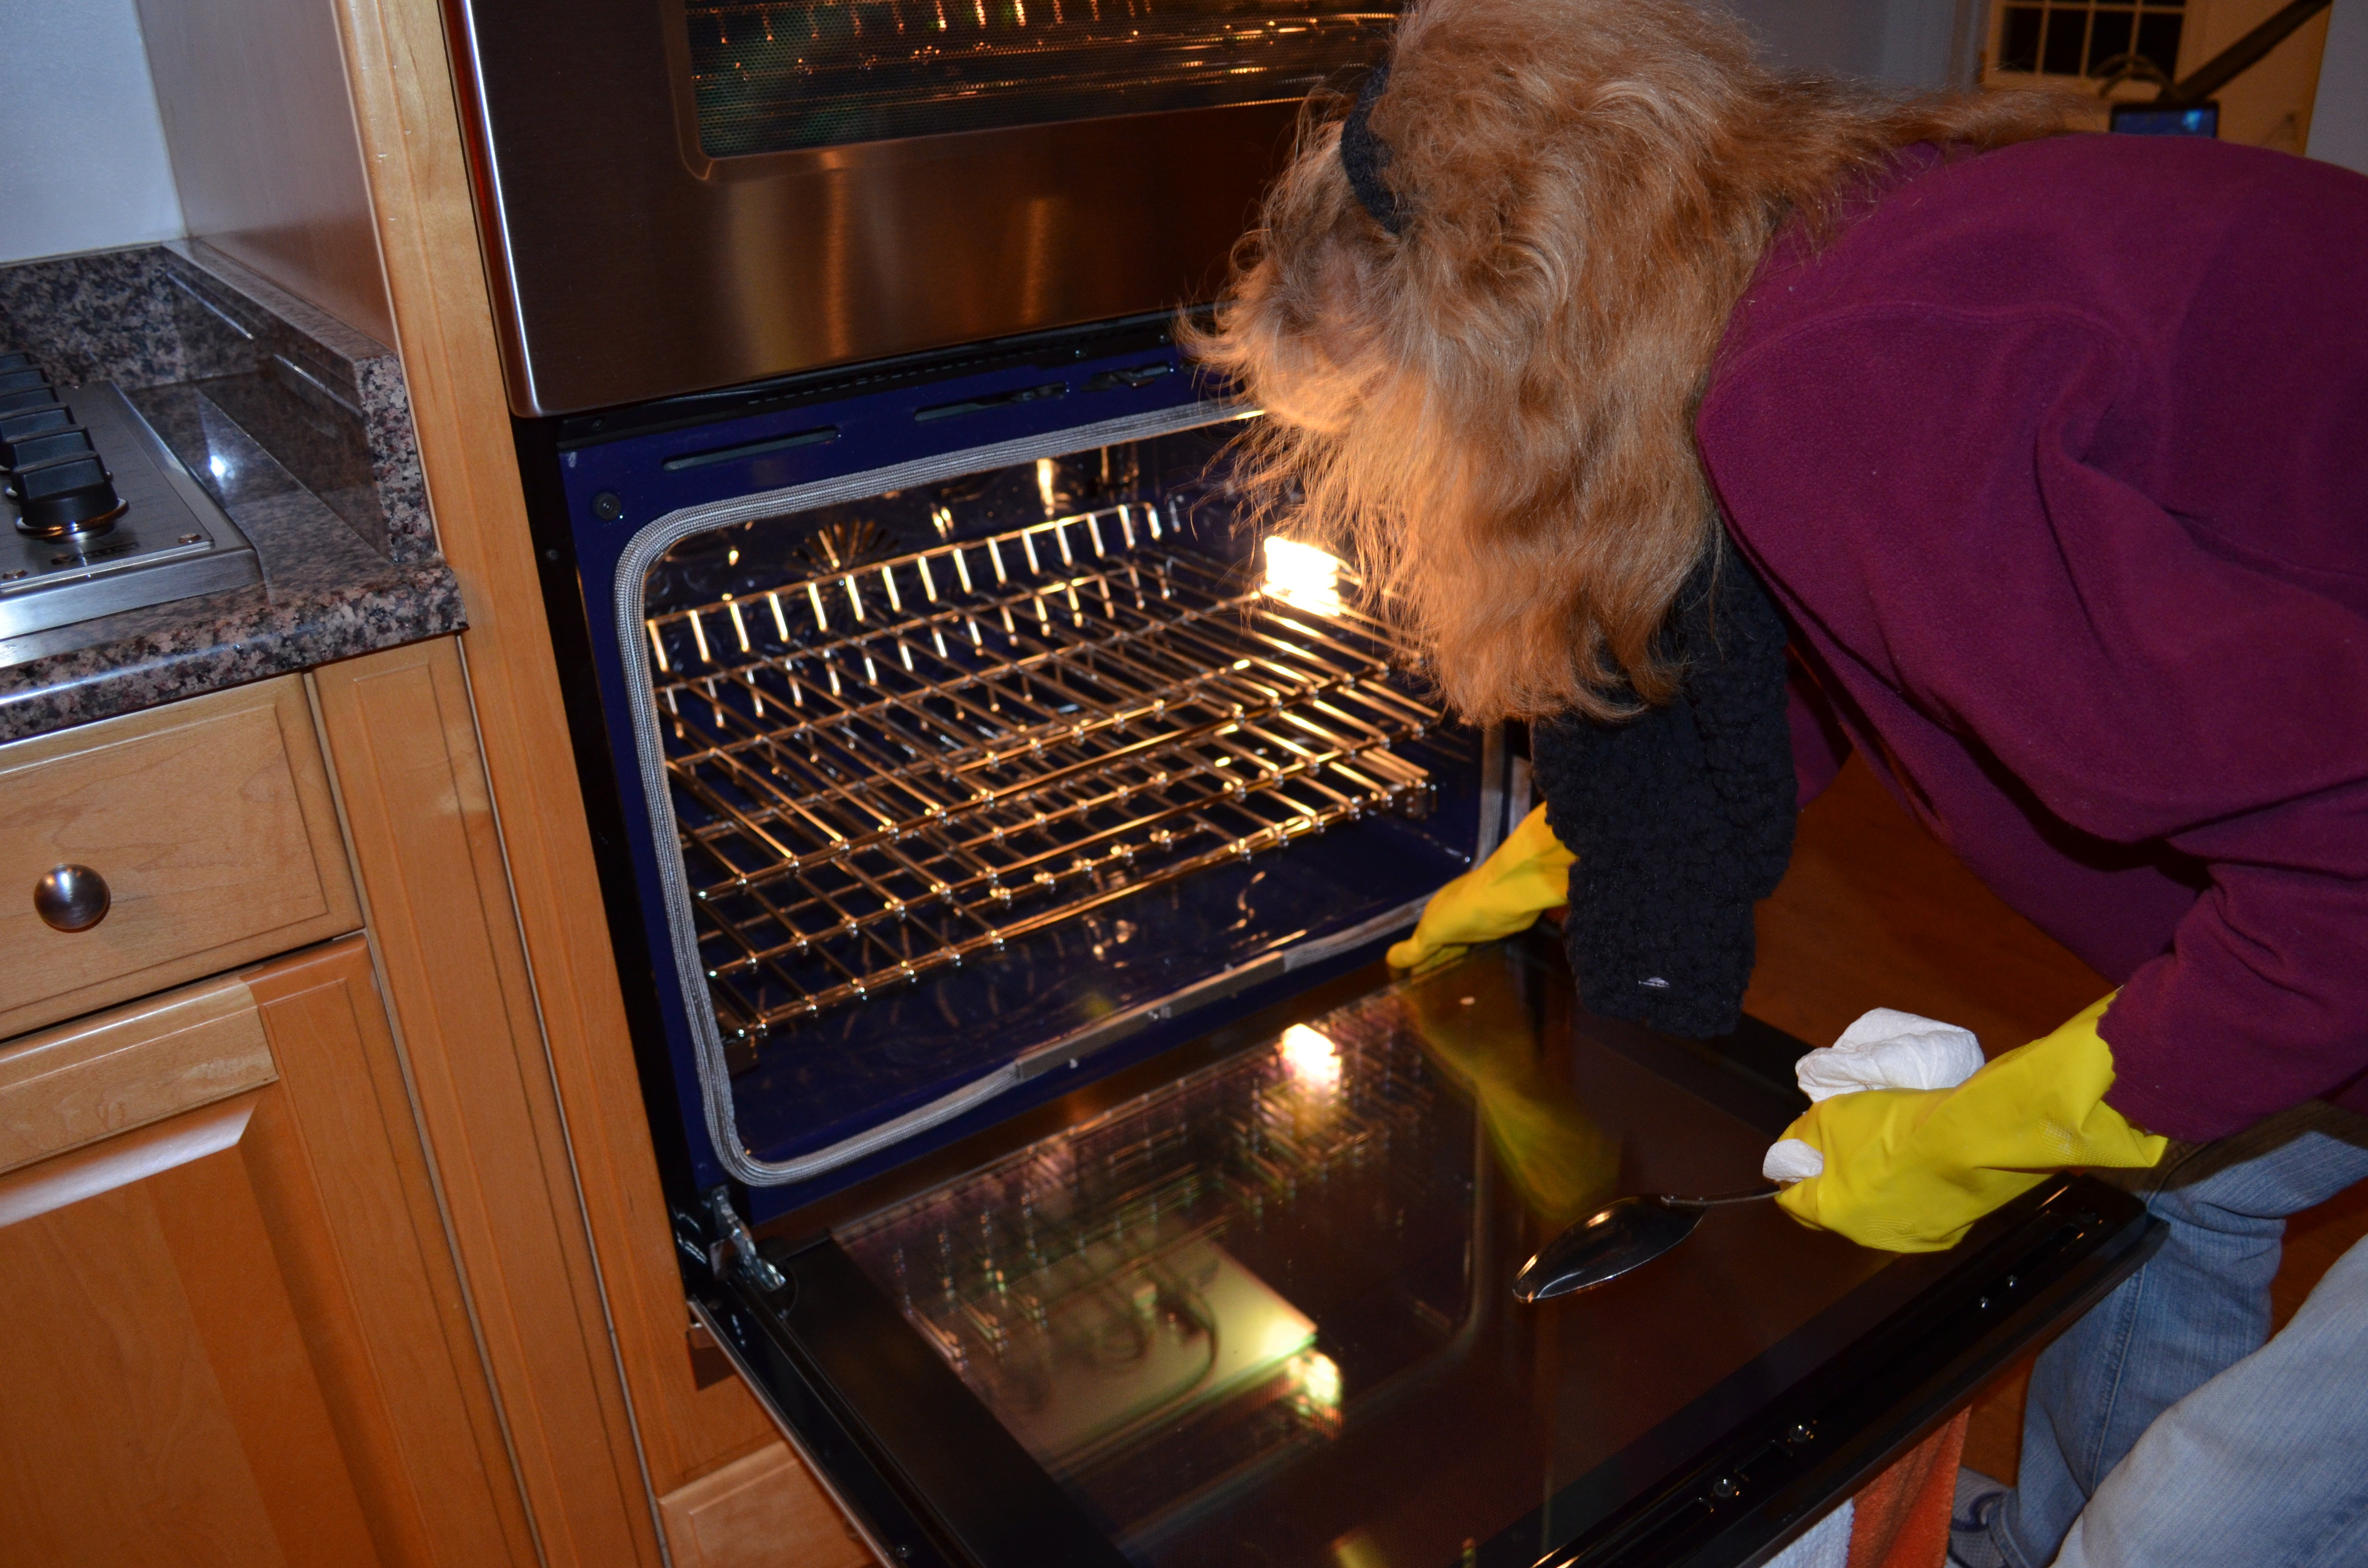
This is a quick picture of my mother helping me clean up my popped-seed mess… Whoops!
Now just let it all roast!
Step 3: The Tasty Joy of a Job Well-Done (Get it? Food humor? Well-done? No? Okay, then…)
The seeds will take about 10 minutes (15 max)! Once they are golden brown, just take them out. They will definitely be done before the squash!

Bake the squash until golden brown,a s well! They should take between 35 and 40 minutes (check them after 20 and then go from there).

Serve it up at Thanksgiving (or any) dinner or just use it as a tasty treat. I promise, this healthy recipe will not disappoint!
End Note: Thank you so much Do It Delicious for the fabulous recipe! Also, folks, please be careful with sharp and hot objects – they can hurt you! Keep a fire extinguisher and/or supervisor and/or paramedics on standby (if you find this humorous then you don’t know me very well…)! Stay safe and eat a lot!
Happy early Thanksgiving, my darlings! Be happy with what you’ve got (i.e. my blog… kidding!)!
%20%7C%20Do%20It%20Yourself%20%7C%20An%20Utter%20Craftastrophe)