
Tis the Christmas season, and you know what that means – gift giving! Have you begun your search yet? That vast adventure into the uncharted lands of Toys “R” Us and Macy’s? If you ask me, those gifts are SO overdone! Instead, give them something that they can keep forever – something that you crafted with your heart (not your wallet). Why not give them a lovely new piece of artwork? Maybe something to do with everyone’s childhood memories, evoke a bit of nostalgia? Oh, folks, I’ve got it! How a bout a little do-it-yourself Crayola crayon masterpiece? Yeah, that’s what I thought too – such a fabulous idea!

What you need to make this gift gorgeous:
- A Canvas (size is up to you)
- A Lot of Crayons (make sure you get enough for the size canvas you have)
- A Hot Glue Gun (danger warning – I hurt myself again – BE SAFE, KIDS)
- Hot Glue Sticks (don’t be an idiot, the hot glue gun won’t magically work without them)
- A Hair-Dryer (or blow-dryer or whatever else you call it)
- Something to Cover the Surface You Are Working On (I was not that smart when I did this – it was an utter craftastrophe all over my friend’s desk… oops)
Step 1: The Crayon Collection
(At this time, you should cover the surface you are working on top of (i.e. desk, table, etc.).)
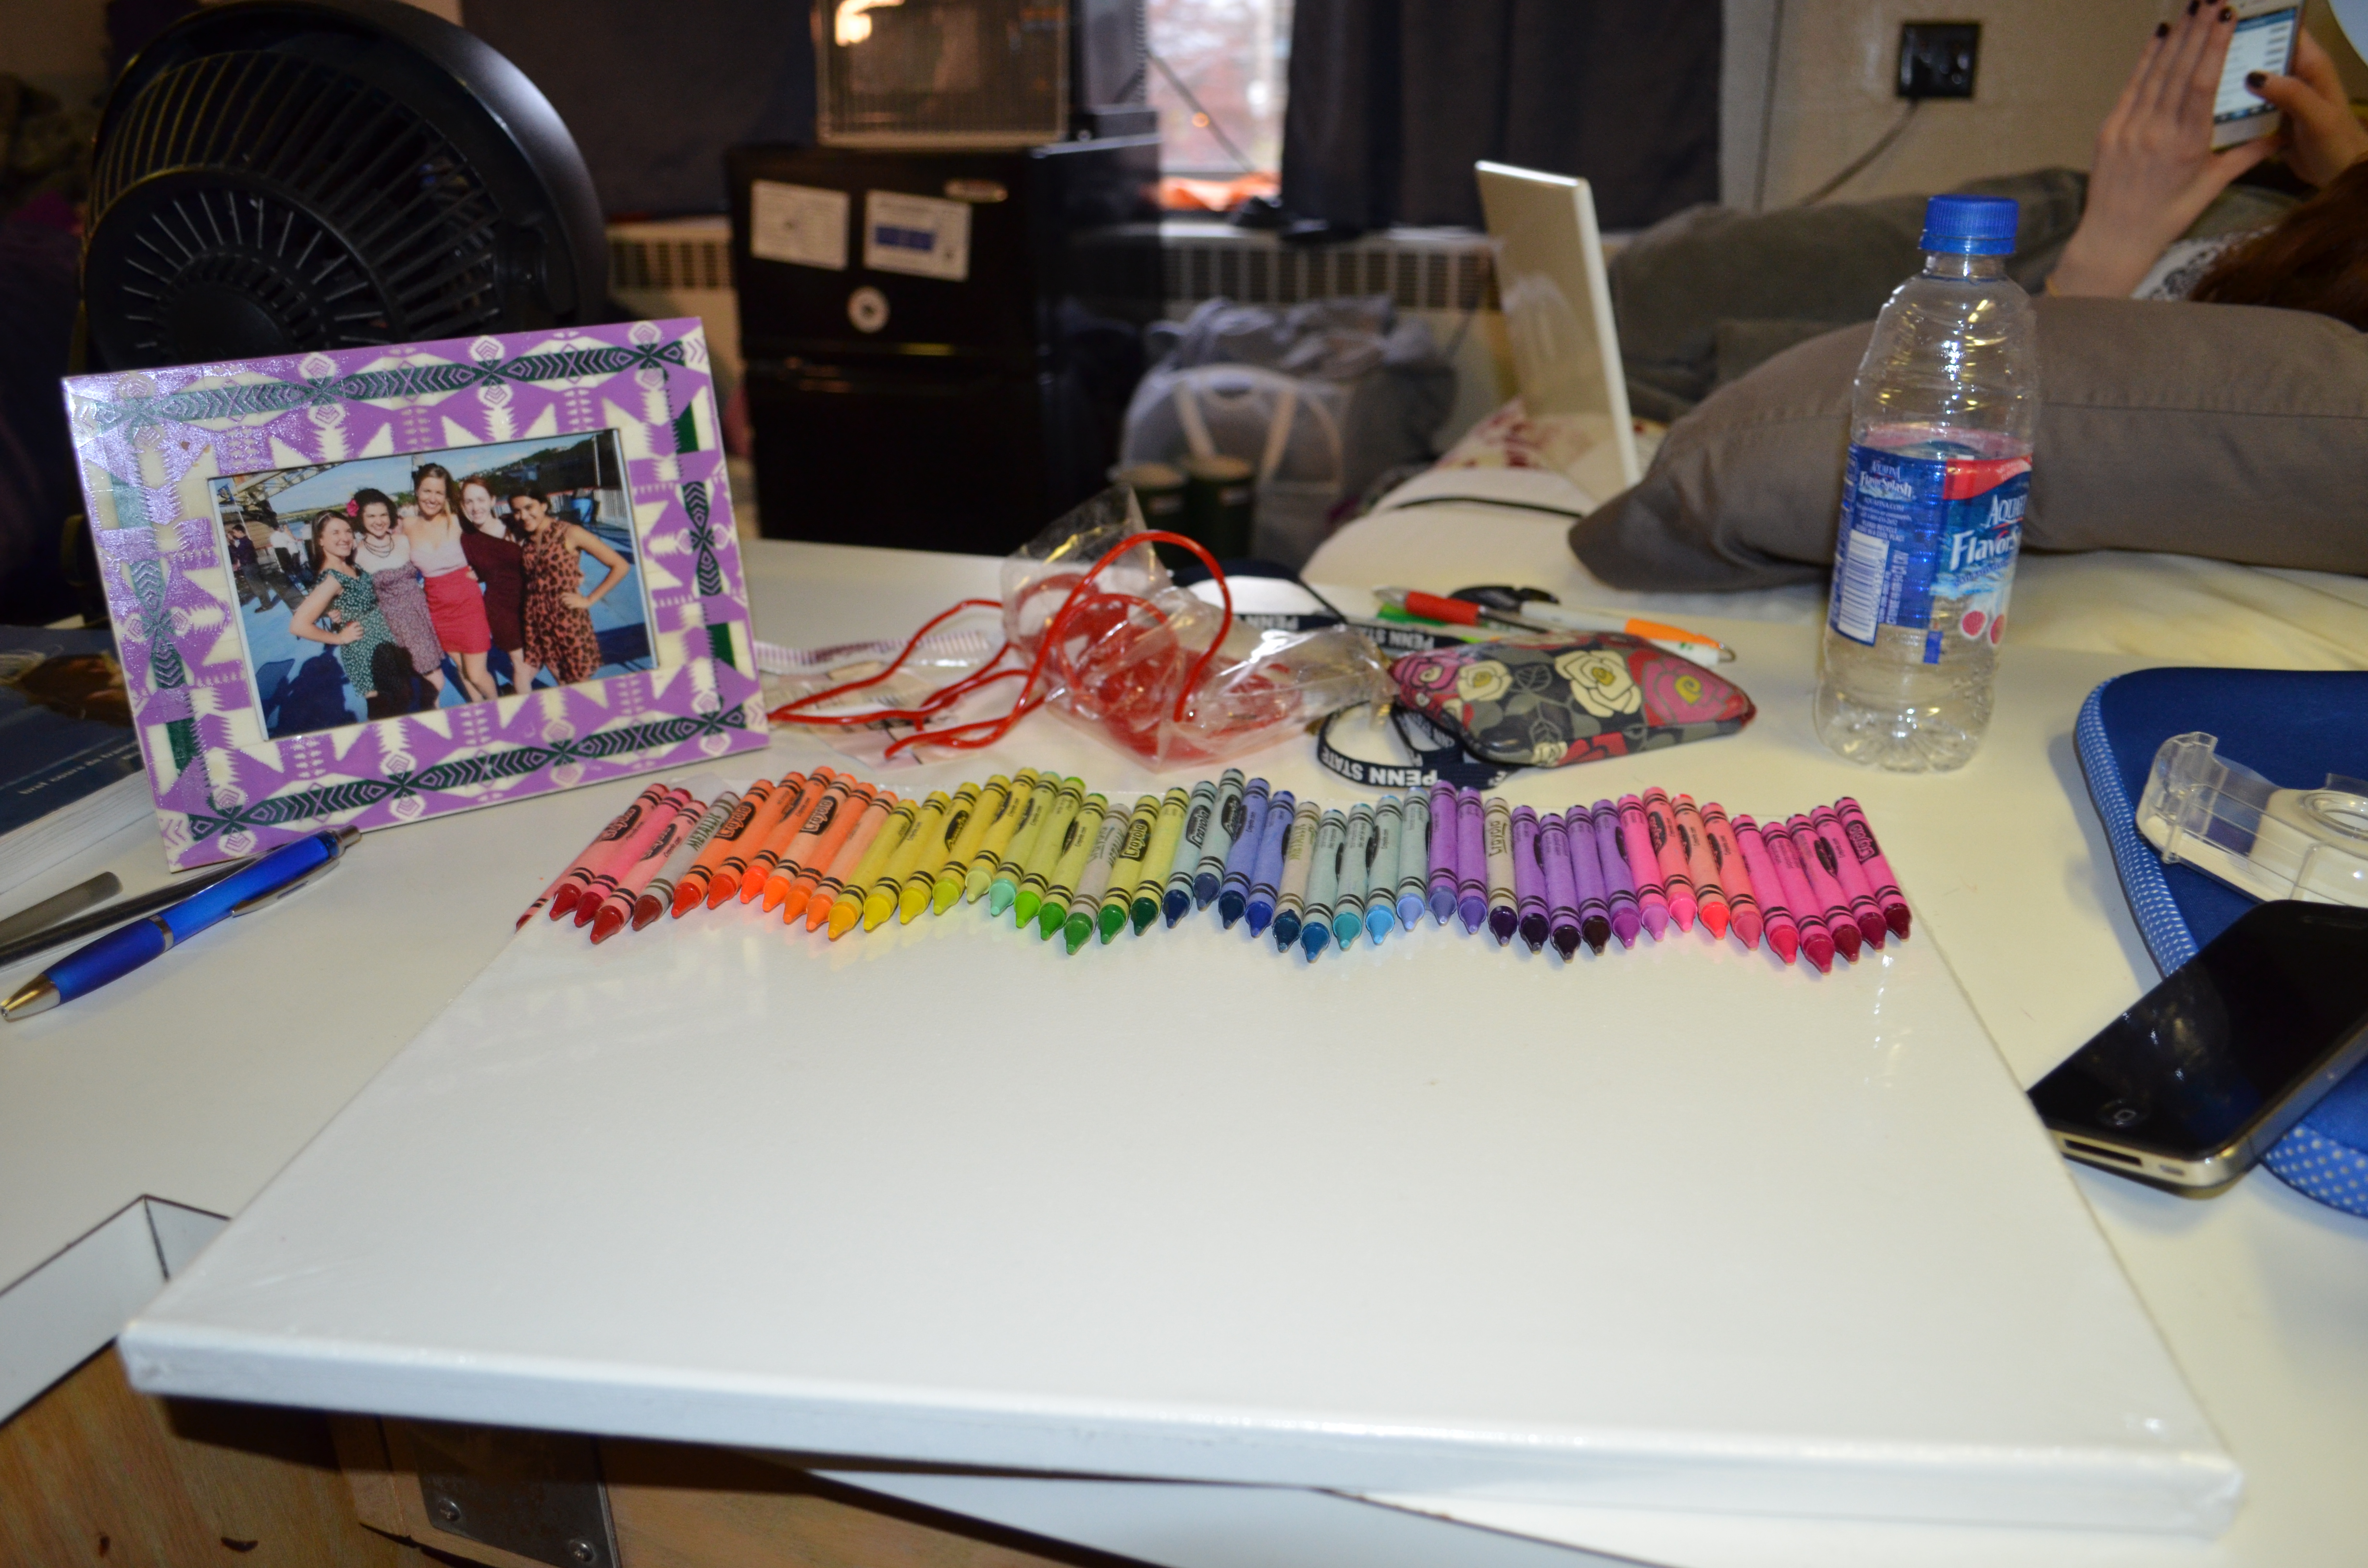
When picking the crayons you would like to use, I typically give one primary word of advice… CRAYOLA. Generic crayons just don’t seem to the trick, so don’t use them! Colors are up to you. Some people like the classic rainbow effect, while others go for a fifty shades of insert-color-here. I like a little bit of pizzazz to my paintings, so I added some glitter crayons (if you don’t already own them – invest now).
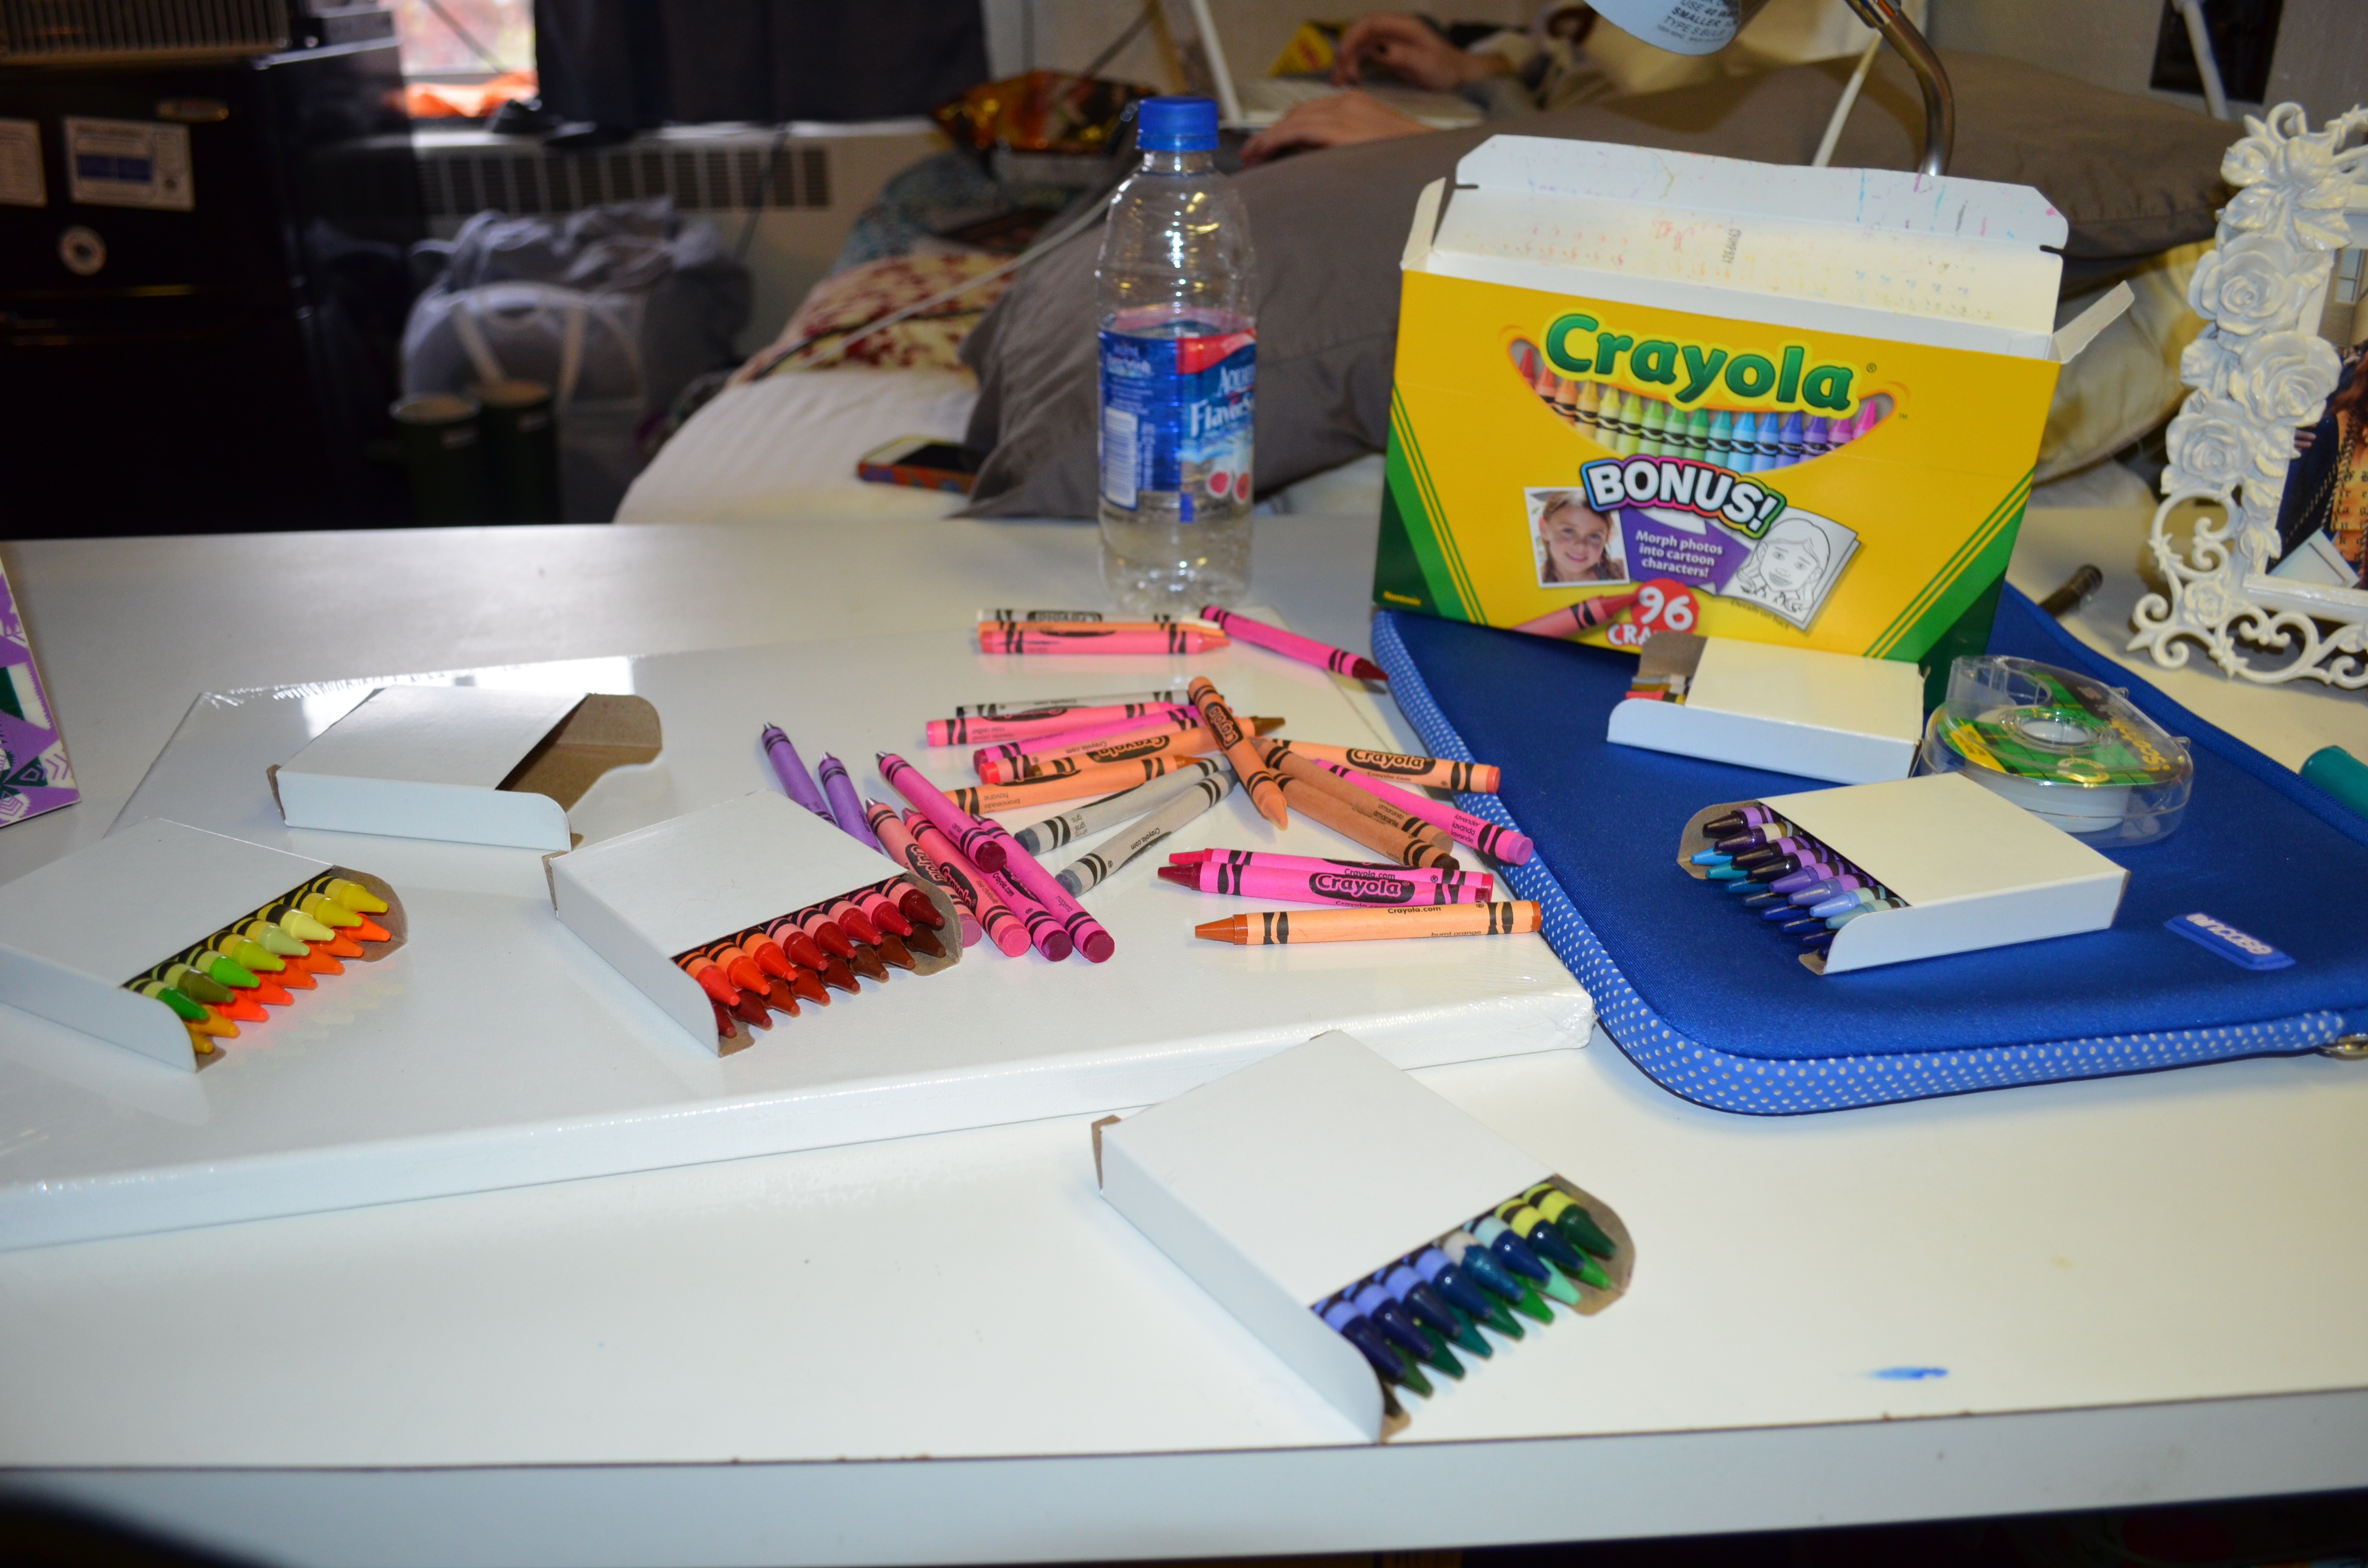
Now, I was lucky. I had two canvases of the same size when I did my craft, so I just taped the crayons I wanted to use to the other canvas and transfered them to the other canvas when I was ready to hot glue. You may not be so fortunate! I recommend measuring out your canvas, then laying a piece of paper that is that size down on a flat surface. Then place the crayons in the order that you want them in and in the design you want them in!

Most people to for the straight across look, but I was feeling a little crazy.
(A Tidbit of a Tip: DO NOT SKIP THIS STEP! If you try to go at this project all improv-style, it will not turn out the way you had hoped! Believe me, I’ve been there – it’s a long, dark, messy road.)
Step 2: The Hot- Hot Glue
After all your crayons are ready to go, you are ready for some hot glue! I recommend keeping all of the Crayola labels face-up on the canvas (so you have to put the hot glue on the directly opposite side of that), but it’s up to you and your ever-boundless creative license!
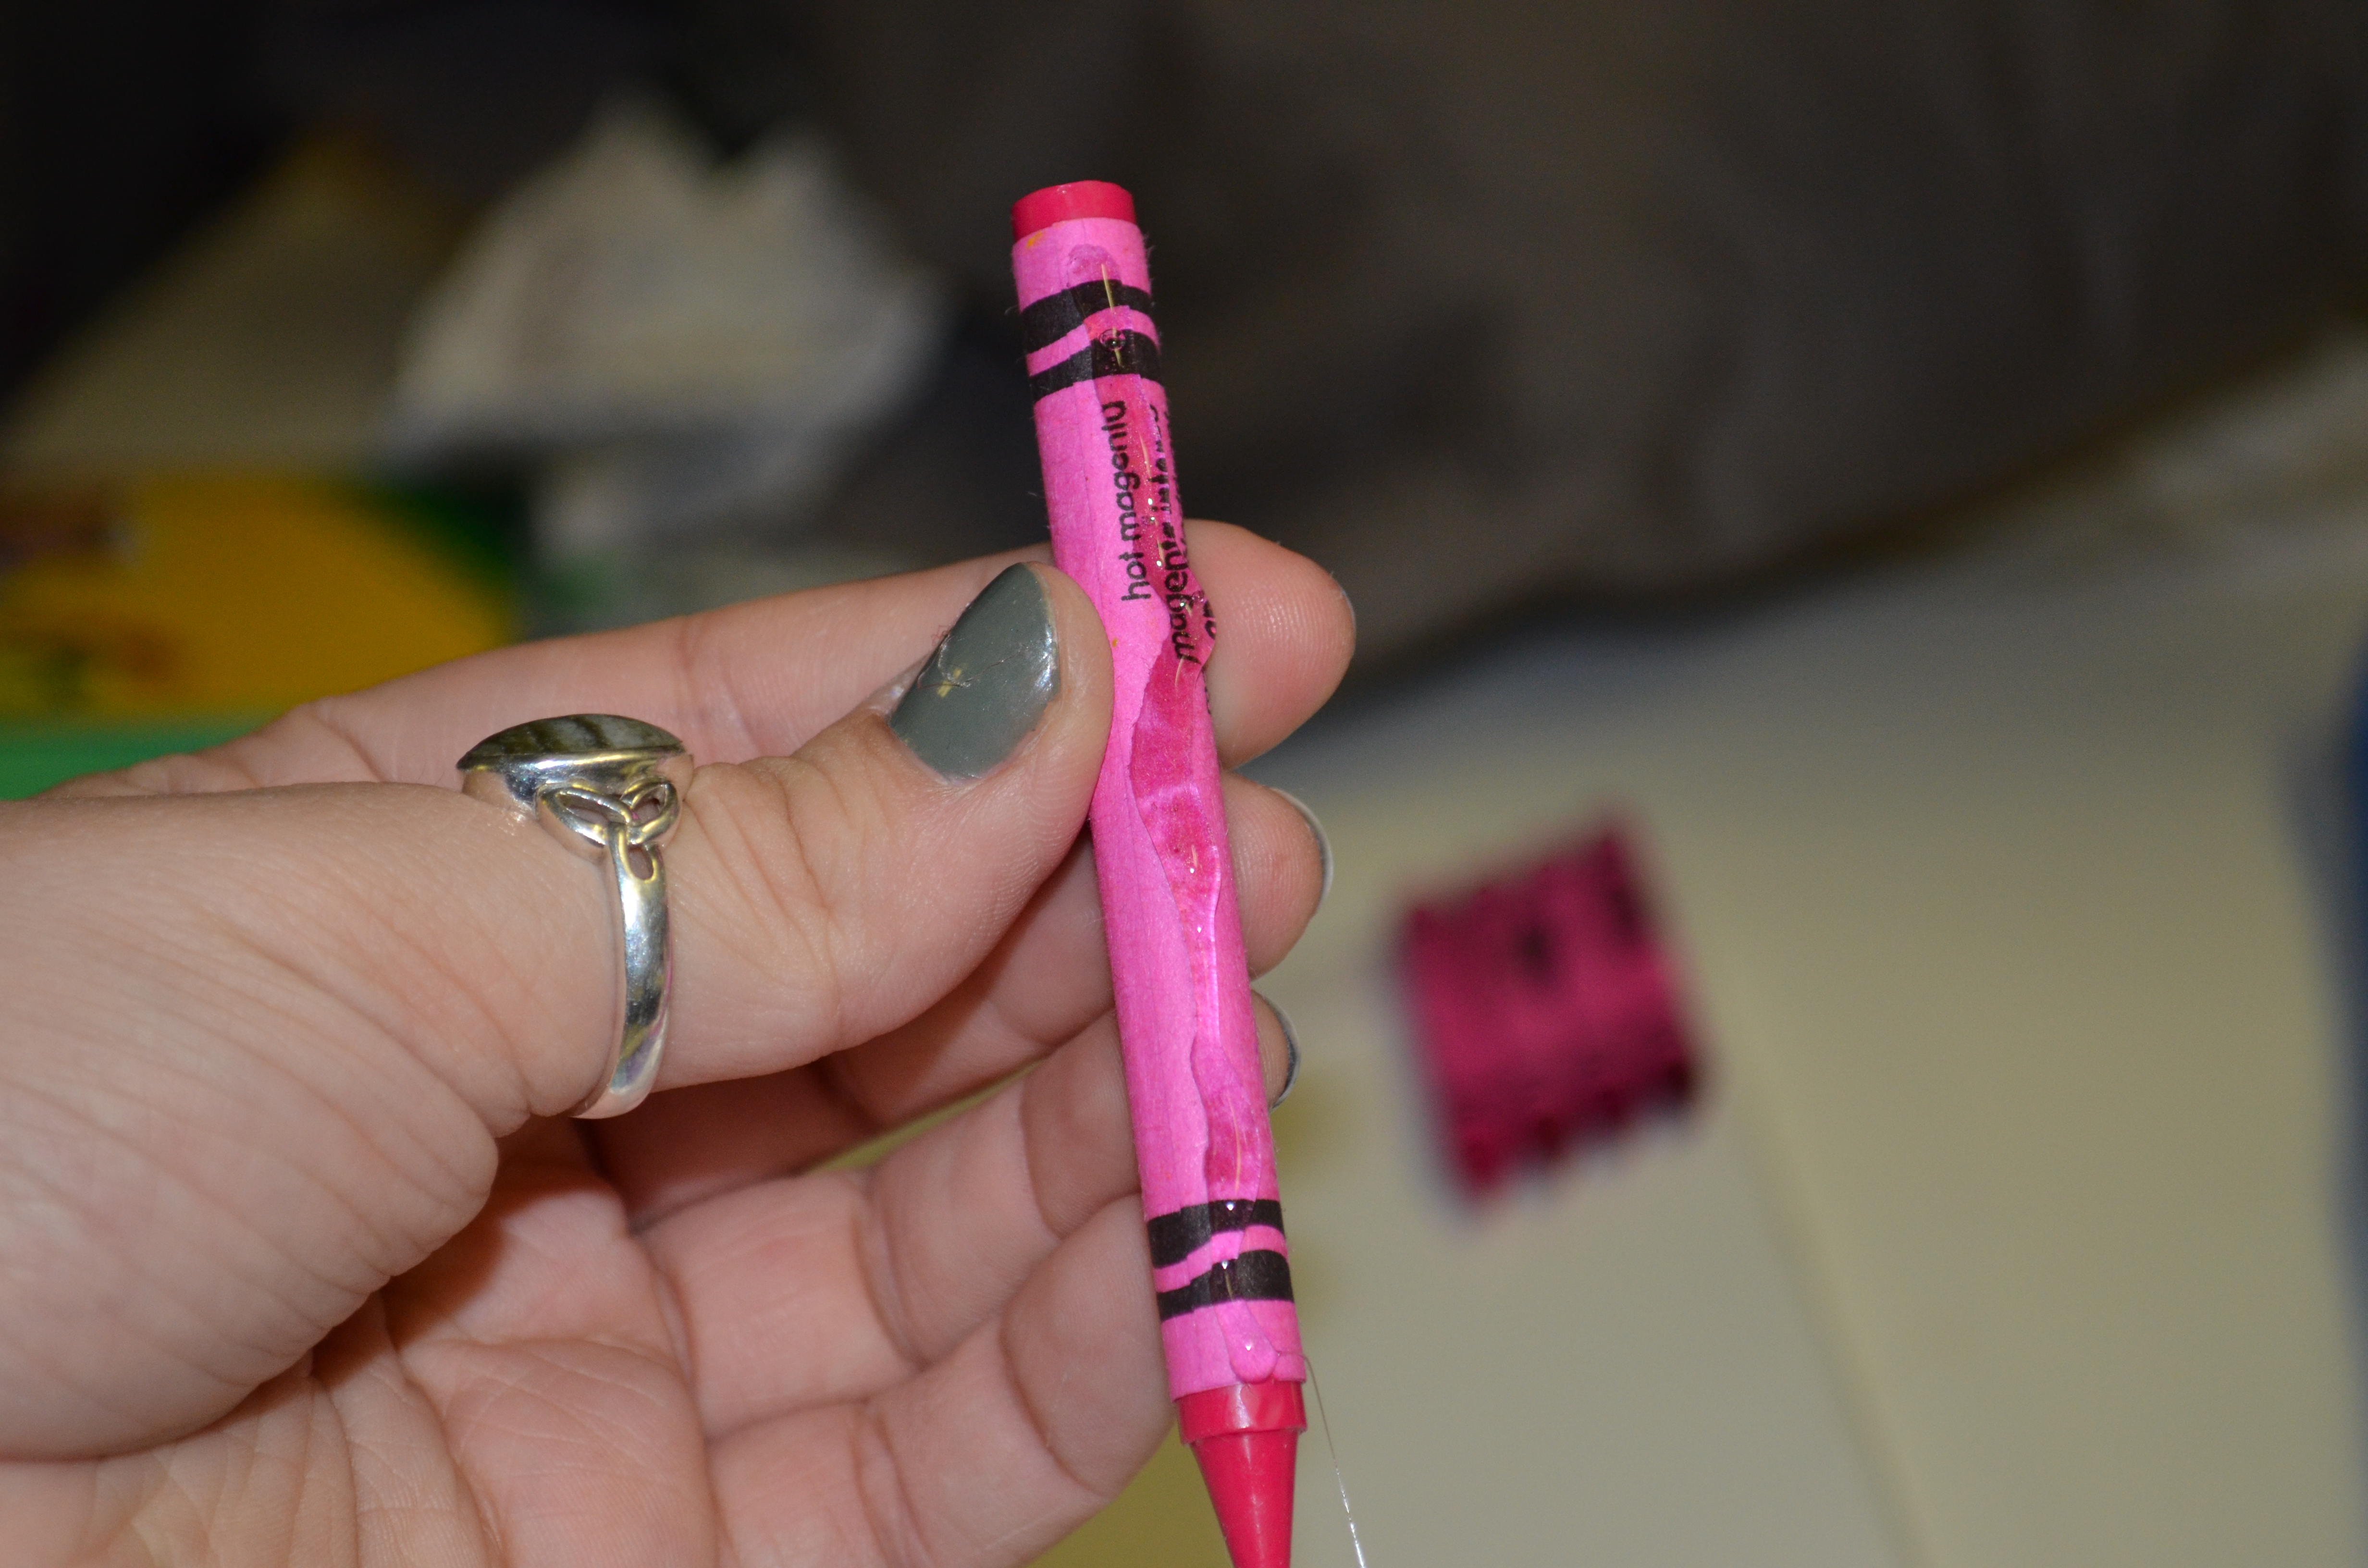
Carefully place the crayons the way you want them on the canvas that you will be using. (Please, be sure to take the plastic wrap off of the canvas first. – Just double-checking!) Don’t make the strip of hot glue too thick (or too thin) on the back of your crayon. Don’t worry it will stick, I promise!

(A Tidbit of a Tip: Be safe! Don’t accidentally hot glue your hand(s)/body-part(s)/clothing. I know, it happens… My hot glue gun and I have not been on good terms lately.)
Step 3: The Blow-Drying Disaster (but hopefully not)
Hold your canvas standing up before you begin blow-drying. Be sure that no crayons are too loose and falling off. Place it against something so it remains standing up (slightly tilted backward – that way when the crayons drip they drip onto the canvas and not onto the surface you are working on). Then be sure it is secure! Once you’re all clear, you’re ready to take off (no really, that’s what my blow-dryer makes it sound like).

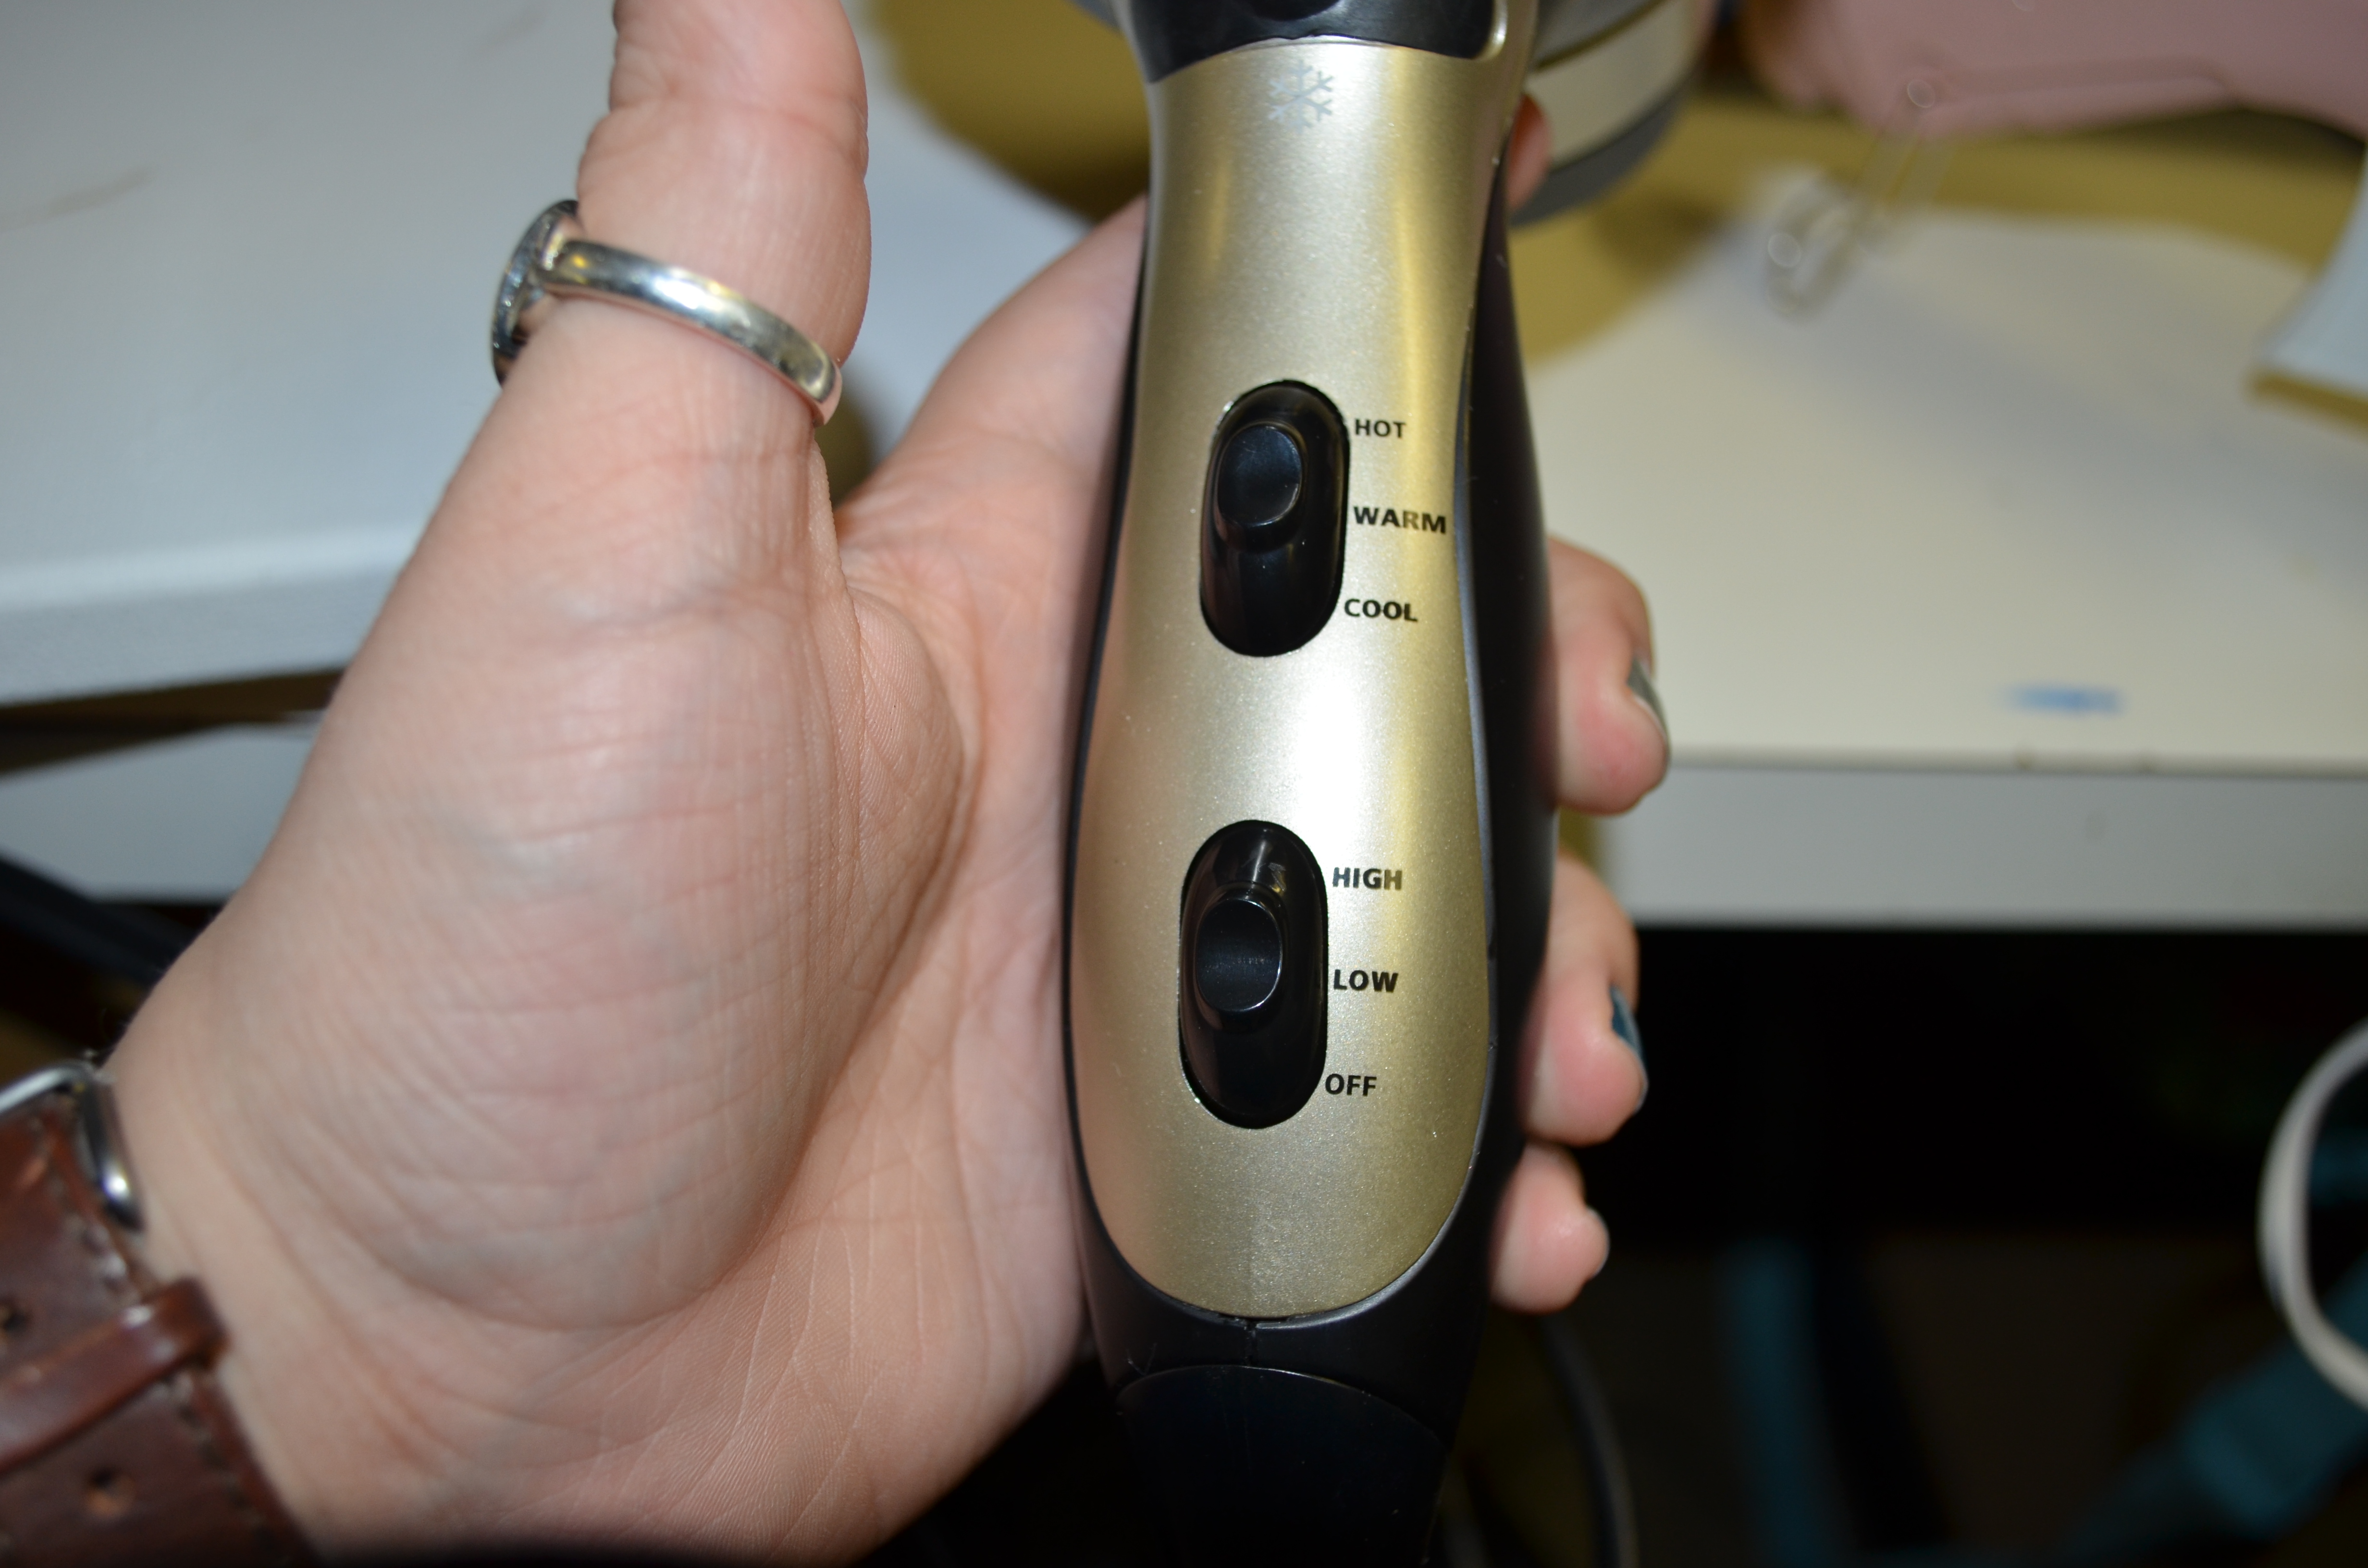
Set your dryer to WARM and LOW. Don’t change these settings (or at least the “low” setting). You may need to change to the high setting (try not to – be patient), but you should definitely start on low heat.
Aim your dryer at the top of the crayons (top of canvas) and hold it in the place. Don’t move the dryer until the crayons are as melted and dripped as you want them to be. After that you can move on to the next section of crayons.
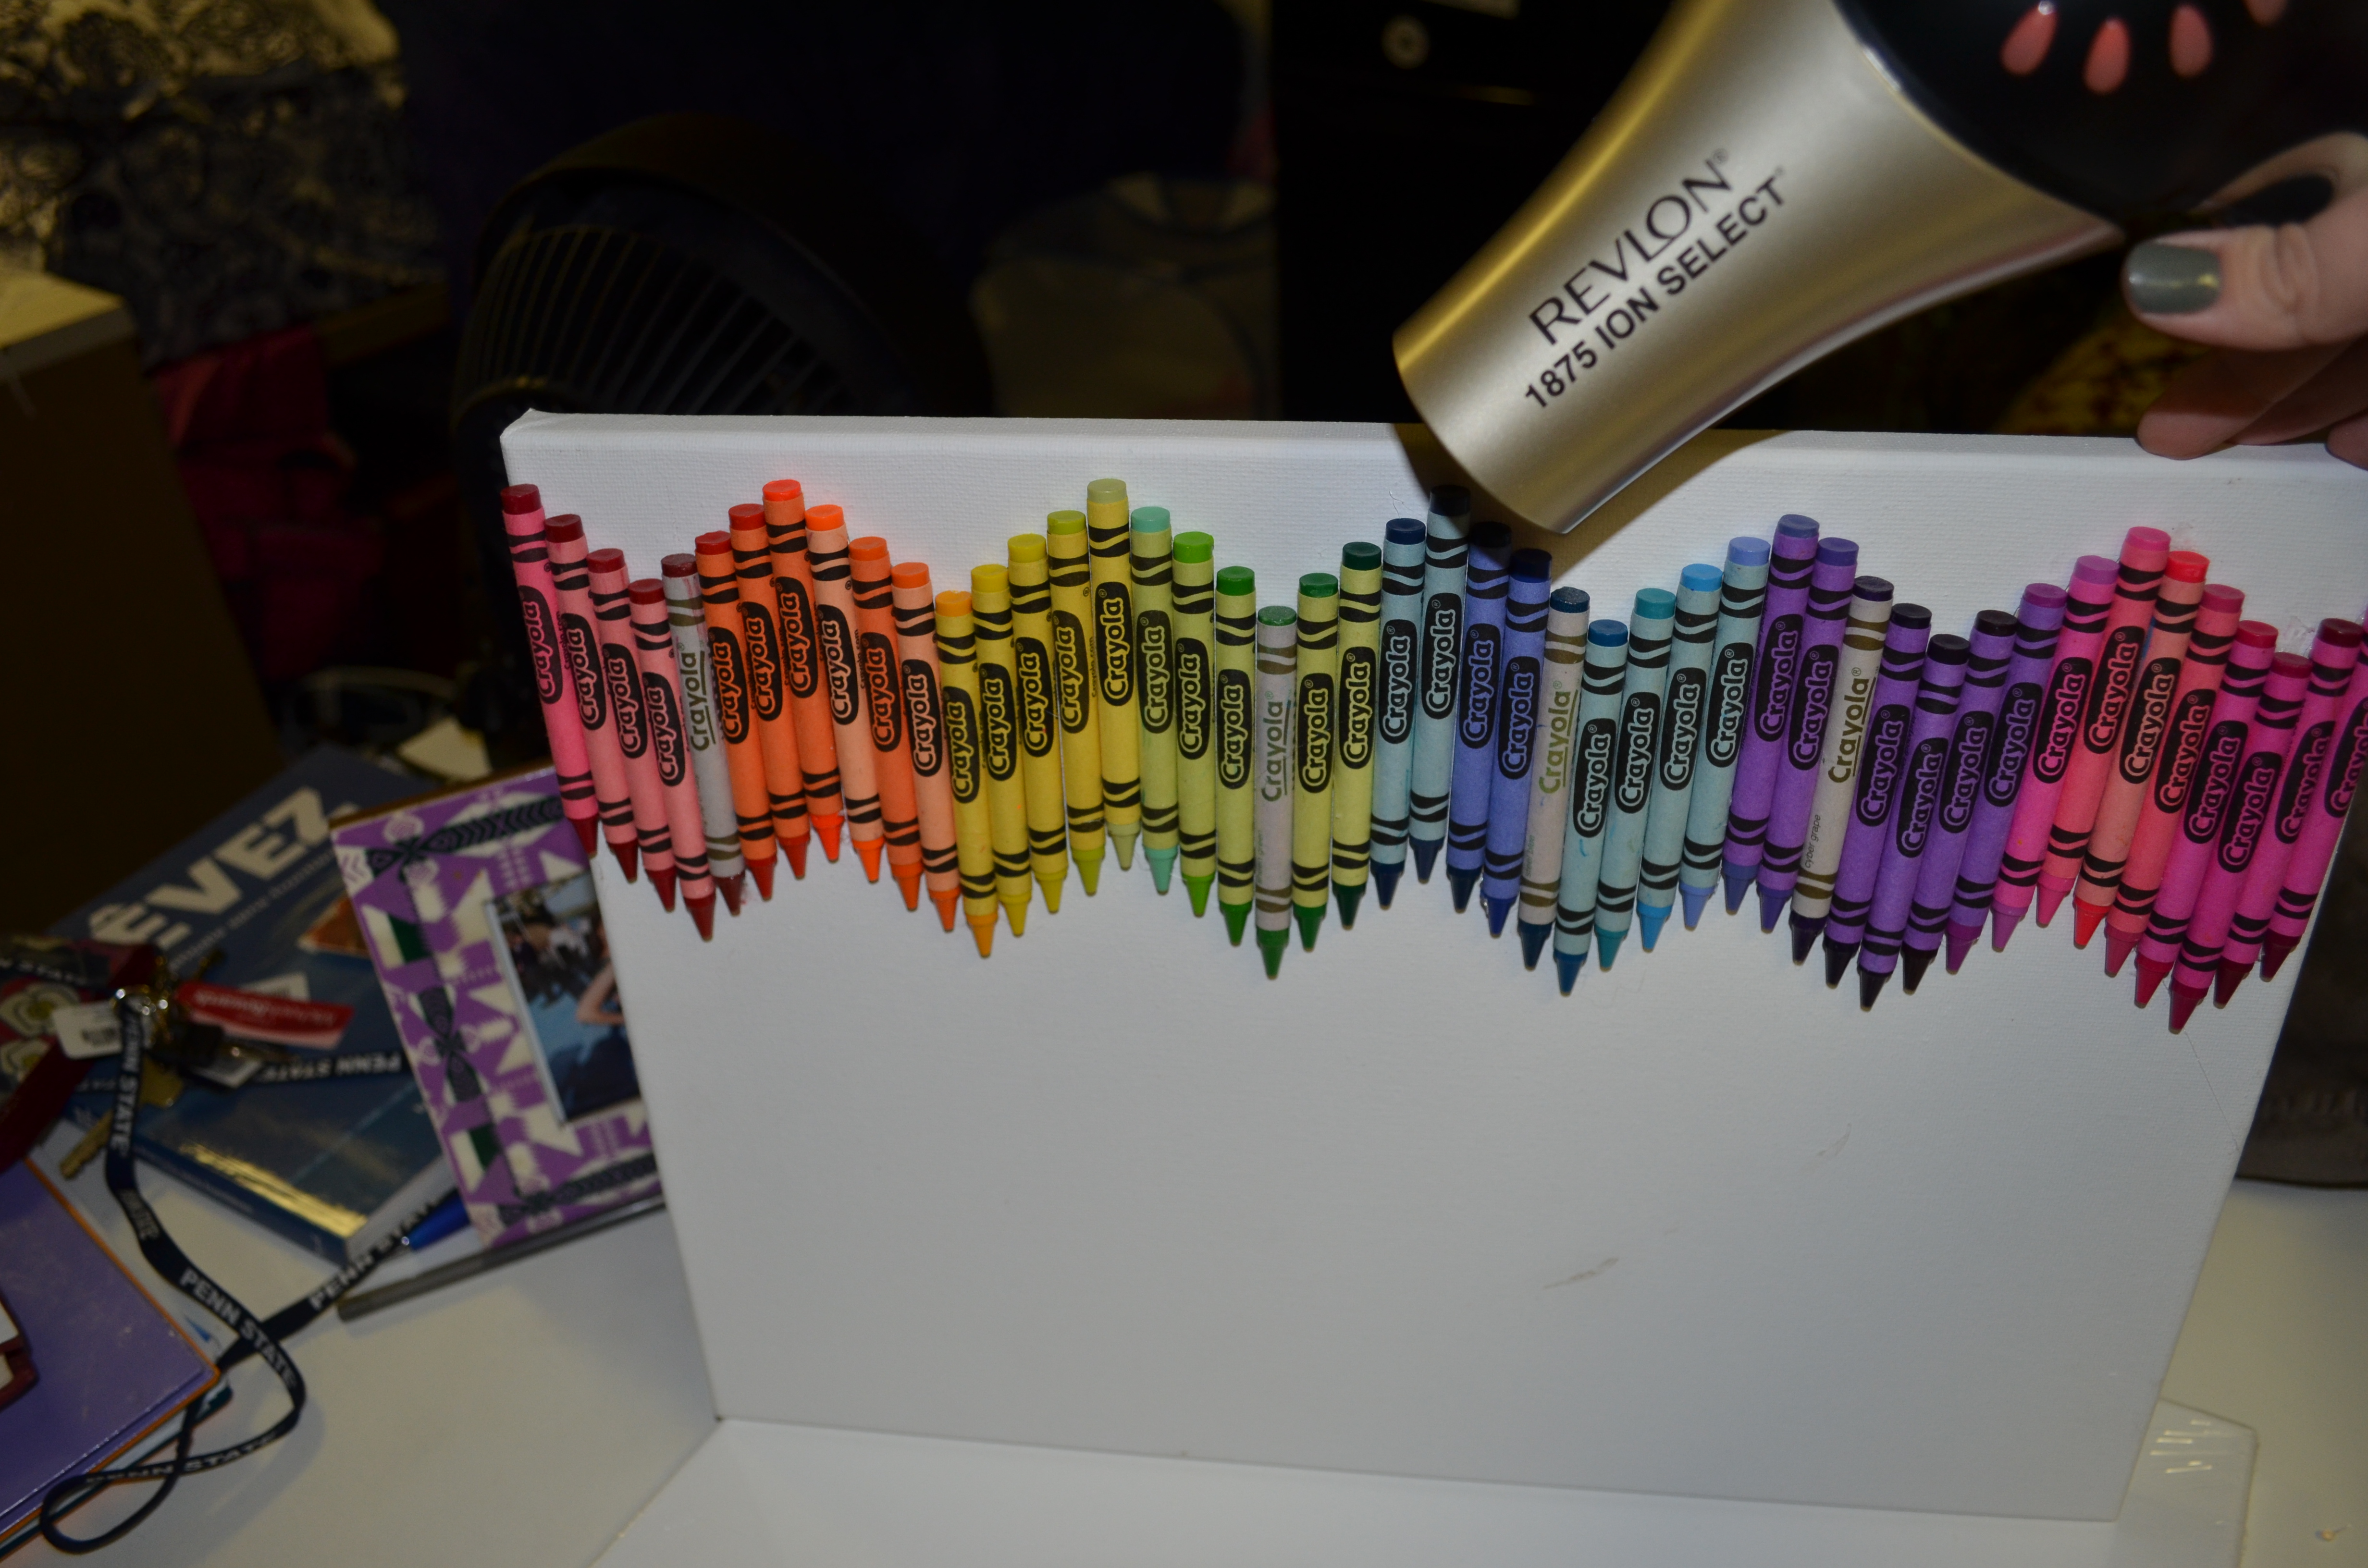
(A Tidbit of a TIp: Don’t move around your dryer! Then the crayons will not melt evenly. Also, aim your dryer DIRECTLY downwards on top of the crayons, which I did not do (oops). Otherwise, the crayon drippings really will spray in all sorts of directions. It’s not as pretty as it may sound, I promise.)
Step 4: The Visual Appeal (and Awe) of a Job Well Done

People will marvel at your craftactulous creativity! Plus, it is fun to make, so you can enjoy making the other two thousand crayoned canvases that your friends, family, and etc. ask you to make after they see this masterpiece! I’m not kidding – that really happens (even if your first one turns out absolutely awful).
Good luck and happy crayoning, folks!
End Note: Really, though – cover your surface and no hot-gluing yourself. I don’t want to be held responsible for any craftastrophes!
